Was able to work parts of a couple days. Accomplishments: sanded and glassed inside face of cockpit coaming, formed both hatch rims (one installed), took a 1st pass at wet sanding the outside of the hull, and scraped the hull interior.
For the hatch rims I’ll point you to One Ocean Kayaks. Their manual was well worth the investment. Sometimes it is good to have cross references on techniques. I generally followed this method except I used fiberglass cloth and mat instead of carbon fiber in large part to the fact I had it and didn’t want to add the cost to this boat. While ounces add up, there was very little to be saved for 2 rims.
One other difference was I used small blocks of wood hot melted to hold the hatch in place securely. Duct tape was too flexible. Also thicker gauge plastic works better than food wrap as a release agent.
So, here are the shots:
 |
| blocks hot melted to top of deck & hatch. |
 |
| plastic over underside of hatch area. |
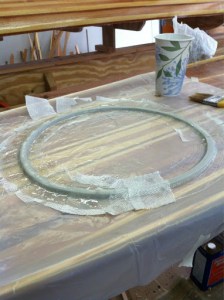
I found that laying the strips of glass in a constant direction allowed for easier wetting and smoothing of the build up. Five alternate layers of 4 oz cloth and mat were used. I could have been more diligent about pushing out the bubbles.
 |
| filleted weather stripping & glass |
 |
| wet sand placed over plastic to squeeze lay-up |
 |
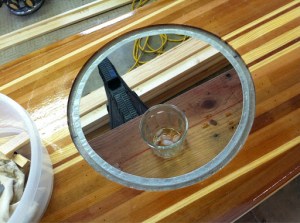
| rim after trimmed |
 |
| rim epoxied in place |
Here you should police the oozing epoxy and keep the weather stripped groove clean. It wouldn’t be easy to remove after epoxy hardens.
 |
| finished rim w/o thicker weather stripping |
I haven’t decided on the method for holding the hatch down. Instead of some sort of mechanical dogging system, I’m favoring shock cord under the deck. I’d like to preserve the clean lines of the boat. I considered magnets as some have done, but I don’t want to cause problems with any compass I might use.
 |
| hatch resting on rim. |
At this point, the real boogey man is joining the 2 halves. There is much sanding & varnishing to come, but we are well on the home stretch.
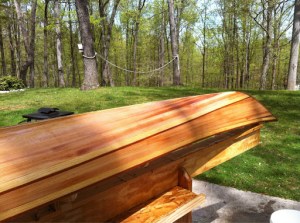
Here are a couple pics of the hull. I took the opportunity to do most of the sanding while it was still on the forms.
 |
| close up |
 |
| hull with forms knocked out |
 |
| scrapings. |
What I noticed in glassing the underside of the deck is that if only one coat of epoxy is used, the finer sanding used on the exterior is not necessary. I will scrape, use the ROS with 60 grit and quickly smooth with 120. For the cockpit area, I am likely the use at least 1 extra coat to help in cleaning of sand, mud, etc.