Apparently Luna narrowly escaped. Tuesday night was rough in our backyard. High winds blew over the temporary shed. Without the weight and anchor of the trailer, it was merely a matter of time. Just glad it wasn’t last week as I moved the boat in and out of the shelter. This made disassembly easier.
The table saw under the blue tarp took a beating. All repairable, but its a rusty mess now. I think it took me 2 hard days to erect the structure. In only 2 hours a hammer and cordless drill put the whole thing away. Now maybe we can get some grass planted in its place.
Luna now floats and is much happier. So am I. Who could blame her? All boats lose their dignity on the hard. I’ll make it up to her. We’re going sailing a lot this summer.
So much of the “now” is fake, demanding attention, here today, gone tomorrow. As I’ve wrestled to get Luna water ready, furtive thoughts pry, “Is she worth it?” This morning I brushed on a second coat of Petit Trinidad ($250/ gallon paint. Only 1 needed). Yesterday’s coat was rolled and tipped. Got to get that extra fraction of a knot? No, but darn if it doesn’t look better. Wetting the cooking driveway hopefully delays the planks drying. So much to learn about true wooden boats. Loading the mast and installing road supports for tomorrow’s trip east takes no small effort, a two-man job. Glad I have sons to help. Conceptually many simple task s have taken a week of days. In this hurry-up world, is she worth it? There’s varnish yet to be spruced. Yet, she is going back better.
“Worth” for me all comes down to passion. Not the task to get there, but the reward for the effort. In two nights I plan on enjoying the evening with Luna … somewhere … at anchor, dreaming about distant horizons. Nothing is more divorced from our hectic world than floating in a loved boat. For that joy, I owe so much to my mother. She allowed me to spend so many hours in a boat as a child. I was hooked at an early age. My soul is rooted to the bottom of a boat. I can’t shake it. Don’t want to. This is real. Thanks Momma. I love you-
Somewhere, some time ago, I read that an unused boat suffers more than one put to use. This is true.
Several weeks ago I began the process to get LUNA to water. We’ll try a mooring for her. That “official” process was a genuine pain. Too much government and all run poorly by design. Anyway, my little boat “suffered” 16 months under cover in our back yard. Despite occasional watering below the waist, a canvass shed with ground floor, her cedar planks had opened to the point where caulking separated from planks. This was in part due to the nature of the wood, but mostly from life out of water. I had reefed seams before, cotton caulked those needing it and payed all with Interlux brown seam compound three years ago. After talking to well known Maine boat builders Alec Brainerd and Doug Hyland, I determined to take a slightly different tack. Both recommended the same brown compound but split 50/50 with roofing tar. This should be more pliable and sticky.
Alec went further in giving better storage design:
“… I would recommend adding walls and a roof to your shelter. The side and back walls can be boards or plywood or whatever and should be spaced 4″ up off the ground for ventilation. The roof needs to be insulated with something like 1″ blueboard, and then congregated metal would probably be least expensive. Light color materials are best for both walls and roof. Put vents in the gable ends of the roof but no windows anywhere.”
Now I have impetus to start a boat barn.
LUNA does have a new dress topsides, her name is crisply set, the battery monitor now works (missed a wire before. Ashamed to admit I stared at that wiring diagram too long) and she now has a bilge pump counter. That will be crucial as I plan to keep her on a mooring. In this push, many small details are getting don. As I get her back in shape, I remember why I fell in love with her. She is such a beautiful boat. Launch is in 10 days. Much to do, but all doable. More later-
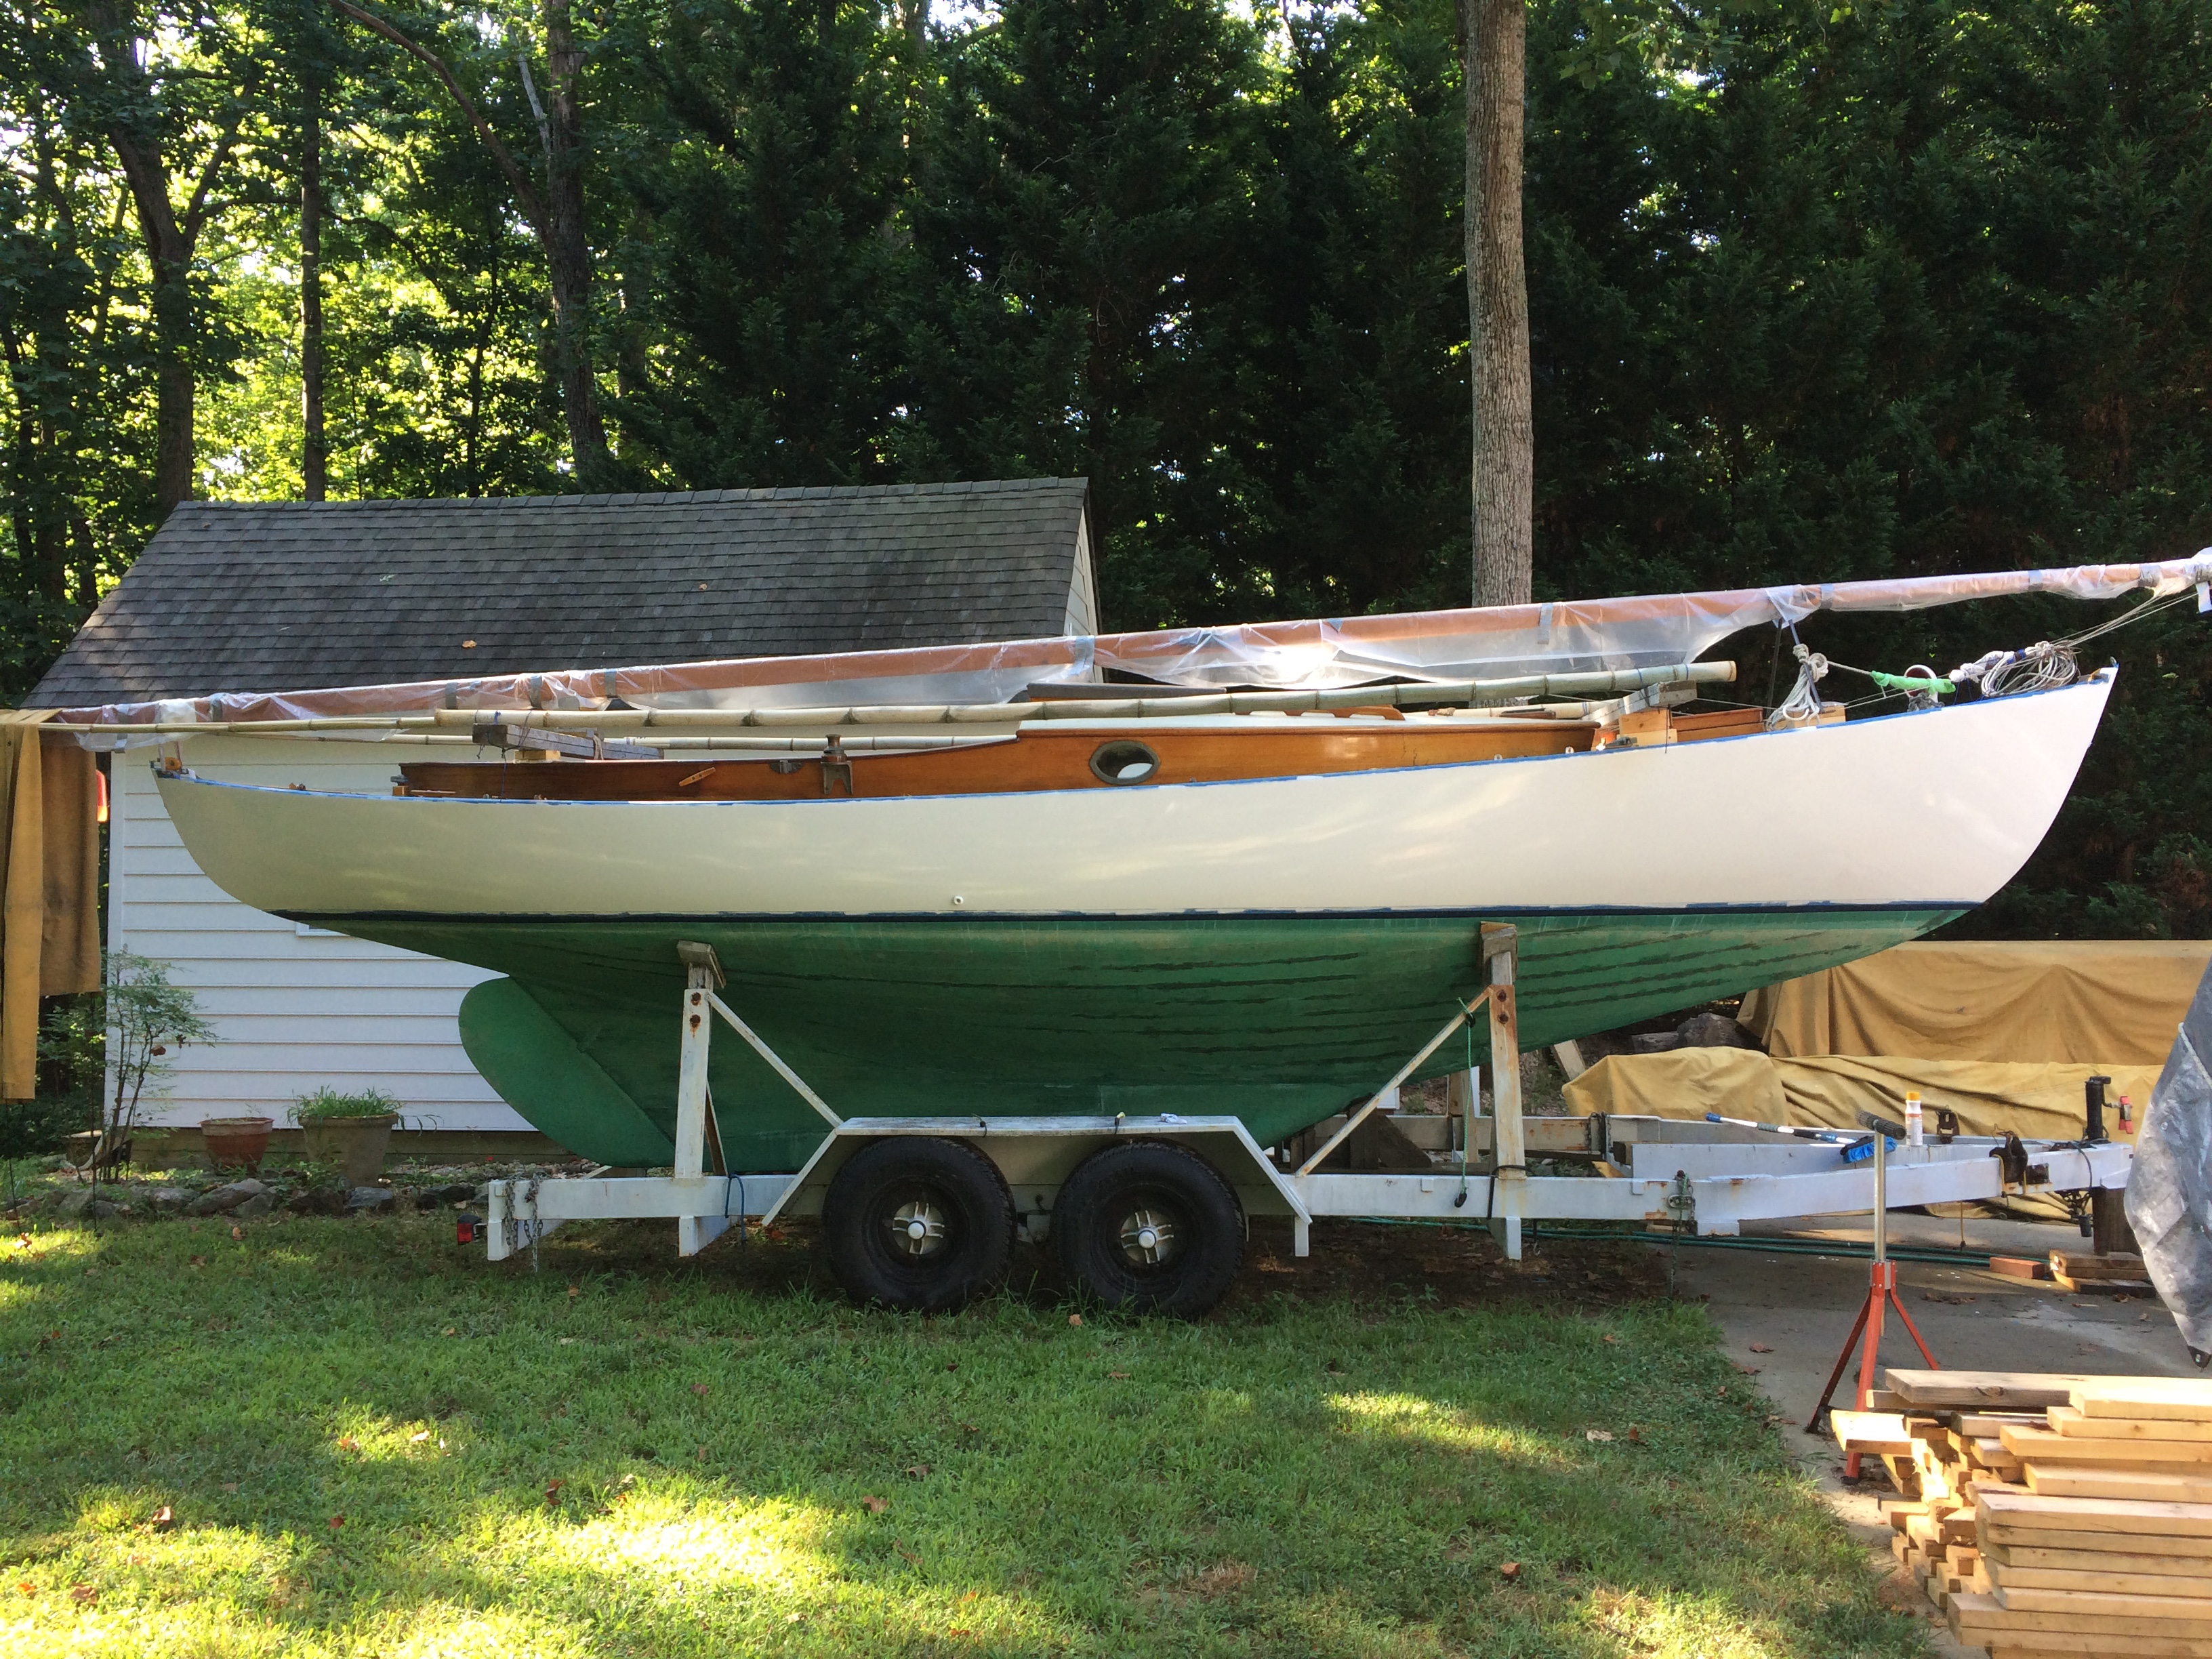
If only it was so simple for the rest of us. Hard to believe we have owned (had stewardship) of LUNA for 2 years now. After a few bumps and bruises, she needed a new coat. 3 years seems to be the limit for a linear polyurethane exposed to our sun and salt water anyway. That may be 1 year longer than traditional paint. I’ll take it.
First coat
Thought I’d offer a few tips in the rolling and tip method to covering, some I’ve scoped on-line and some I just had to learn by doing.
Conditions: Warm, 70-75 degrees, still, somewhat humid, but early morning.
Materials: Interlux Brightsides “Matterhorn White”, Interlux Brushing liquid 333, Tee shirt rags, white “hot dog” roller pads, small paint pan, 3m blue painter’s tape, 3m wet sanding block #220, etc.
I previously had wooded, sanded (120 grit to 220) and applied 5 coats of LeTonkinois on the toe rail port and starboard. I’ve saving a final 6th coat until topsides are done.
Topsides were wet sanded with the 220 sponge, rinsed, and dings fared with a red glazing compound that worked on UNA well. These spots were then sanded.
Before painting wetted the surrounding yard +/-20′ from the boat to knock down the dust.
Topsides were then taped off from rail and boot top, sides cleaned with the 333 thinner and hit with a tag rag.
A pint of paint was added to pan with 1 cap full of the 333. My middle son took rolling instructions and was a big help. We started at the starboard bow and worked around the boat. We are both right-handed. This allowed me to follow his 18-24″ application by roller with my backhand tipping from top to bottom.
Even with the thinner, we had to move fast. Here is a big tip we learned after the first few applications: The brush tipping must overlap the previous patch by a good 8-12″ in order to not telegraph each start and stop.
In rolling, place paint in thin coats from left to right and finish with up and down rolling for horizontal tipping from top to bottom, quickly. Do this twice. Once with more pressure to push the paint along evenly and the last with a delicate touch. By this time the roller boy has the next spot ready.
We were done in 1 hour. The port side looks best as the technique was mastered by then. A little gentle wet sanding of the starboard side will improve it. You cannot go back and work out any drips or imperfections while the paint is drying. Forget about it. Save it for the next coat.
2 hours later and no drips whatsoever are evident. Thinner coats are better than heavier. 1 quart of paint may get 2 coats done.
Wineglass gorgeous
We took the dog for a swim and waited 2 days before coat number 2.
dog paddling
Coat 2 was quicker and covered the sins from coat 1. Using the same color paint allowed 2 coat coverage and all with less than a quart! 28″ is so much easier to care for than 42. No surprise there, but it is a factor of 4. I’m very happy with the results.
Found a 1/2 dozen gnats in the mix. To be expected in July.
Overall. Bootstrap is next.
Given the weather has not held rain (but it is coming), I sketched an idea this morning for shade to go after the decks.
scribble
But … Couldn’t finish the real thing in today’s heat, 99 degrees.
Had to take a “swim” myself. Bud Light helped too. Stinking hot!
September is coming. More later. Stay cool.
Shelter gained.
Later: got the last trusses and tarps on. The whole elaborate thing took longer than expected, but not having to yank tarps on and off and to have shade makes the whole prospect of working the decks and cabin more appealing. The old tarps came from years ago when I renovated our first cruising boat “Emily”, a 1974 Pearson 1 Meter. She too was a nice boat. Too many of them out there. Here she is after an Imron paint job and 2-3 years of sometimes weekend alterations and repair. Too much to list. Emily took us for many, many weeks up and down the Bay for maybe 15 years. Memories.
Going to add some hurricane ties from rafter to beam wall and add a couple cross beams under the trailer for any uplift risk. Not today though. Real feel 105. Yep, it is out there.
LUNA is not quite under the tree, but close enough. Over the next few months some of the projects on the “list” can be completed. And, as she waits on me, she’ll warm my heart with the promise of that first Spring cruise. Can’t wait.
This slideshow requires JavaScript.
Getting her home was no small effort. Before yesterday’s sunrise, my middle son and I left for the marina, had a cold motor trip around to the boatyard (no wind), spent 3-4 hours removing the masts, hauling the boat, and tidying up the equipment for travel. 12 hours later we found ourselves back home, but unable to move LUNA from the bottom of our gravel drive onto the concrete apron beside the house. Apparently a Ford F150 has only so much umps to haul uphill. After several attempts and digging too much gravel, we called it quits for the day. This morning a trip to Enterprise returned with a real truck. Make that a Ford F350 dually diesel. That beast in 4 wheel low yanked our boat up the drive like a wet rag. Amazing.
The Home Owners Association is specific about not keeping boats in yards. So far, no calls. In my opinion, her beauty adds to the neighborhood. God knows there are enough ugly house additions around. Besides, she’s really just visiting and … its Christmas. Hope yours is a blessed one.
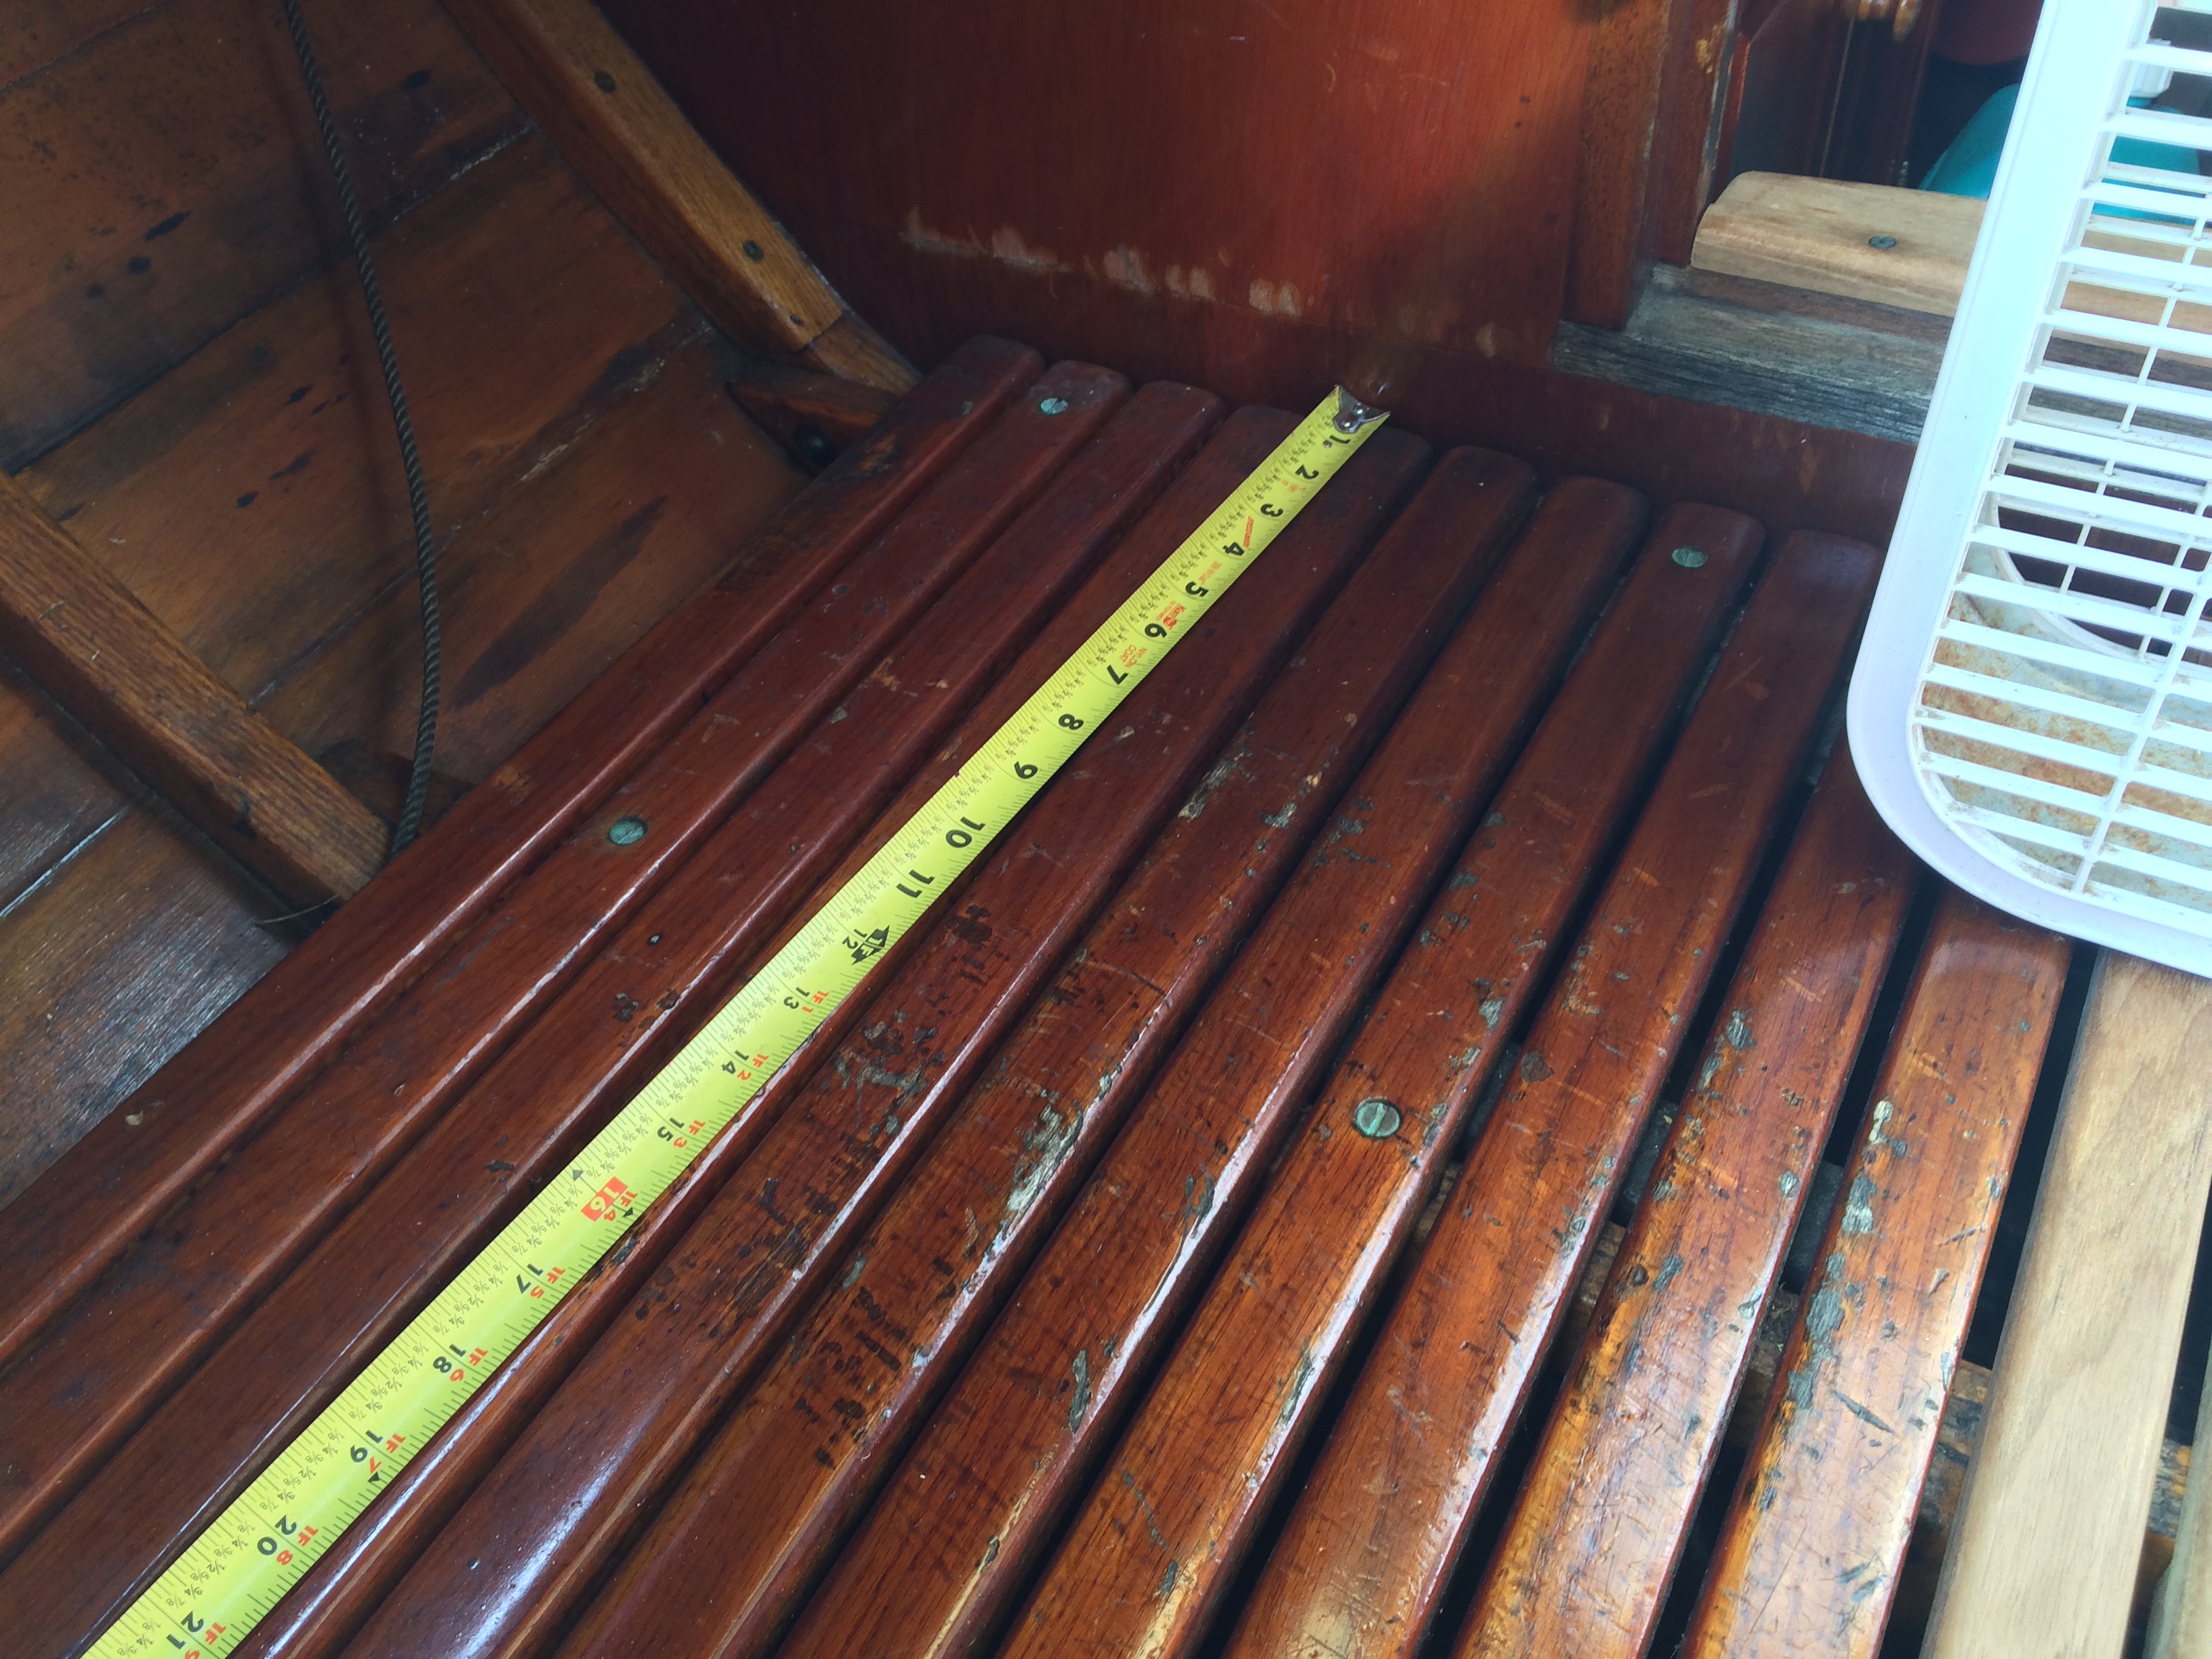
A very gracious friend gave me a dozen teak boards of random width that he had inherited. If there is one wood I save every scrap of, it is this, especially the real article, Burmese. Retail now demands $28 a board foot. The gift was significantly weathered and 1″ thickness netted 3/4″ once run through the planer, but then looked good as new. 3/4″ duplicates Luna’s oak cockpit floor dimension. Rough use by this owner warranted either a ton of sanding and varnish, or better yet, replacement. Alternating and changing the width of the slats has made it more comfortable on the feet. Raw teak offers great traction and … no varnish. Functionally this is a big improvement and the appearance certainly satisfies my eye.
Before
C
Wet and almost complete. Note leather “beer” straps between frames above seat.
the improved result
I salvaged the bronze screws from the originals which I’ve kept in tact, but with steel screws. Last night I tested their psychological impact. Dragging the anchor chain across them didn’t bother me one little bit. I call that value added. Success.
In order to proceed with the Ducker hull, I need more room in the garage. So, last month I added a small addition to the backyard shed we built 10 years ago. All of our gasoline equipment, tools, cans, etc. are now housed there. I wagged an estimate of $650 in materials to complete the space. It ended up more like $800. That’s $14.25 a SF. If you threw in my free labor in there I guess you could triple the cost. The worst of the project required digging 2 holes for the outboard post footings. Nothing but hard clay and rock (lots of rocks). Thankfully I had my 18 yr old son and his buddy to sweat the digging with me.
The low slope roof just sneaks under the existing gable window. 30# felts are under the shingles. The Hardi Plank siding was nasty to cut with circular saw or jig. Finally, I discovered that 3 scores with a utility knife on both sides allowed for a clean enough break without all the dust. Some policing of the adjoining grade still needs to be done. Also, the soffit vents are still missing, but we can move on now.
In the interim, LUNA’s hatch has been repaired, again, and both the boat hook and bilge pump handle have been stripped and varnished.
Next up: can we make UNA a boat cover out of Emily’s 2 awnings? Solving that will allow UNA to stay outdoors temporarily while the Ducker hull takes shape. I may begin with the spars and other parts before that.
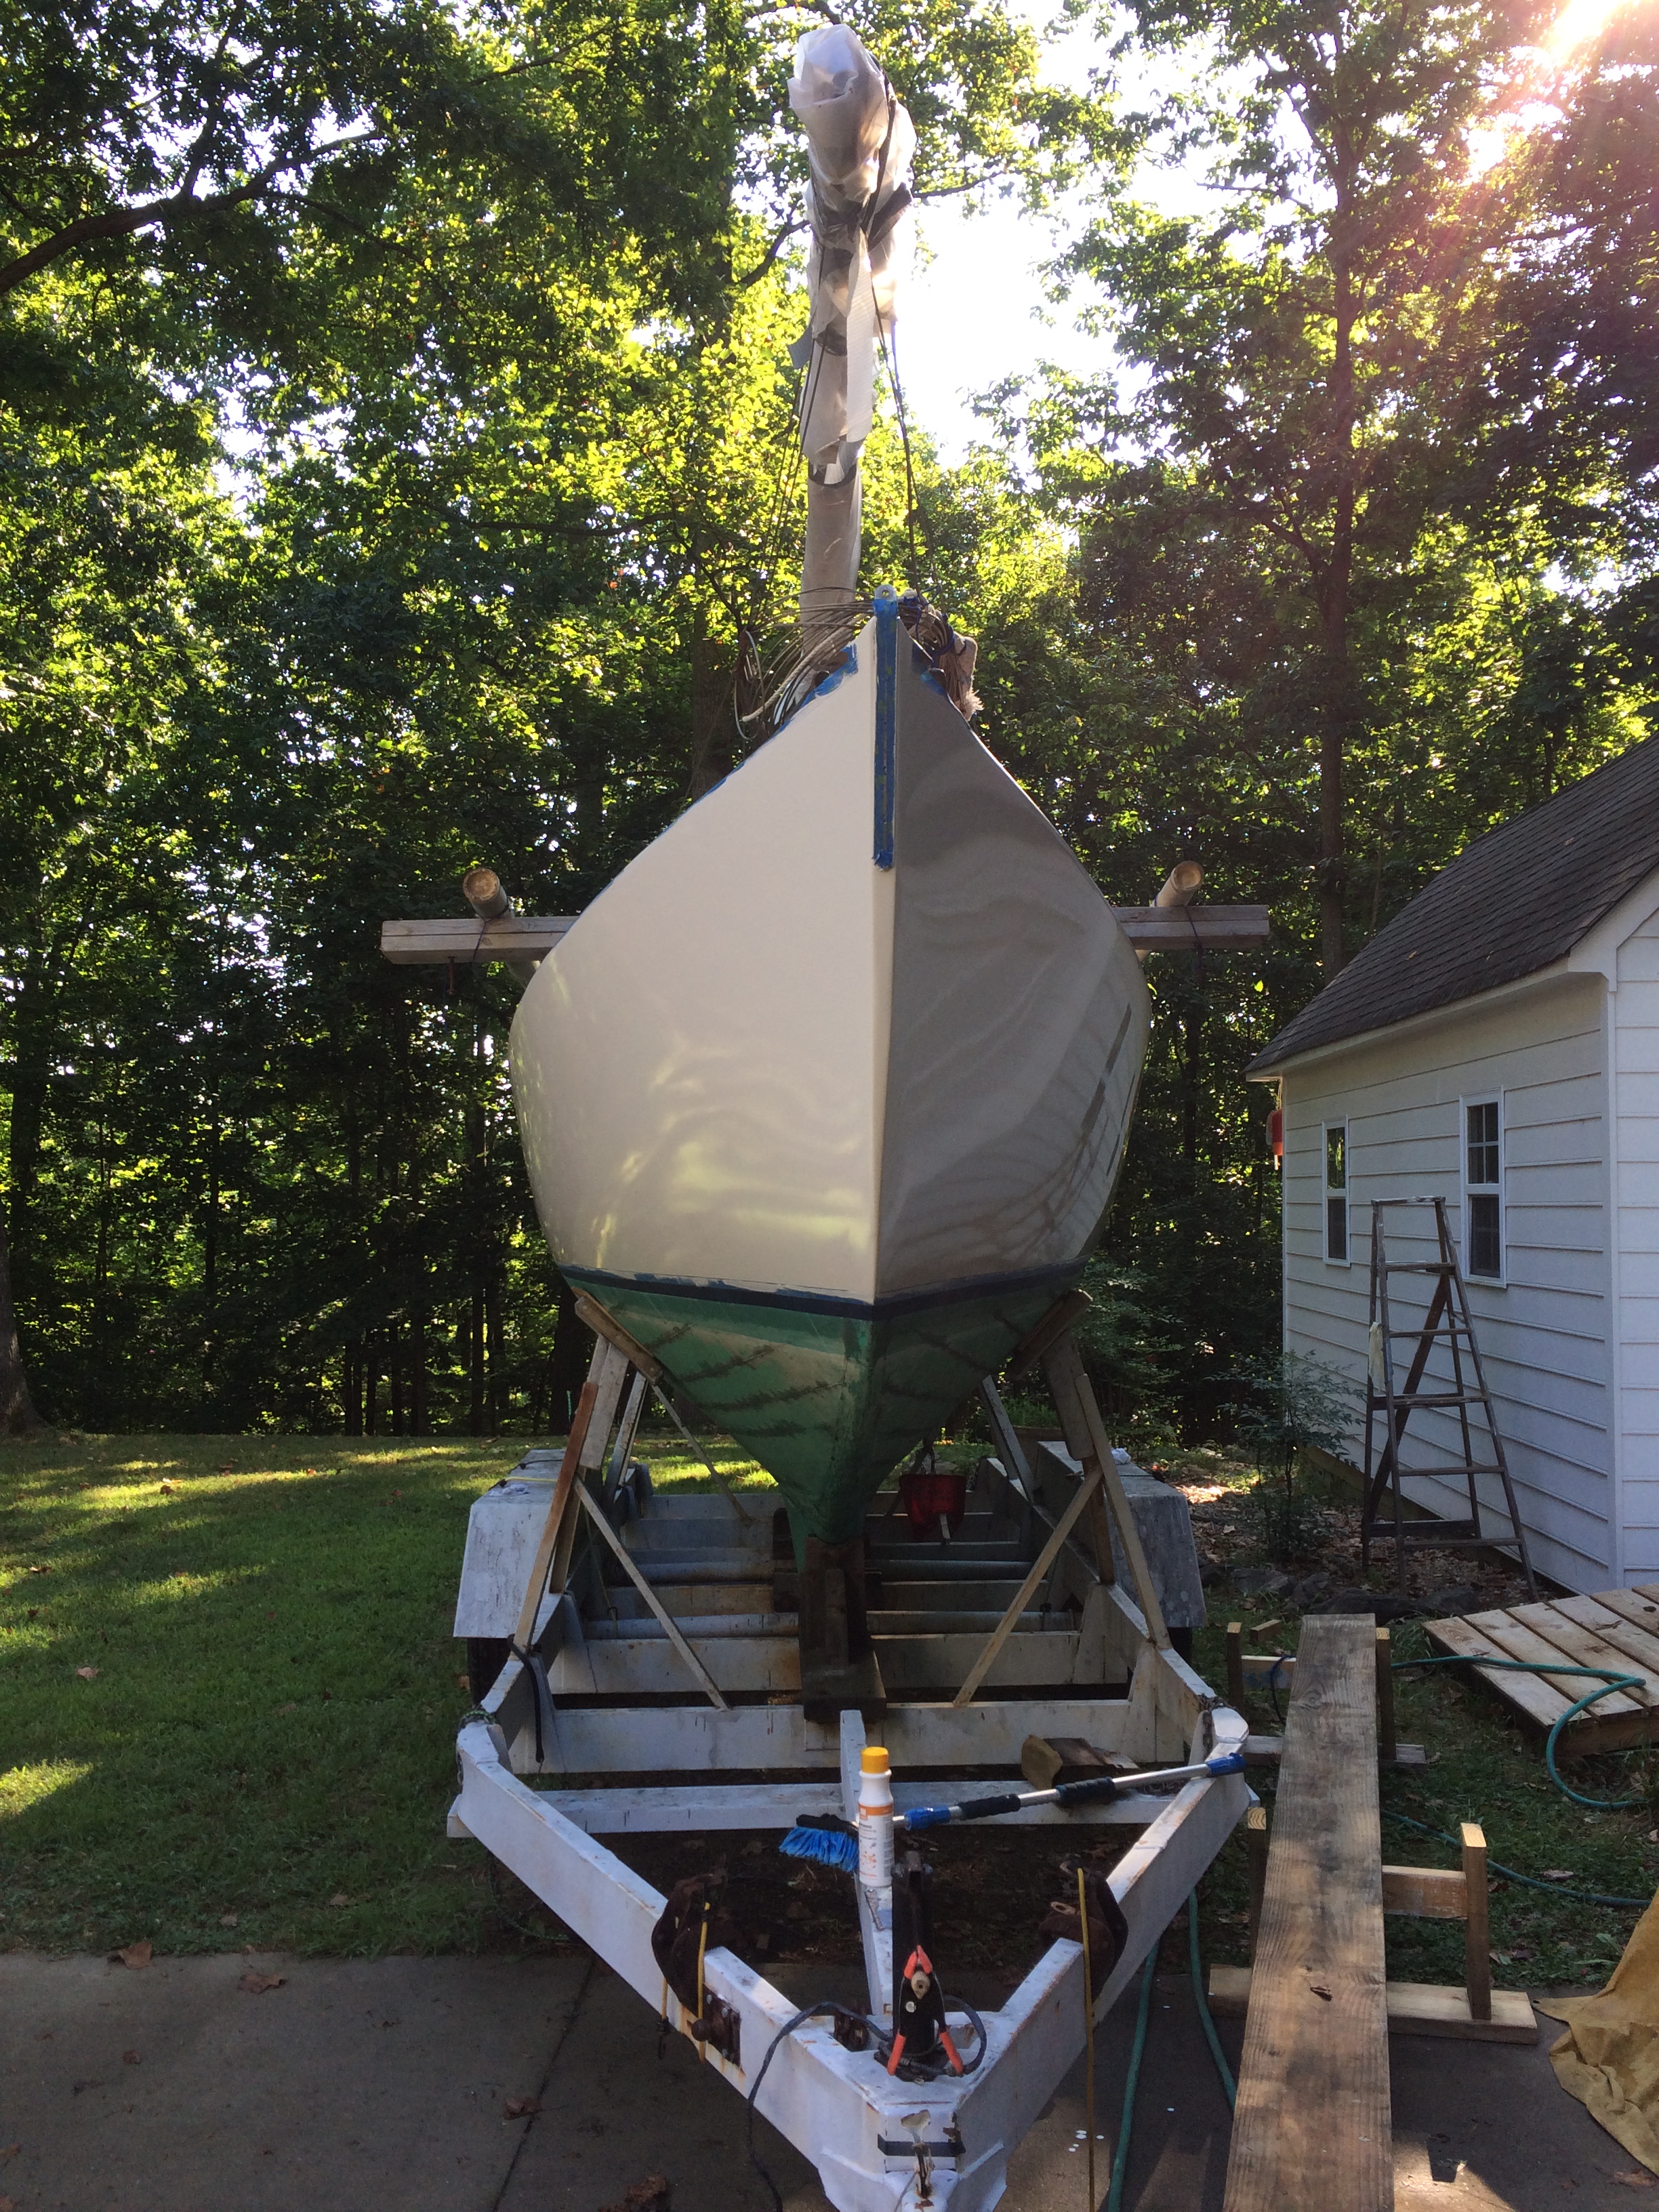
After loosing the main halyard up the mast weeks ago, the state of the varnish on the main mast troubled me. Last week I had the mast pulled, hauled the 34′ stick on my 19′ F-150 home, stripped the spreaders, added 2 coats of epoxy and finished with 3 coats of Brightsides paint. The mainsail track was removed and the entire mast given 3 fresh coats of Petit’s Z-Spar Flagship varnish. Last Friday I returned to the boatyard (name withheld for reasons soon to be clear), painted Luna’s bottom, wax ringed the opened seams, and reinstalled the mast the following day without event. However, the removal of the mast was nearly a literal bust. Thankfully many hands were available. This video was taken by a new friend, Tim, as held one of the control lines. It is the only record I have of the work. Wish I had taken a photo of the mast travelling contraption I used, perhaps next time. Hauling the long stick upwards of 70 mph for 75 miles took some consideration.
Anyway, many hands averted what could have been a tragedy. For the record, I had remarked that the block and tackle looked to be from Magellan’s Victoria. I was assured that there was at least one more lift in it. Little did I know how close to the truth I was.
Here in Virginia it seems late in the season, but we’ve had rain on top of rain for 1 1/2 months. Yesterday finally had clearing skies, so with both my youngest boy and my newest pup we went to unwrap Luna yesterday.
skipper, pup and newly varnished hatch.
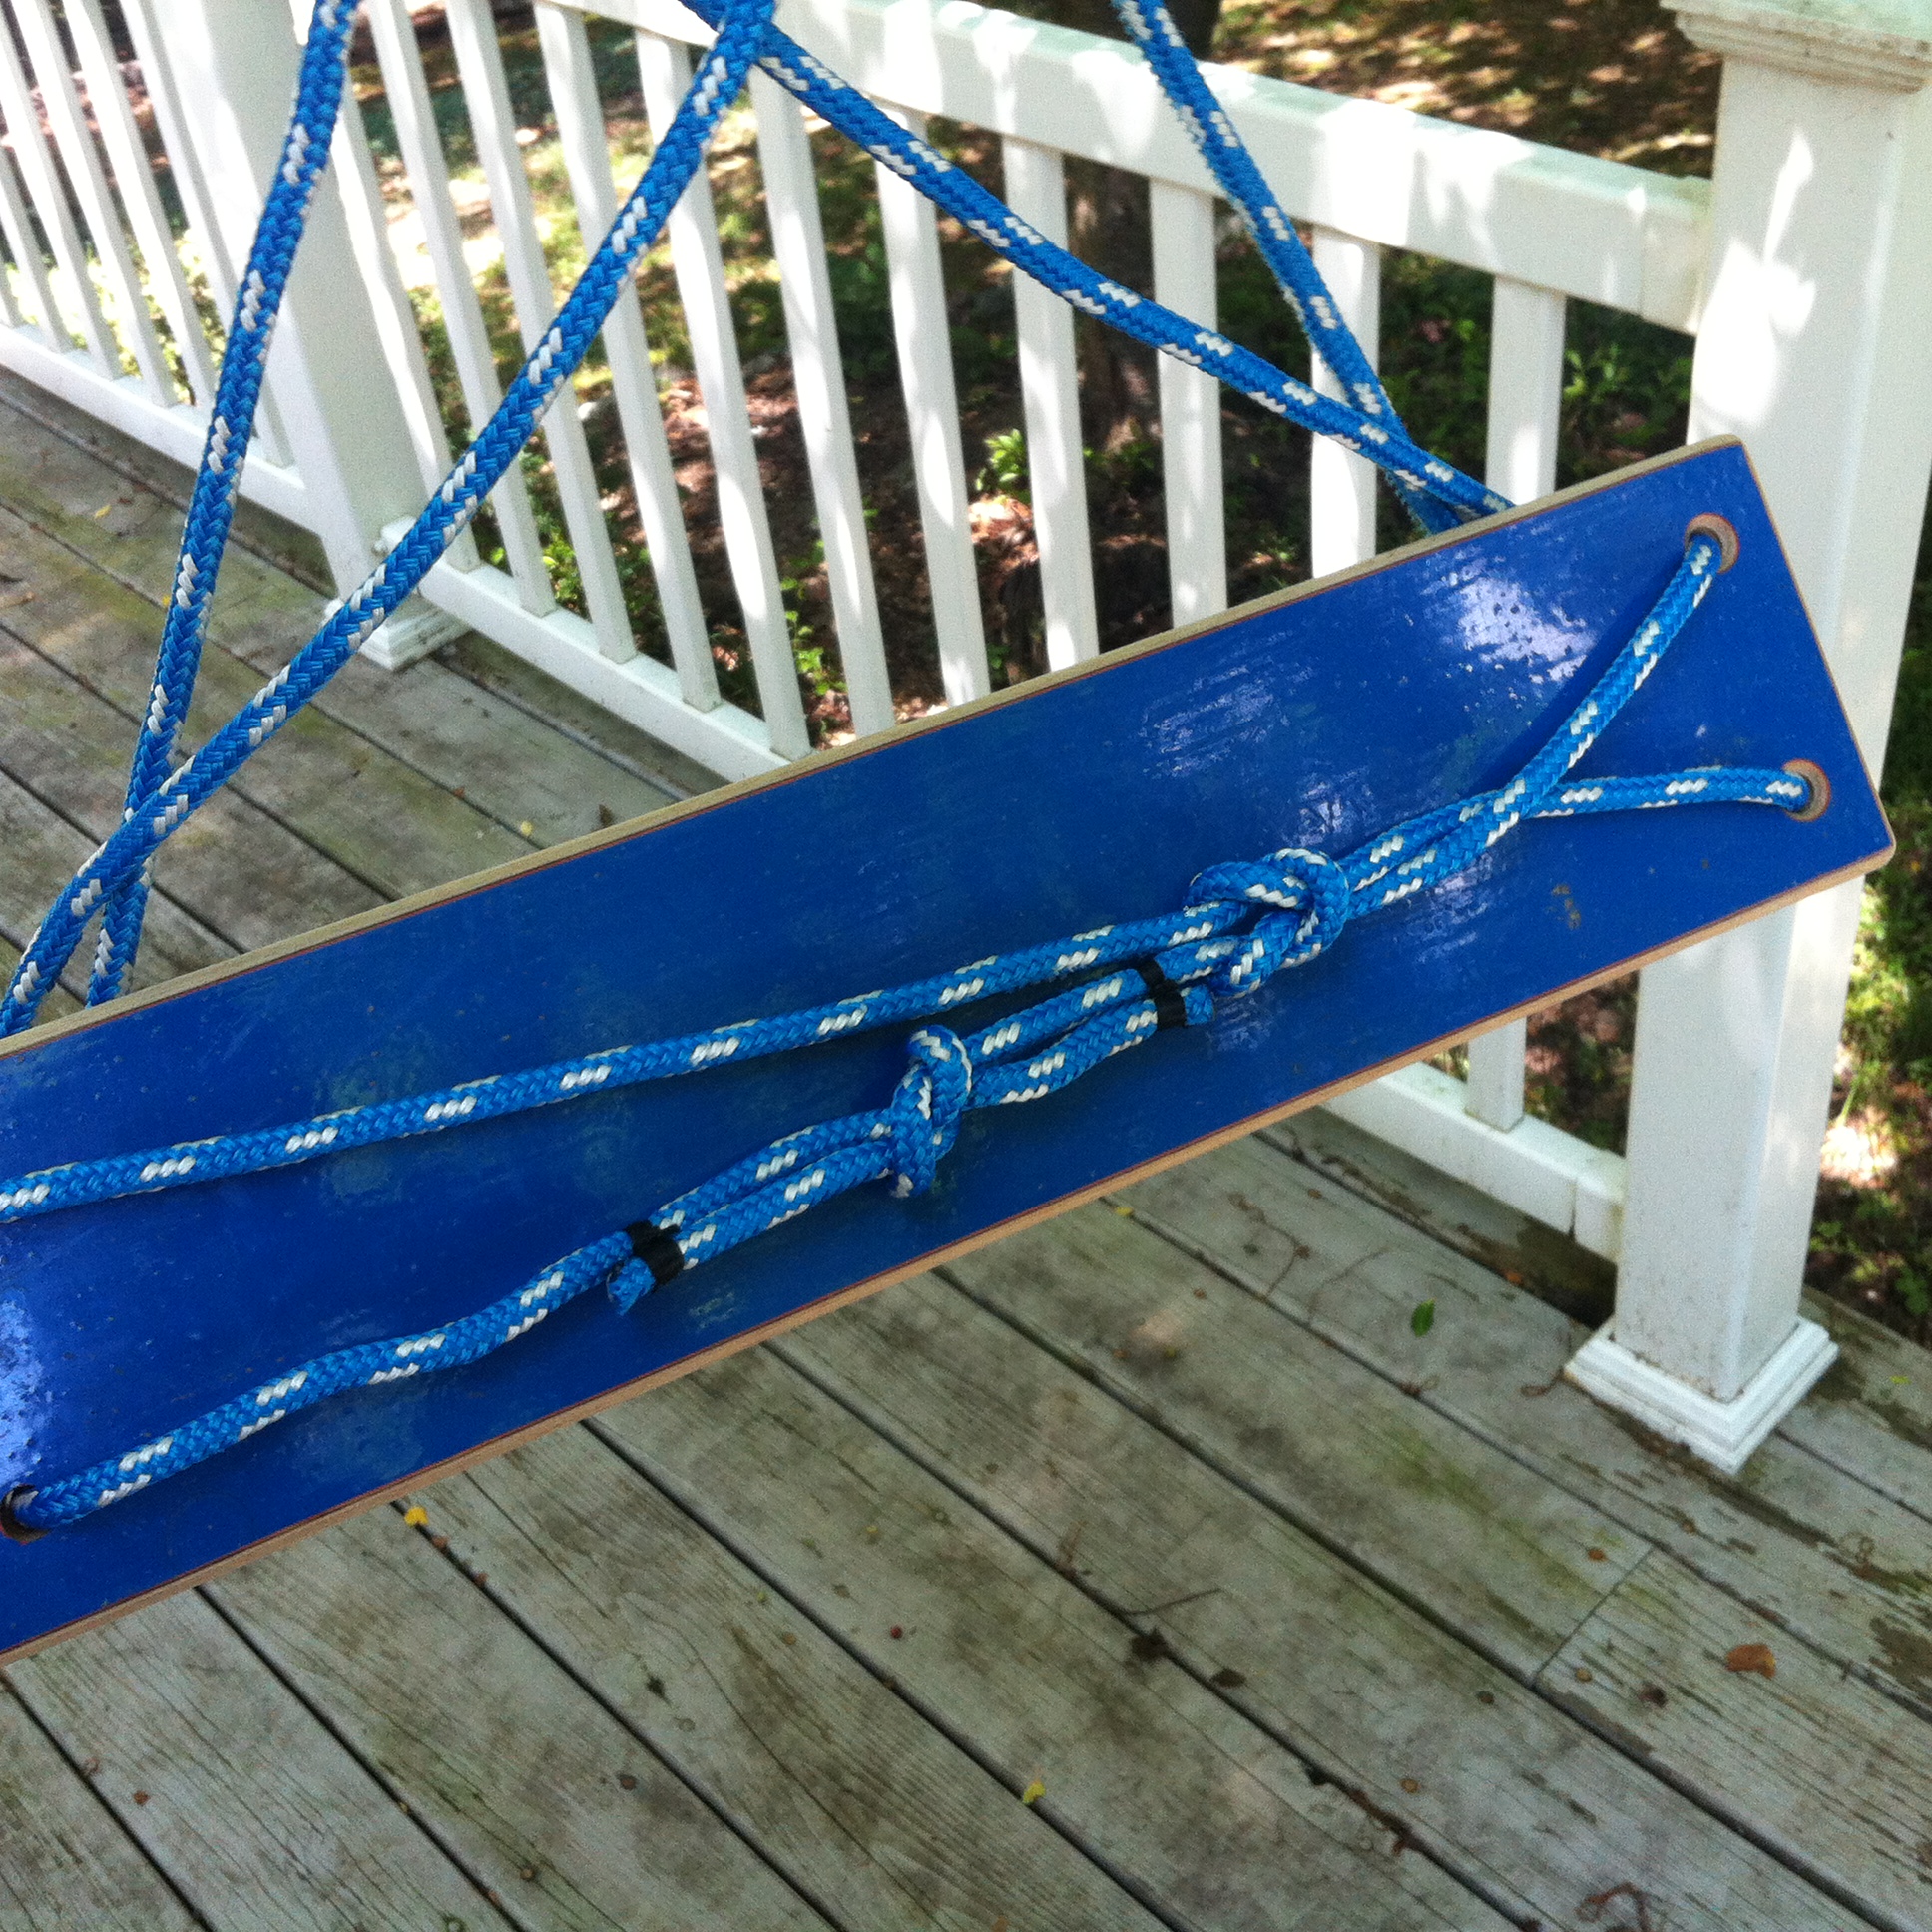
Aside from being discouraged by the degradation of the varnish on the toe rail, all was going fine in removing the 3 tarps, the structure supporting them, and hanking on the sails. Fine that is, until I watched the main halyard run up the mast. Dumb! The marina “experts” promptly suggested all kinds of retrieval methods from heeling the boat using the jib halyard, standing on an adjacent powerboat with boat hook to linking 3 boat hooks together and reaching high. Perhaps more pedantic, I decided to fashion a bosun’s chair and haul the youngest at 81 pounds with a boat hook with wire hanger taped to the end to snag the lost shackle. This would be a lesson in self reliance. However, he was not too comfortable at spreader height (or confident in my grip?) so we brought him down. Surprised at how easily I could haul him up on the 2 part halyard, I decided to haul myself up with tailing assistance on the deck. Once above the spreaders and just below the jumper stay, I hauled the boat hook up the flag halyard and grabbed the prize. Back on deck I decided to make a legitimate chair. Here it is:
scrap 3/4″ plywood with bluenosed edges and 4 countersunk holes.
2 figure eight hoist points
continuous line run diagonally and lashed behind reef knots.
We’re not planning to lose the halyard again, but you never know … at least next time we’ll be ready and familiar with the drill.
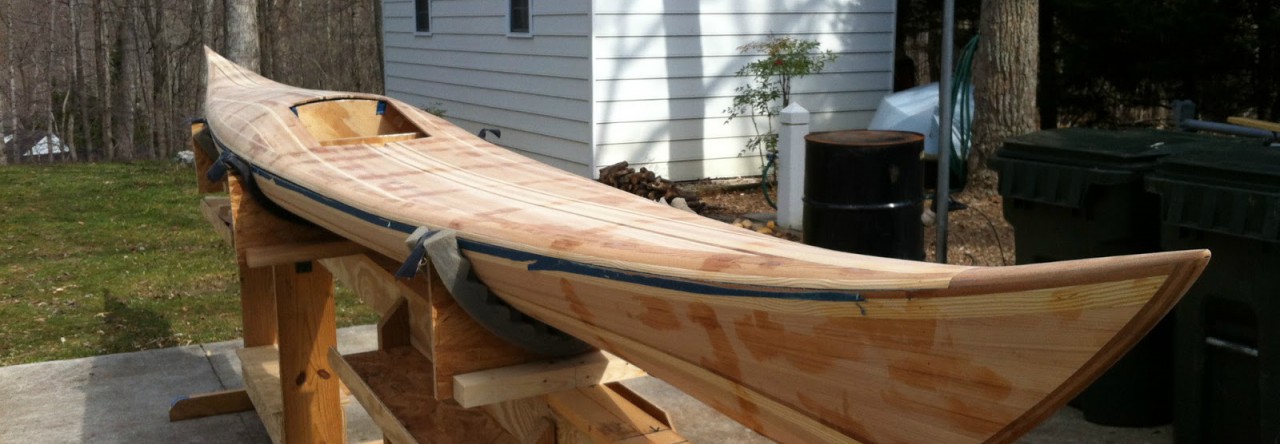
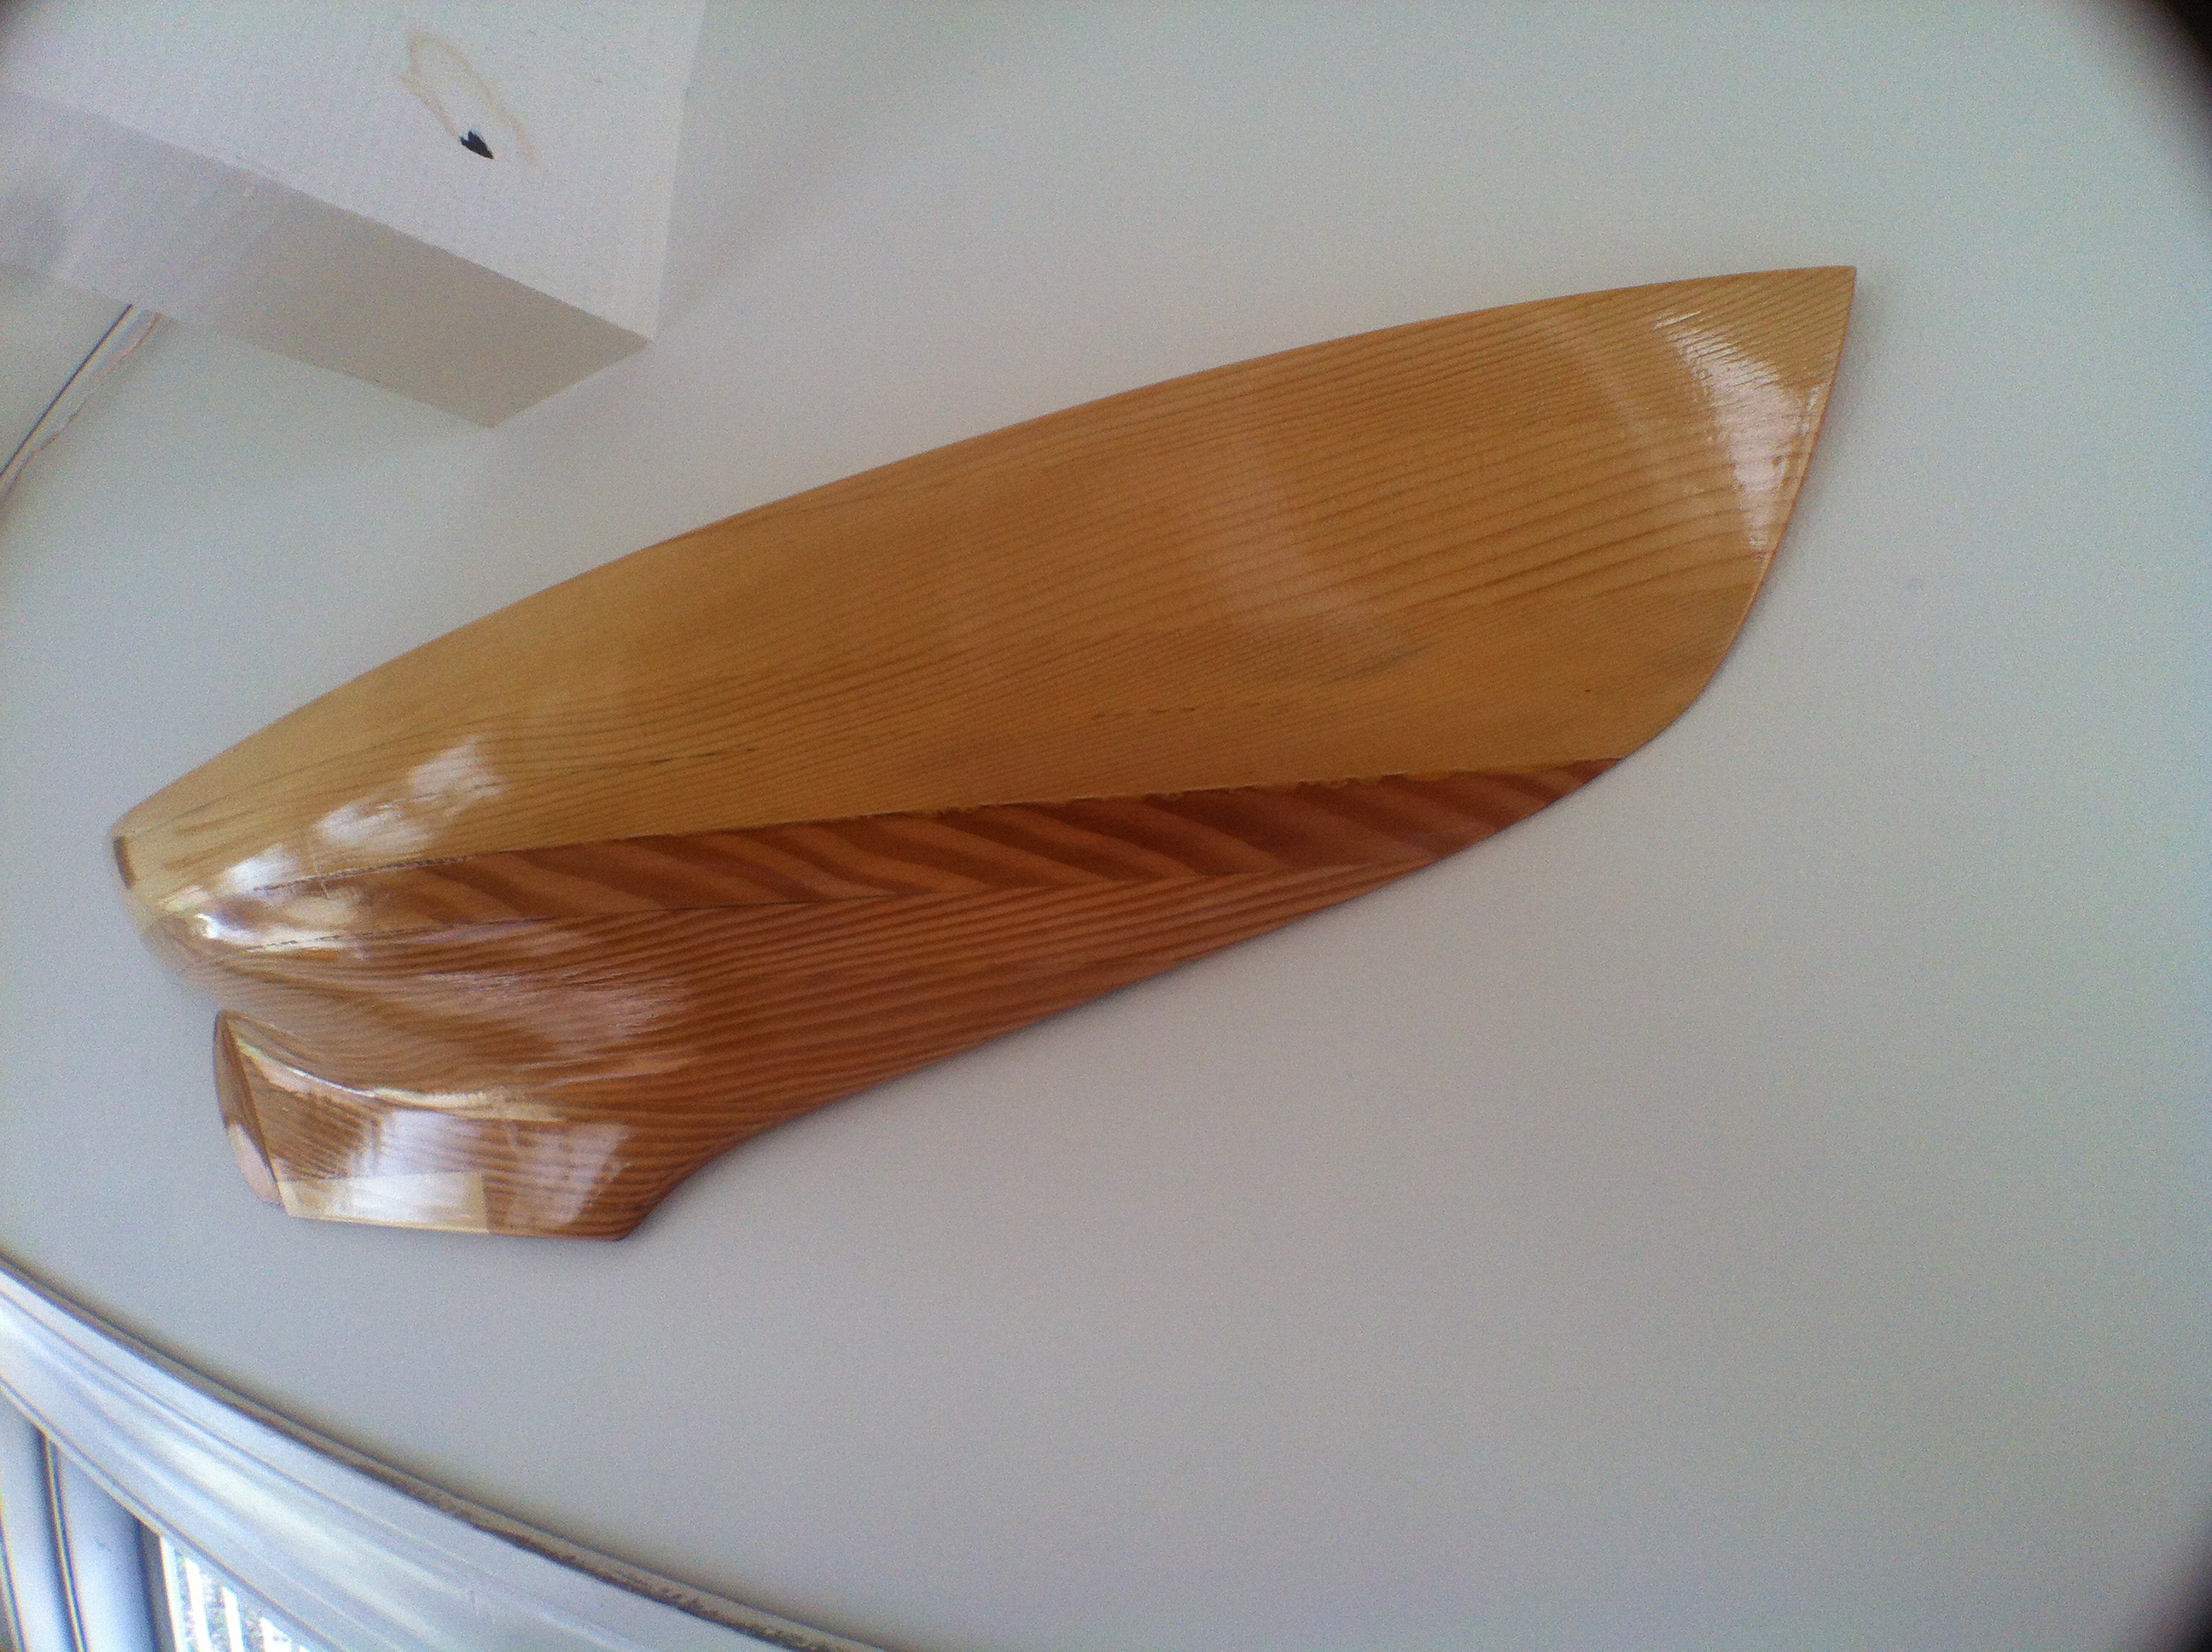
I enjoyed carving the Ducker model so much that I wanted to try another. This time of Luna. Here are pics of the early progress. In removing the last bit from the keel I accidentally buzzed off the tail end of the keel. This gave me the “opportunity” to add that corner back as a delineation of what would be the lead ballast per the lines drawing.
botched trailing keel corner and tick marks for fairing
added “ballast”
rudder added. cardboard stations beyond.
ready for hanging
hung
I’m learning as I go. Too late for this one, but I just rediscovered an old Rudder Magazine article on model making by none other than L. Francis himself, I’d like to do one more. In his description I realized there may be a quicker way to remove the waste wood by not gluing the lifts, tracing the lower lift onto the above lift and separating the individual lifts to work on each separately. Once the majority of the waste wood is removed, the lifts can be rejoined and tuned for the final finish. Rewarding projects. What might be a next go?
Hi! my name is Sebastian (You can call me Seb!) ...welcome to my Blog. I'm a photographer from Worcester, Worcestershire, England. Thanks for dropping by! I hope you enjoy my work.
Gavin Atkin's weblog for the sort of people who like looking inside boat sheds. It's about old boats, traditional boats, boat building, restoration, the sea and the North Kent Coast