Tasks Outlined

OK, the Cliff Notes version of the process:

  1. cut full scale sections (forms) out on 1/2″ plywwod or MDO board.
  2. mount these forms on a strongback. form the boat hull & deck with longitudinal wood strips glued to each other.
  3. sand, glass, sand, and varnish. Simple, right?

Well, here are pics of 30 hrs of work (none of which include the fetching of materials):

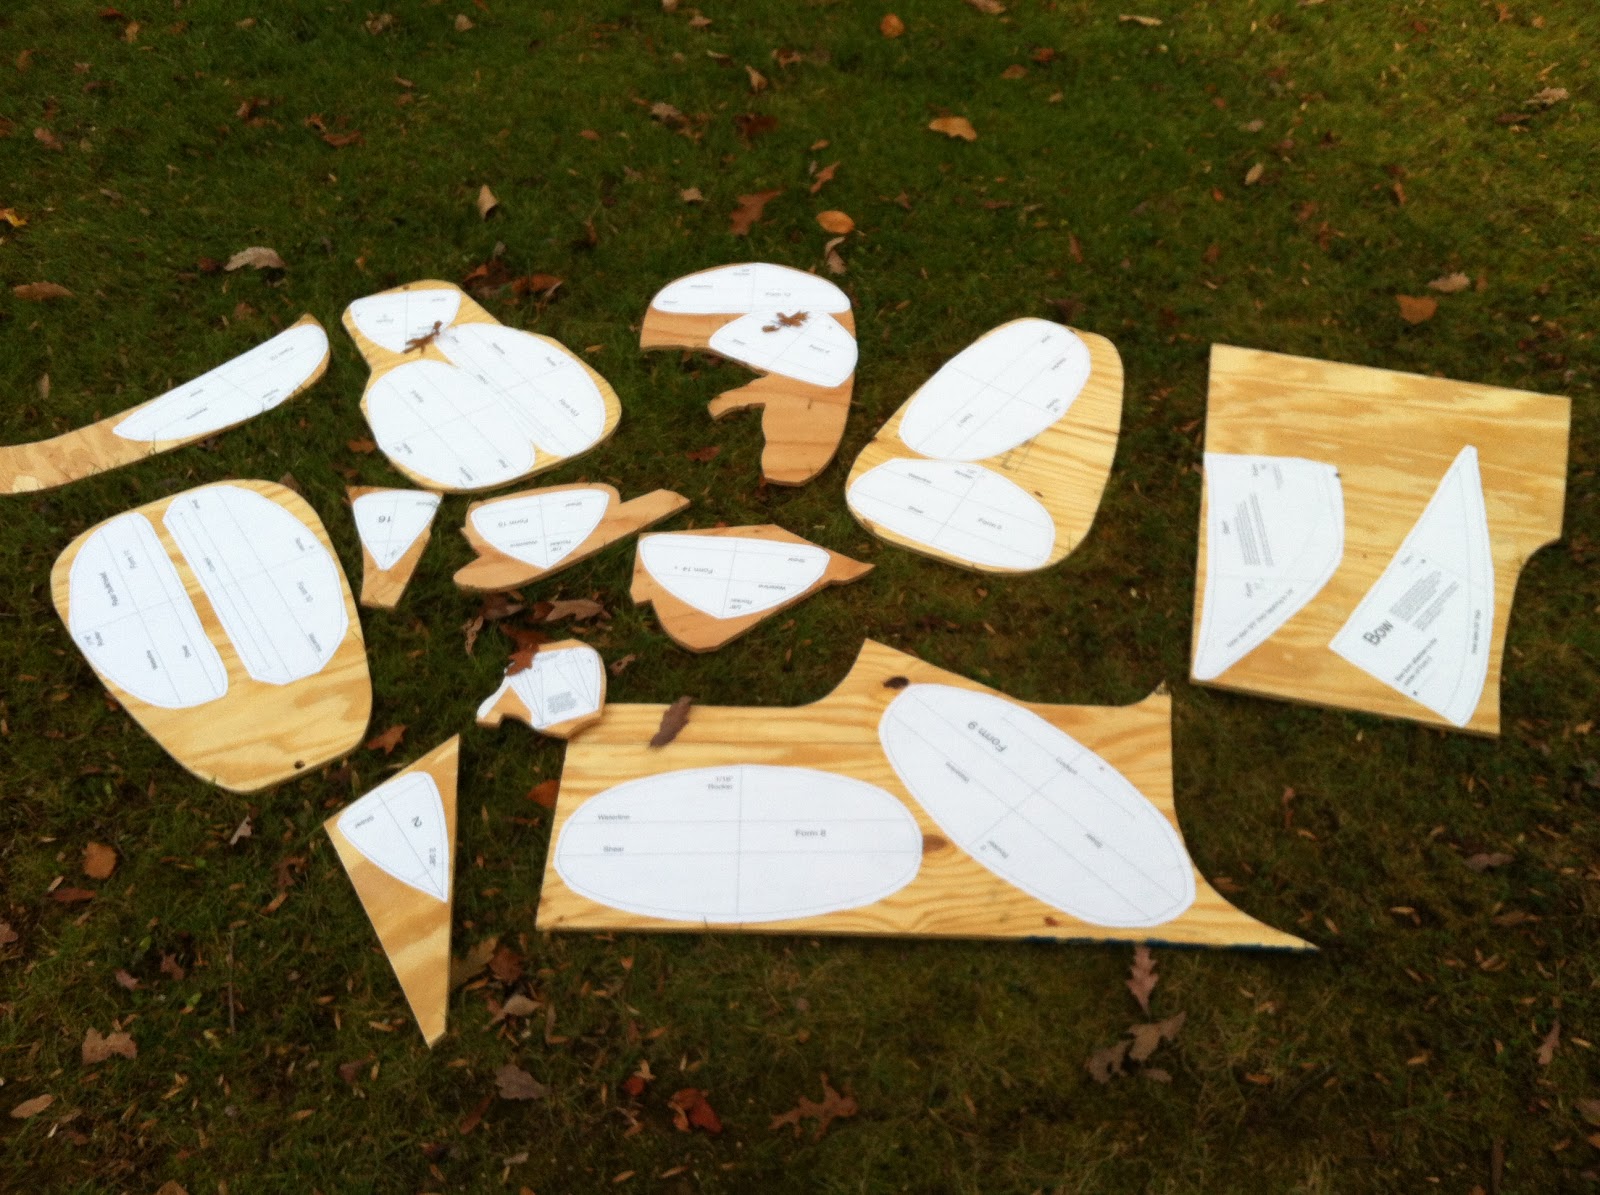
All paper forms spray mounted on 1/2″ exterior grade plywood scraps left over from the previous SOF kayak builds.

Good quality tools make all the difference. After years of working with cheap jigsaws, I bought a nice one. A Bosch 1591EVSL 120-Volt Barrel Grip. There is a huge difference with better tracking and ease of cutting.

Forms (minus stems) just prior to truing with a belt sander.

My strongback is a 16′ long 2″x5″ box glued and screwed. Other kayak build methods use these dimensions as a spine to string the forms on. The Outer Island does not have the volume in some of the sections to allow that however. Maybe pertinent on a subsequent build. The saw horses are a variant of several I’ve seen out there. Posts are notch to receive the strongback. Notches allow for sling straps to be added to support the hull when is done and flipped.

Forms mounted on strongback with brackets

Don’t assume your floor is level. My garage floor has quite a bit of “wave” to the slab. While I took care to level out the strongback, you rely on a floating centerline strung between 2 sticks at either end of the boat. However, moving the saw horses can throw it all off. I taped reference lines at the base of each sawhorse leg and screwed the strongback after shimming to the horses. When the sanding commences, I’d like the option of taking the hull outside to cut down the dust cleanup. Floor marks should return the boat in the same plane when glassing beins.
Clear plastic packaging tape covers the form edges to prevent the eventual strips from sticking.

All forms and stems here. that’s a Classic Moth beyond.


While nothing here becomes part of the boat, it is nice to see the lines of what she will be. Little mileposts like this help push one on.

I opted to use inner stems. These will stay with the boat. They are shown here shaped with jack plane and ready for strips.

Sawhorse shelves & ledges

I also added shelves and ledges on my sawhorses. Tools and materials can be kept handy this way. Nails on the legs of the horses are good for hanging levels, hammers, glue guns, etc.

Feed stands to table to out feed table beyond.
 Here is my strip cutting manufacturing set up. I tried to save bucks by using “lesser” western red cedar 1xs for the strips, but the added knots caused 1/2 of the strips to break. Those will be used for shorter lengths. I returned with nice clear 16′ WRC. By using a kerf blade, I got 15 1/4″ strips from a 1×6 board. I also cut some Yellow pine and mahogany for accents.
2×10 Out feed table is bolted to the oak 1x fence.


I waxed my table to grease the feed. I’ve read corn meal or talcum powder works too. I could see meal on the out feed, but was concerned in adding slight height on the cut table.

Feed stand

Here Garden stones ballast and prevent the feed stands from capsizing.

Far end of out feed table. Battery is ballast.
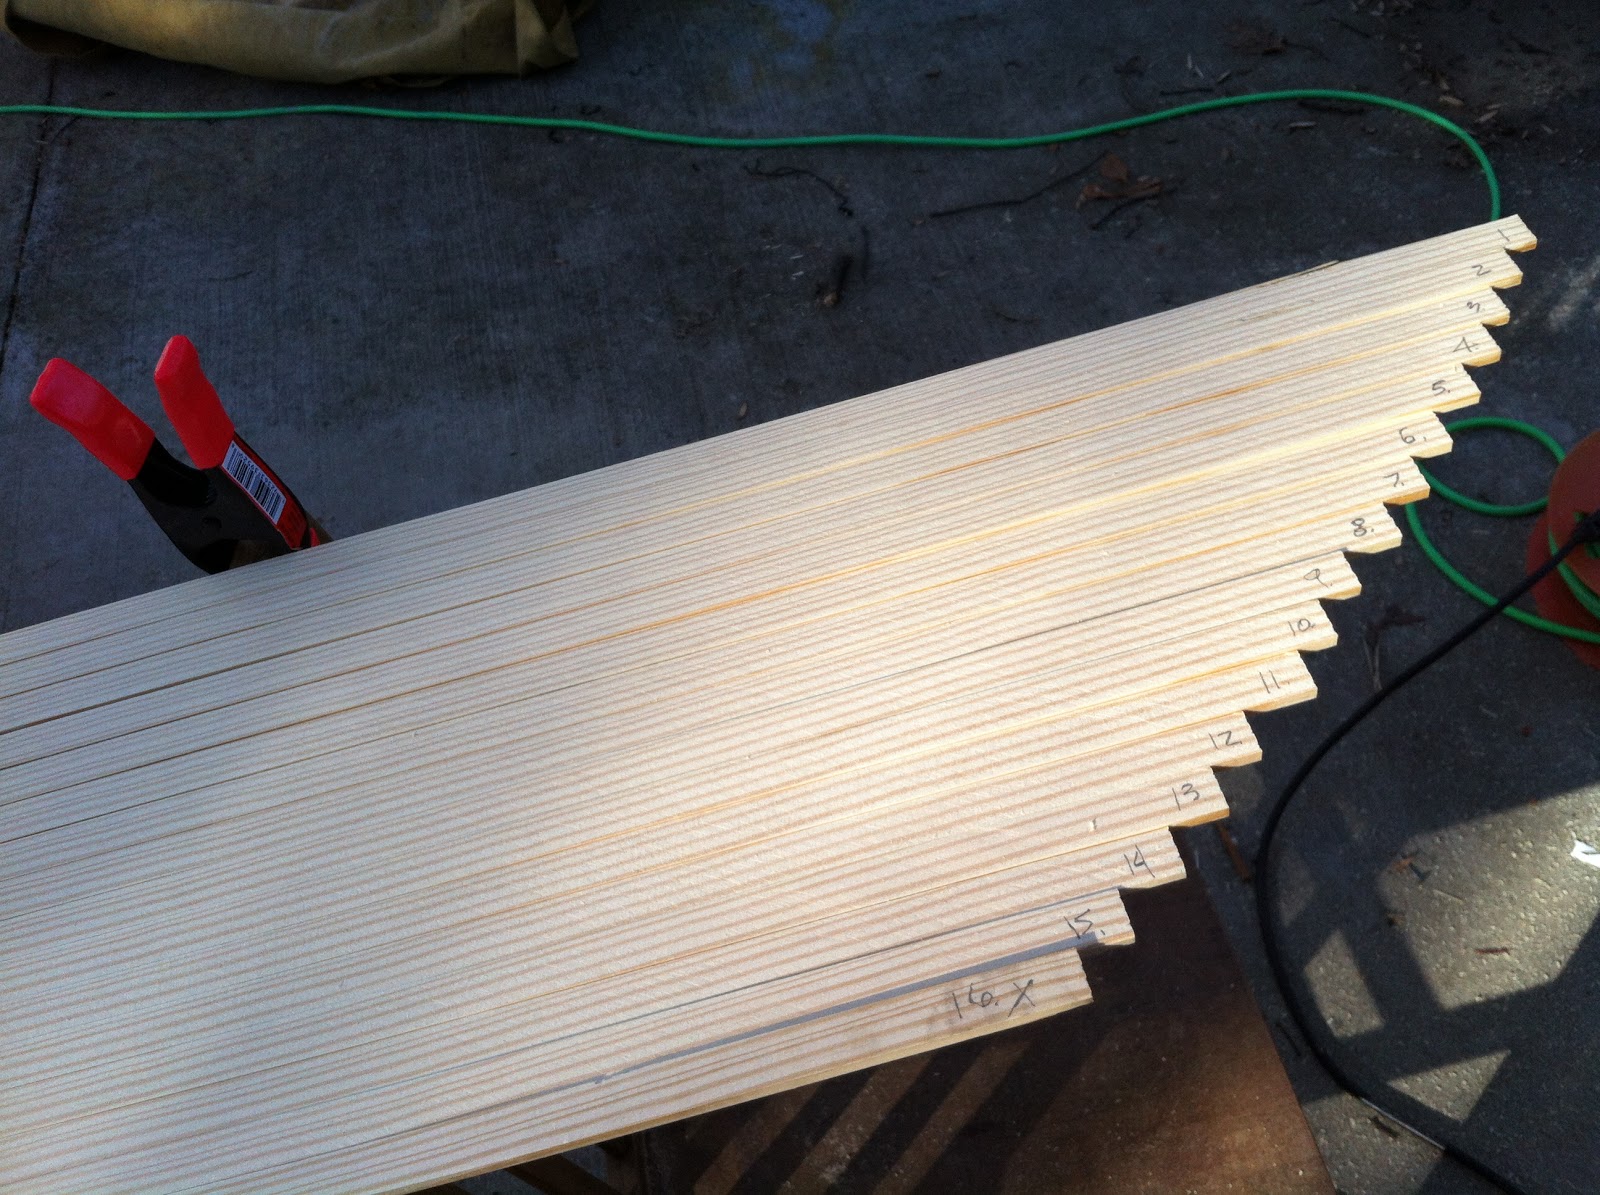
First strips of yellow pine

I numbered the strips as they came off the saw. This allows for uniform grain and color set up if I decide to do so. I’m certain it will help in the eventual scarfing of the short strip.

Bundled strips. Note pencilled stripes to keep track of order.

Though not really pictured, I quickly realized I needed to set the strips aside. I used an old portable WorkMate bench and the top back of a chair with spring clamps added to prevent the pieces from sliding off. My thin out feed table allowed for easy placement of the strips.

This table saw has been worth a bundle. I can’t tell you how many projects it has assisted on after 3 houses and who knows how many miles of lumber it has cut. It is a Powermatic Model 63, discontinued, but the company is still out there .. and American. Super quality though some of the parts for this one are no longer available.

Saw set up prior to 1st cut

Clamped finger boards prior to cut.

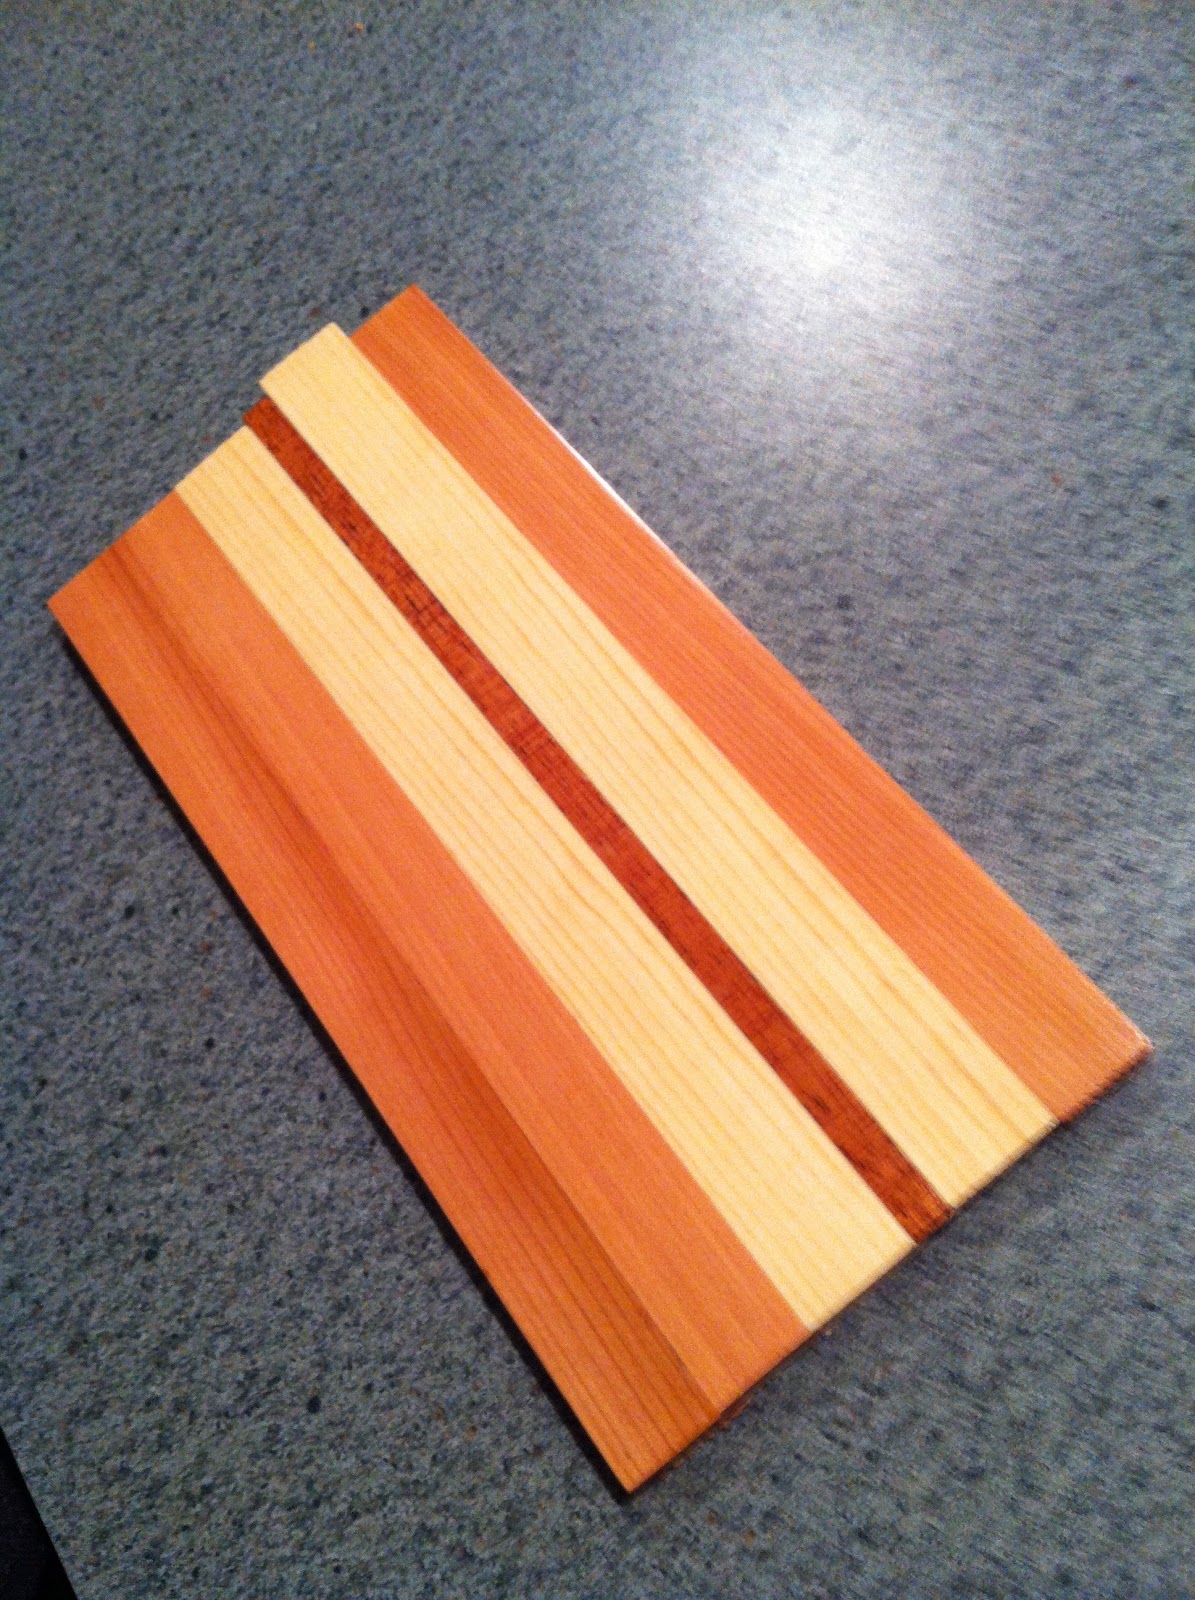
With the strips cut, I was anxious to know what the color of the finished boat might look like, so I mocked up a few strips  and put a coat of varnish on them. WRC, YP, and mahogany looks great. I’ll play with the proportions on the real deal.

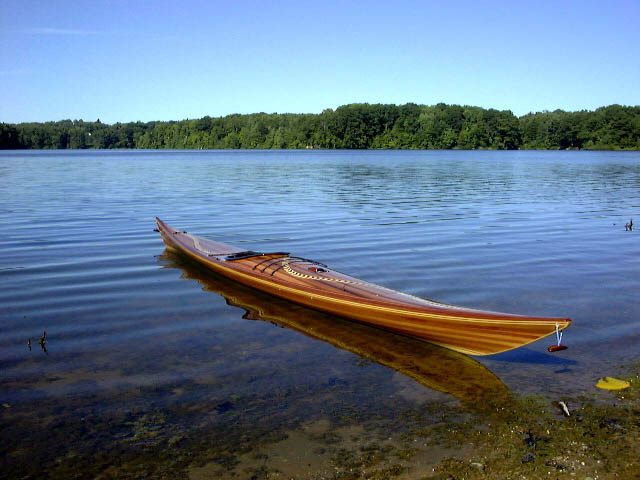
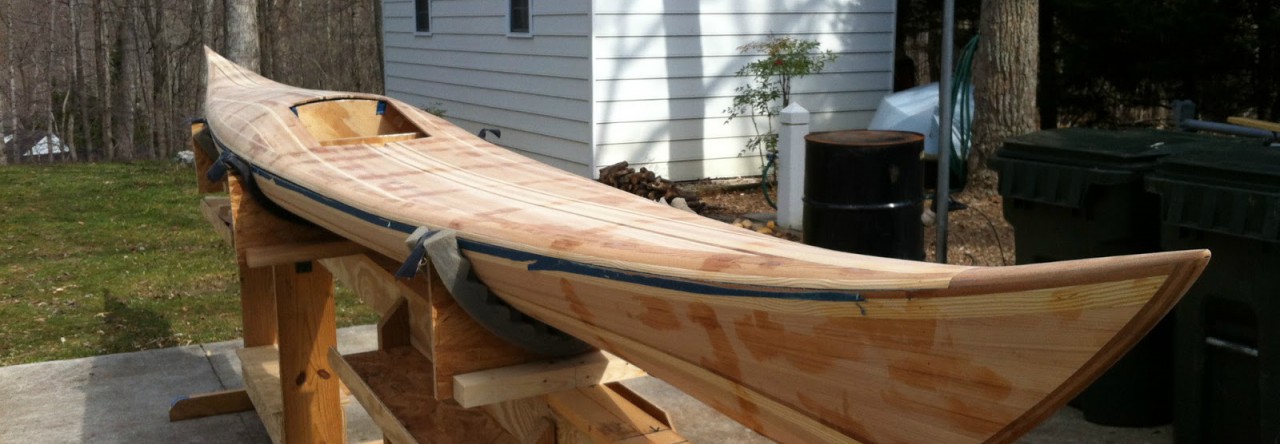
…and I guess it would help to show what I’m aiming at (courtesy of Ross Leidy).

Credit Due

Well, rightly or wrongly, I’ve assigned blame. Now to establish some credits.

For many years, decades really, I’ve made an October pilgrimage to Annapolis, Maryland to wander the United States Sailboat Show. In all honesty most of the boats on display have never interested me too much. Either they are way out of reach and too encumbering or are simply living rooms with a stick. However, the promise of finding the ideal boat and the scene of a harbor full of boats has kept me returning. On one such occasion a modest bateau, a New Jersey gunning skiff (the Melonseed), stood out from the otherwise brash carnival. She was simple, beautiful in form, and to this day represents sailing in its purest form to me. A fellow named Roger Crawford resurrected the 19th century design from extinction. He builds her in glass to this day and a strong and loyal following has resulted. They call themselves, “Melonheads”. Loads of info on the boat is now out there. Perhaps I’ll offer some links later. In any event Roger’s display has always been on the “must visit” list for the show. Every year the boat is the same with hardly a change and every visit is more gorgeous than the last. Why I don’t have one, I can’t figure, but perhaps the stable needs to be thinned first. So, kudos to Crawford Boatworks.

Others to thank for enabling the plunge:

  • Ross Lillistone of Bayside Wooden Boats: He’s an Aussie who’s cat ketch “Periwinkle” re-ignited my small boat interest to the point of seriously considering building (3 yrs ago!). His designs are wonderful and very well thought out. With immense patience he answered countless emails and started my collection of proper tools for the “yak” task here begun. Perhaps there’s a clinker ply boat in my future still.
  • Barry Long: He is the craftsman and dare I say artist of 2 of the most beautiful Melonseeds I’m ever likely to see. I venture to say there is no better documentation on the journey of creating a small vessel as his blog Eye In Hand/ Marginalia. He too has endured many an inquiry and shares in the blame for encouraging my slip from reality here. If this kayak adventure proves as rewarding as I expect, it will be the prelude to a Melonseed build.
  • Ross Leidy: like Barry, he’s an artisan whose site Blue Heron Kayaks shows his prolific kayak builds of which his Outer Island is one of the prettiest out there. I’ve poured over his site to get a good understanding of the build.

Lastly, I credit Jay Babina for his Outer Island design. It is a looker and possesses a form that innately made sense for my use. His plans and manual are well set. An accompanying “free” video will amaze you in demonstrating the kayak’s efficiency of movement and grace. Outer Island

Aside from these 2 skin-on-frame kayaks (below) one of my sons and I built last year as an introduction, I’m no boat builder. I aspire to gain the craftsmanship to pull this new work off.

The “bones” of a slightly altered (deck 3/4″ higher) Sea Tour 17 Explorer. SOF #1.


The ST 17 with skin on frame. All up = 37 pounds.

Pictured is the “japanese lantern” before painting.

She floats.


Here is the captain in the painted (3 coats of Rustoleum) boat on her maiden trip.

SOF #2: A Siskiwit Bay 17. All up at 34 lbs.

Without further ado, what follows will be the pieces and parts of an actual build. I hope it proves helpful (remember, you can always learn from another’s mistakes).

A Start …

You can’t blame everything on your parents, but of this one thing I am certain I can: my love for “messing about in boats”. Early memories evoke summer evenings at age 3 or 4 lying in the bottom of a small sloop as she slid across the Lafayette River. The warm sea air, the sparkling reflection s of shore lights, and perhaps most infectious, the hypnotic movement of a vessel on the water. This all conspired to lure me in.

Fast forward many years and countless such evenings, I now find myself these recent evenings in a cluttered garage100 miles from the ocean. The purpose? To dream childhood memories and build a boat. Not just any boat (certainly not an Ark), but one of the 3 boats this “sailor” has concluded fit his boating needs. They are an 18′ touring kayak called an Outer-Island, a small 14′ sailing skiff named the Melonseed, and 25′ keelboat known as the Nordic Folkboat. I’ve no illusions of building the latter and have whiled away hours staring at the skiff. However, I have finally put strips to forms for my kayak.

How long will it take? A guess would only be that. Others have approximated 300-400 hours. That alone intimidates. Where does it come from? Do you include the unrecorded hours of investigation, correspondence, gathering of tools and materials, and the dreaming? Surely not, but nonetheless, I have begun to record the actual build time. It all makes no sense … unless you are a romantic, and I was hooked as a baby boy.

So, enough of the “why”. I don’t have an answer, don’t want to be a writer (much less a poet), but I do desire to record my progress and process in hopes that it will force a finish and paddle up some river or across a small bay. I too feel some indebtedness to the many folks who educated me regarding this build and to those who’ve kept me from drowning early on.

30 hours. That’s actual cobbling pieces together for you accountants (who aren’t likely to be so touched as to build a boat). I’m nuts and am going to do this contrary to notions of being reasonable. After all the studying, the learning begins. And so, as I continue to figure things out, … this … is … a … start.