Cannonball Folly

Started an initial planing of the deck last night and began shaping the mahogany on the prow at the deck. Here are a few pics that are likely to irritate the fastidious. Please reserve judgement for final results. As a general note, the deck looks good.Planing doesn’t open joints to expose more glue. There is an odd almost indented place to either side of the cockpit at 4 and 8 o’clock. I don’t believe it was intended, but I got symmetrical results. Doesn’t look bad. It is what it is.

The most egregious clamping of all!

Sometimes you just keep adding junk until the task is done. Some sort of strap would have been better, but this worked. No need for a patent here though.

“cannonball hole”.

When I mentioned that I had put the last strip on the boat, my youngest boy (9yrs) piped up and asked, “What about the cannonball hole?” Well put. You can see a light pencil line of the final hole for the cockpit. I didn’t want to fair any more area than needed. Some of this I’ll cut back before glassing as projecting sticks will mess up the laying of the fabric I think.

Deck fairing begins.

Half Way Home

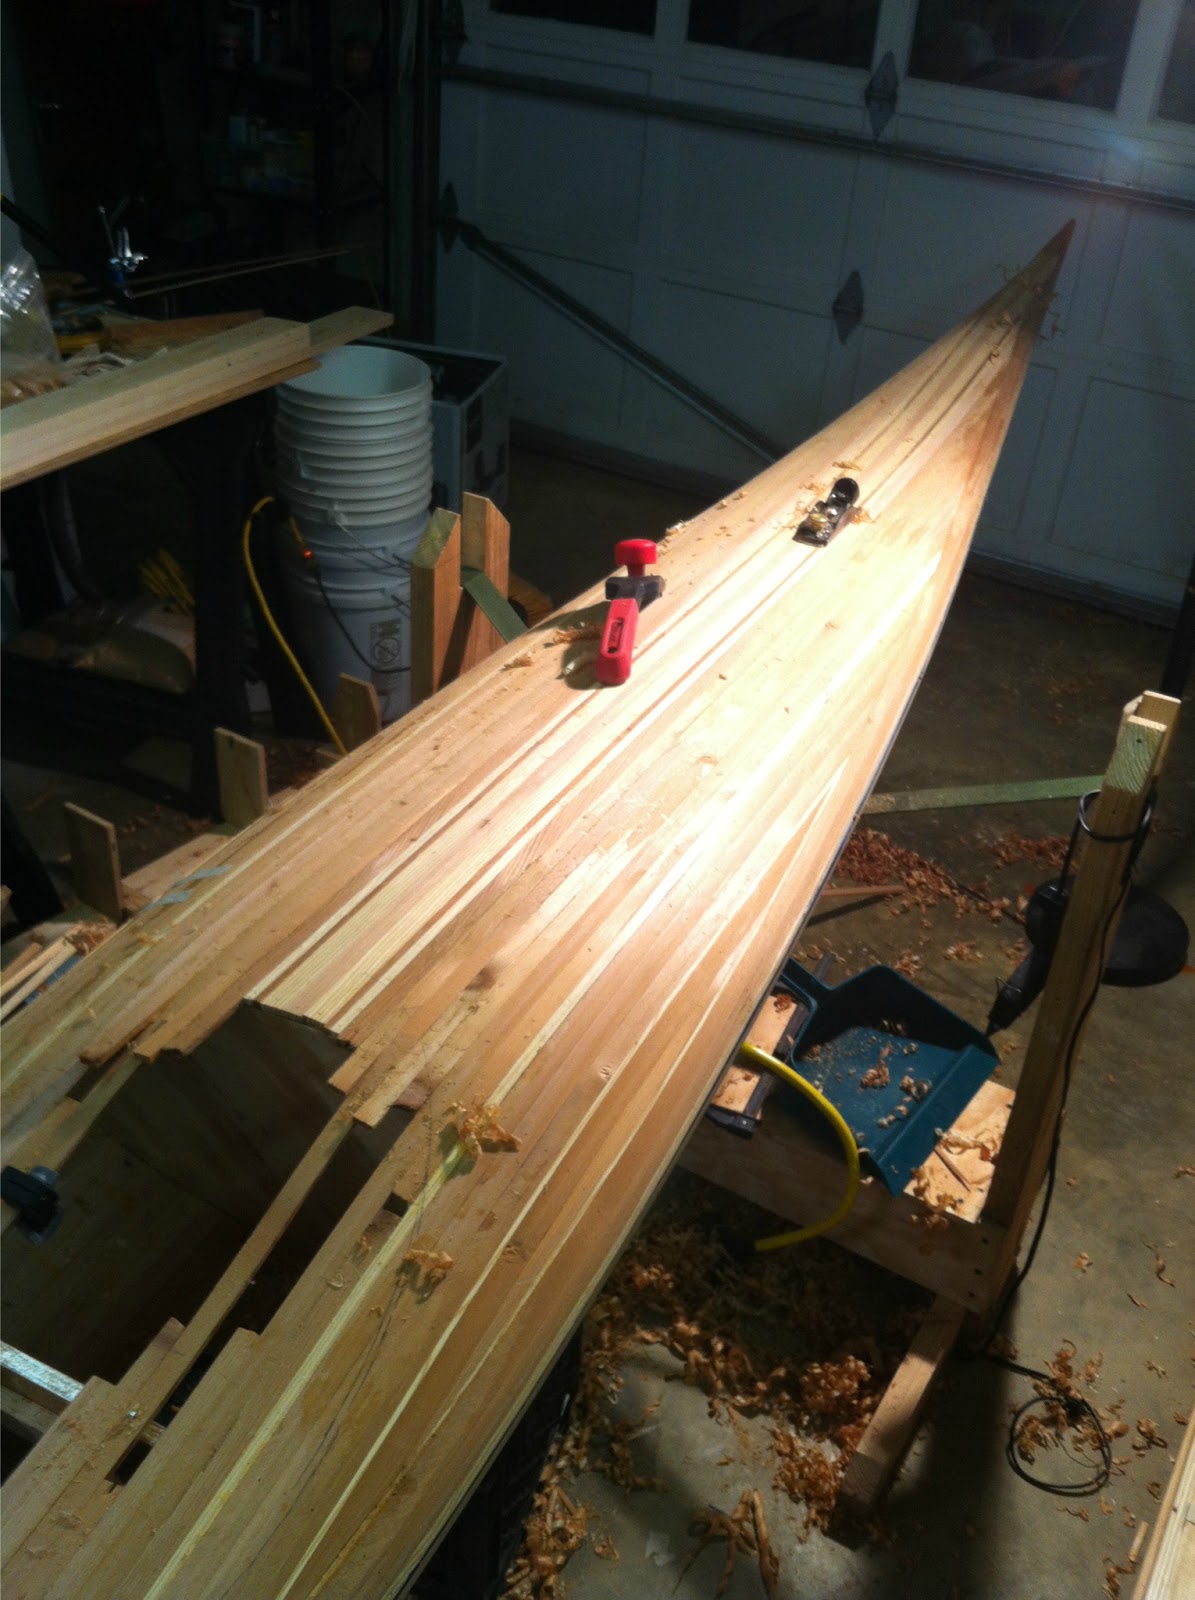
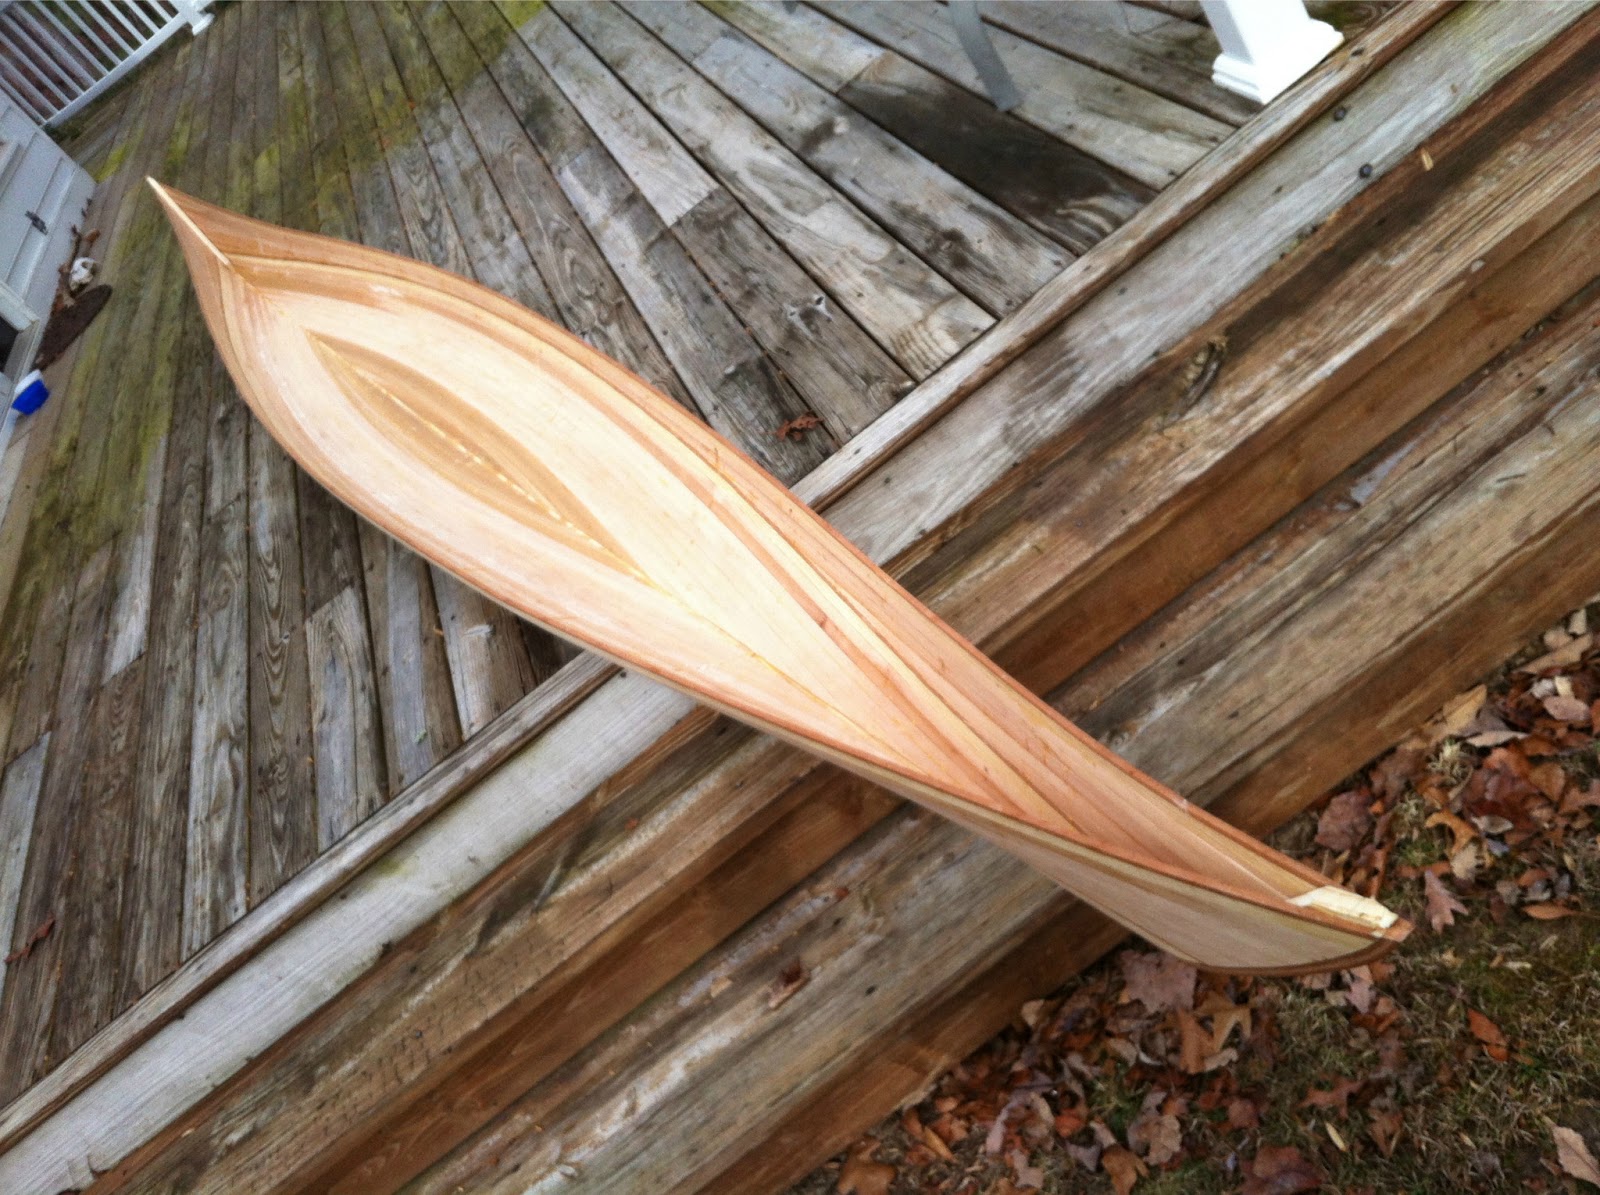
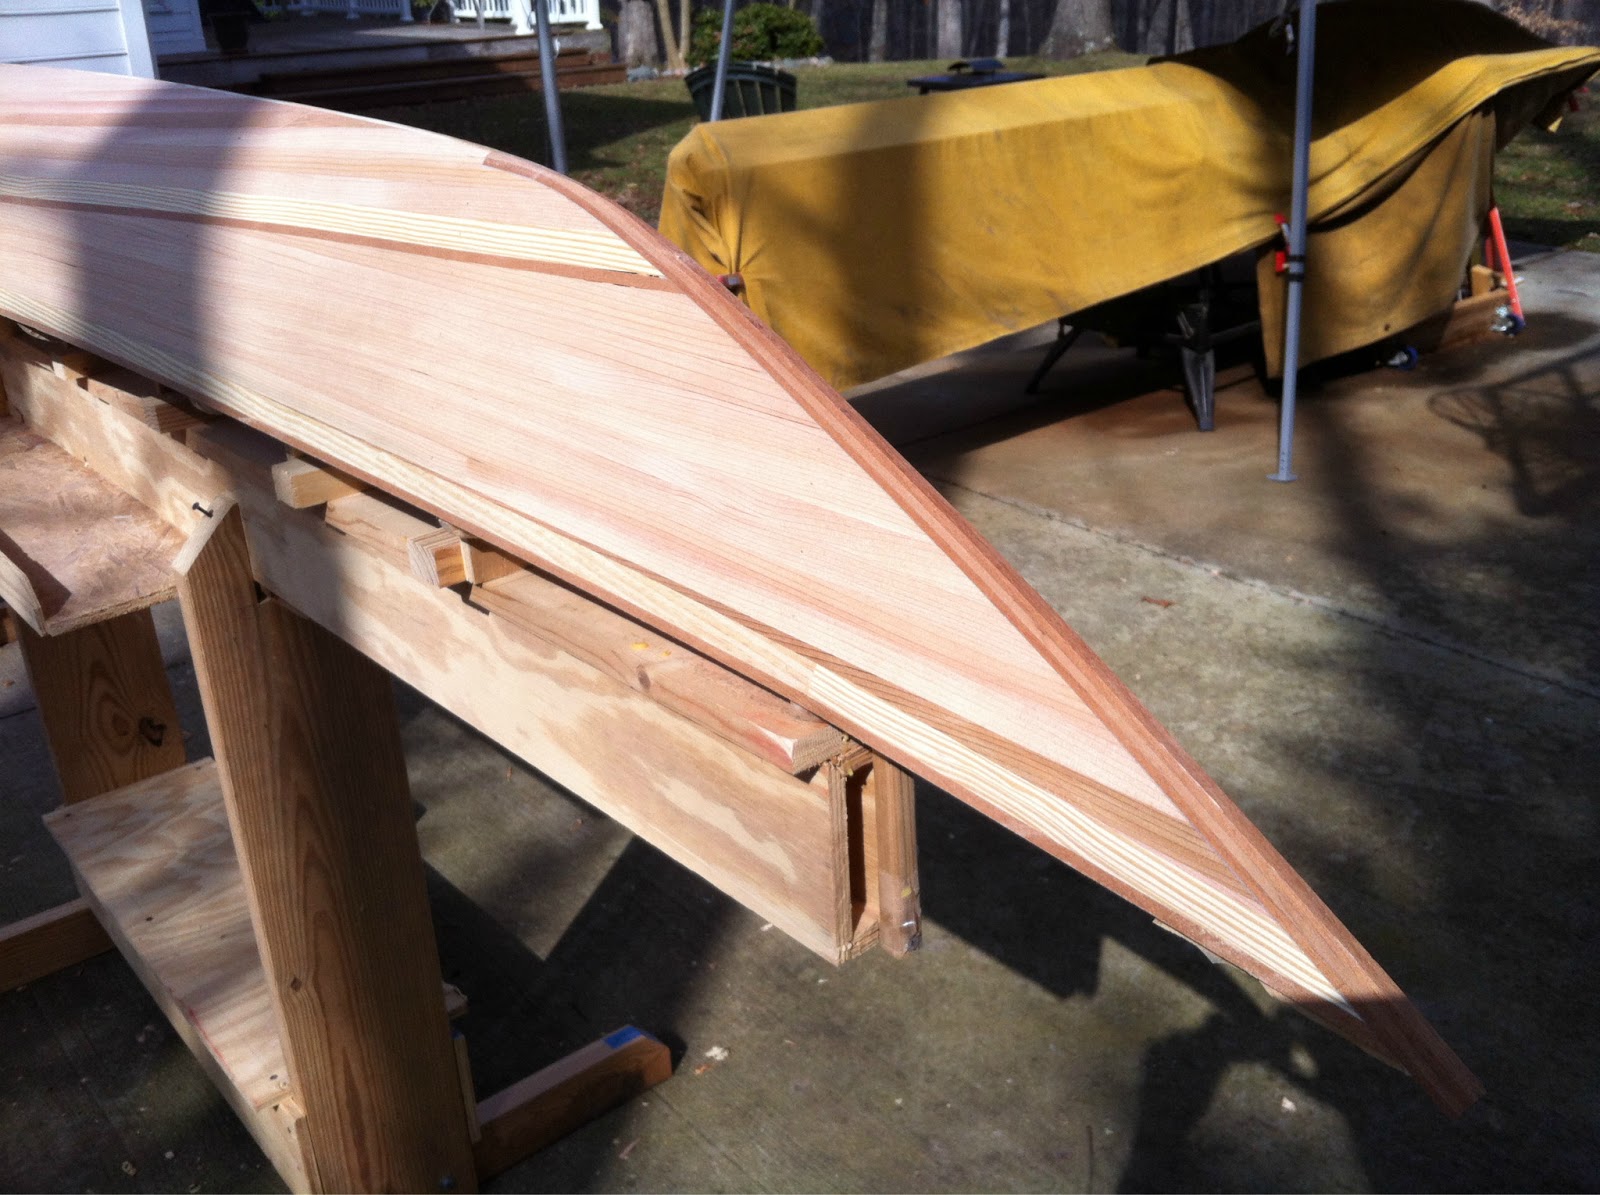
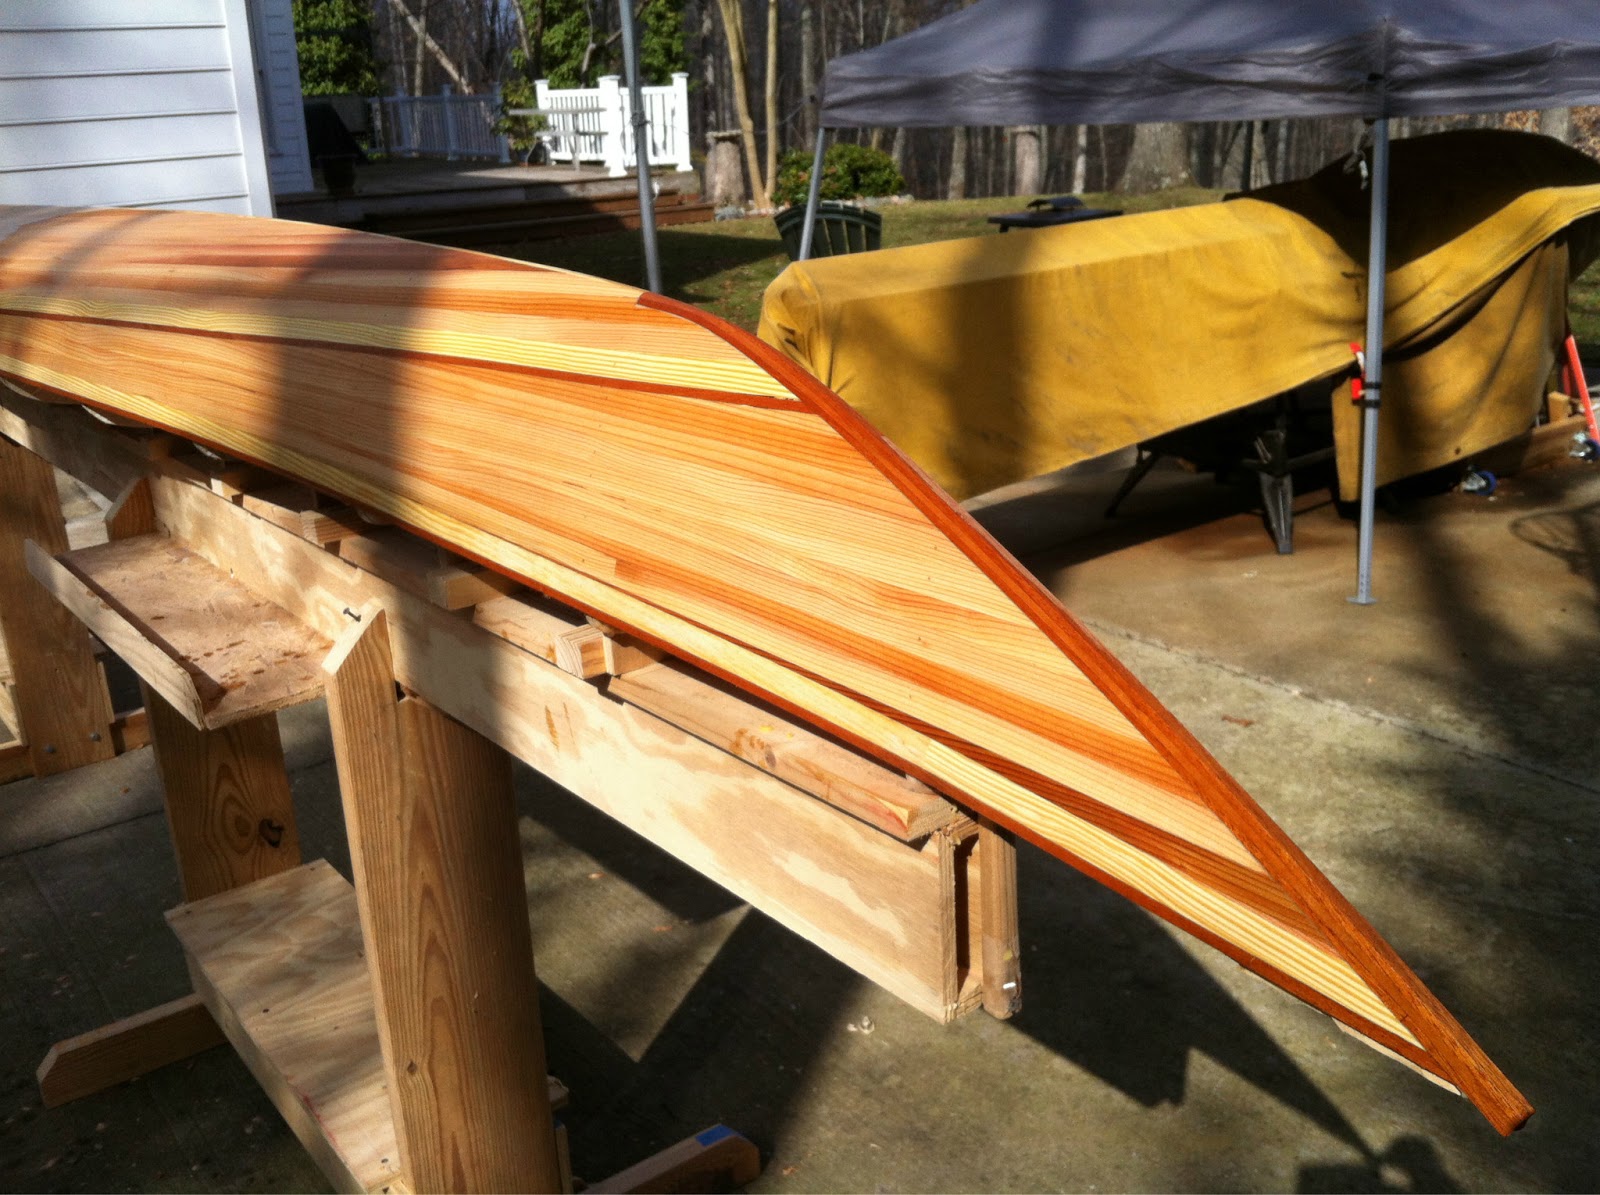
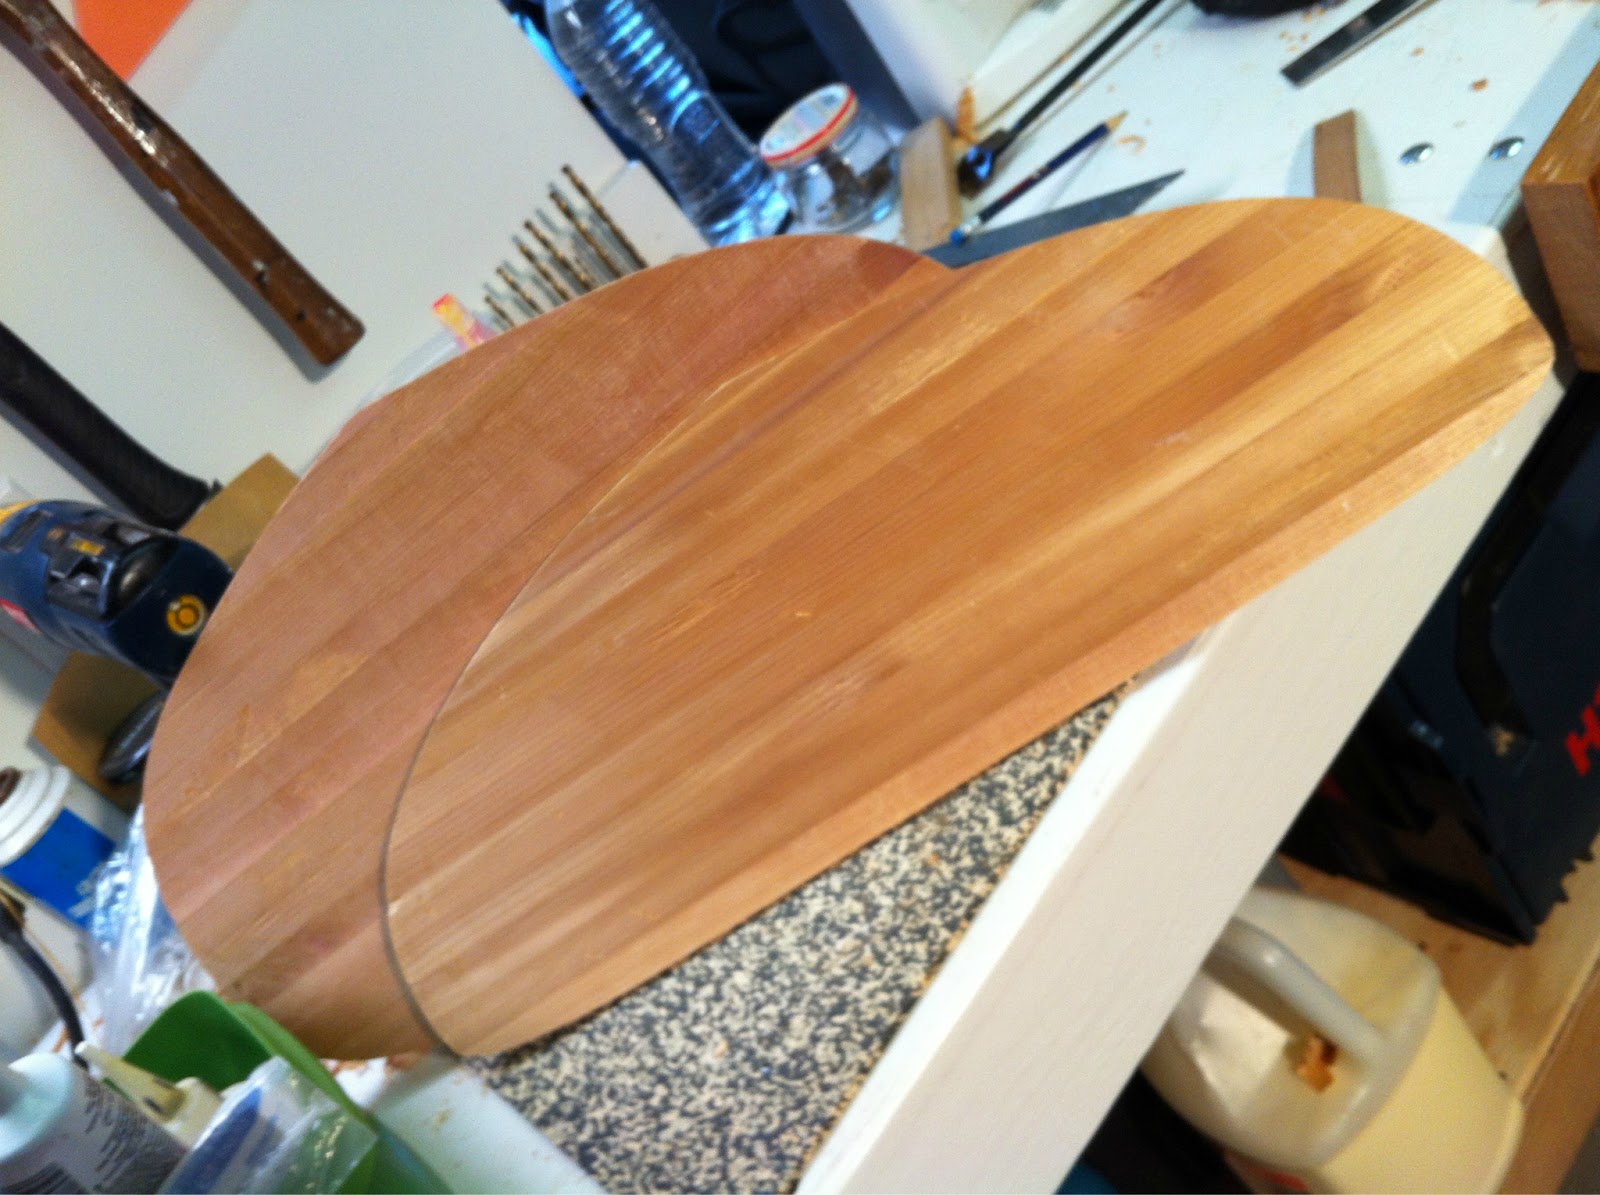
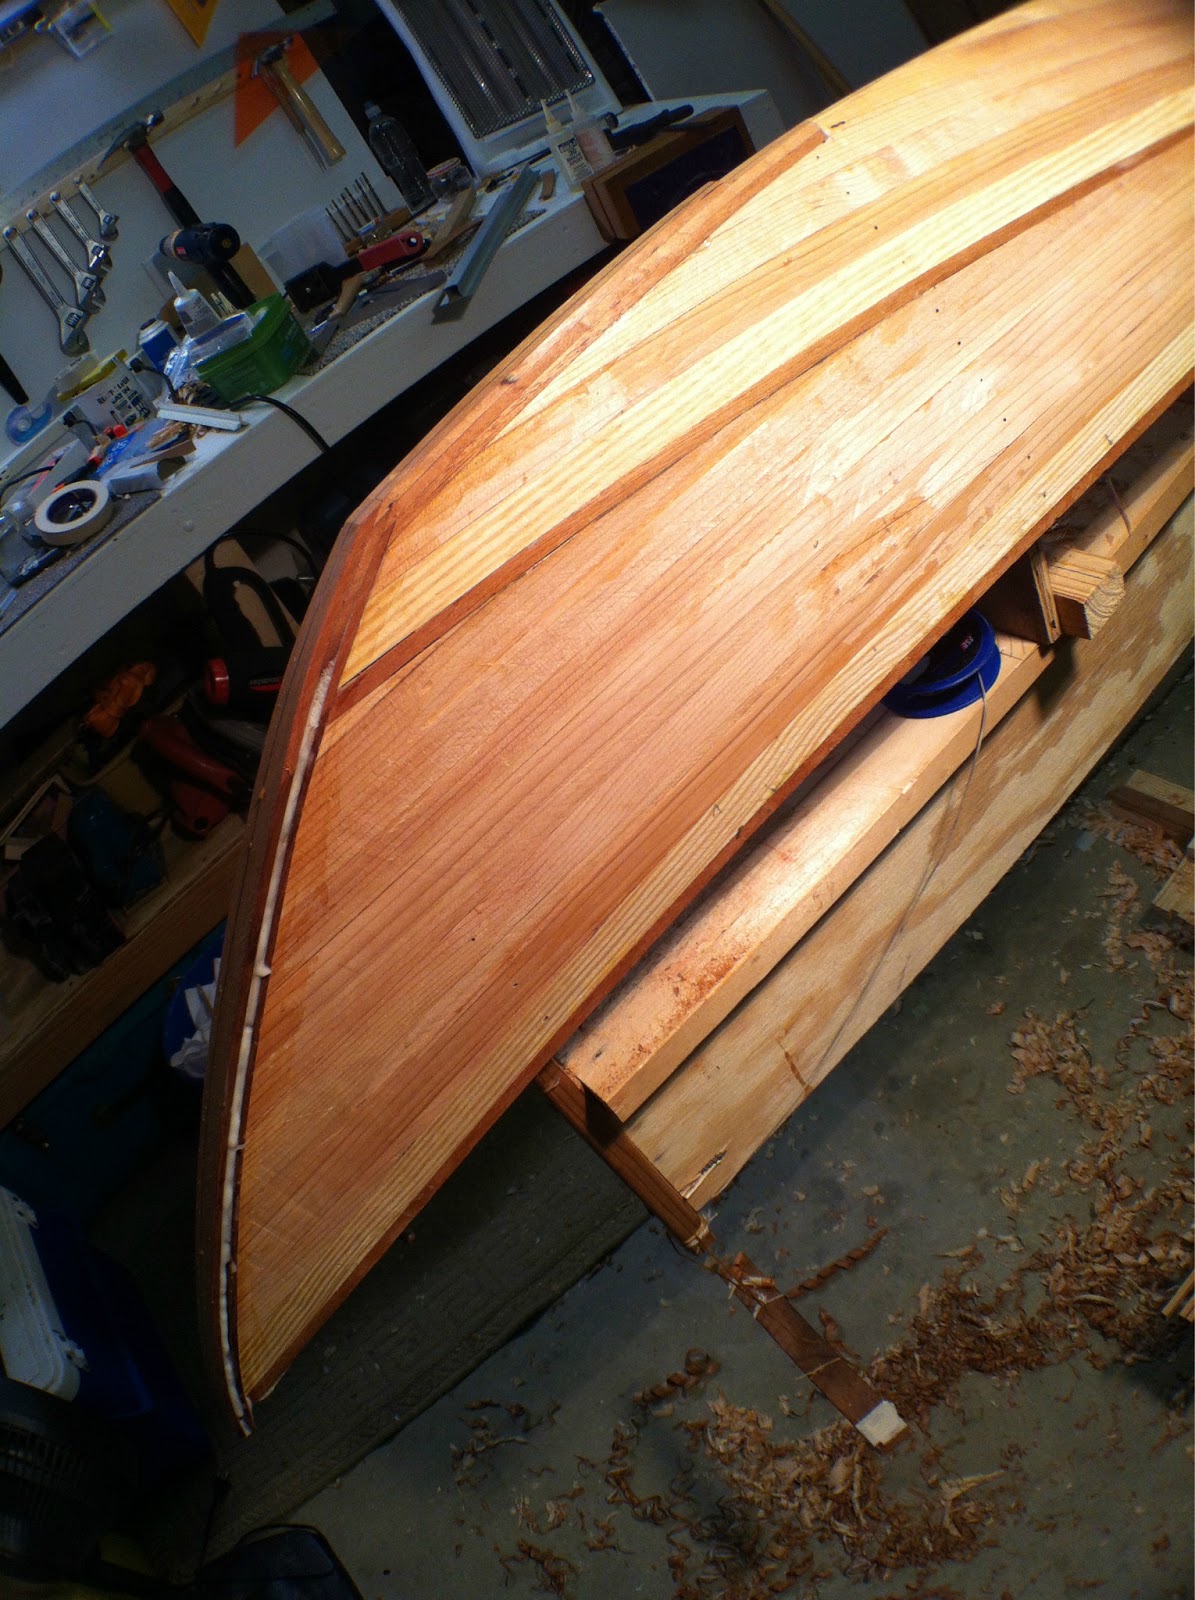
Once the deck is stripped out, I’m told you’re at the halfway point in the build. It has gone quicker than expected and has been a joy really. Yet, at some point this past week I became much more absorbed with turning another page on this kayak. Taking pics became a distraction, but I did continually stepped back to admire the lines.With the hull ready for glassing, the deck seemed an easier undertaking. In reality it is perhaps more difficult, yet my new found skills have allowed me to motor on through completing the strips. I’ve become proficient at measuring, whittling, planing, and then sometimes giving a slight sanding to the tapered ends of strips for a tight fit.

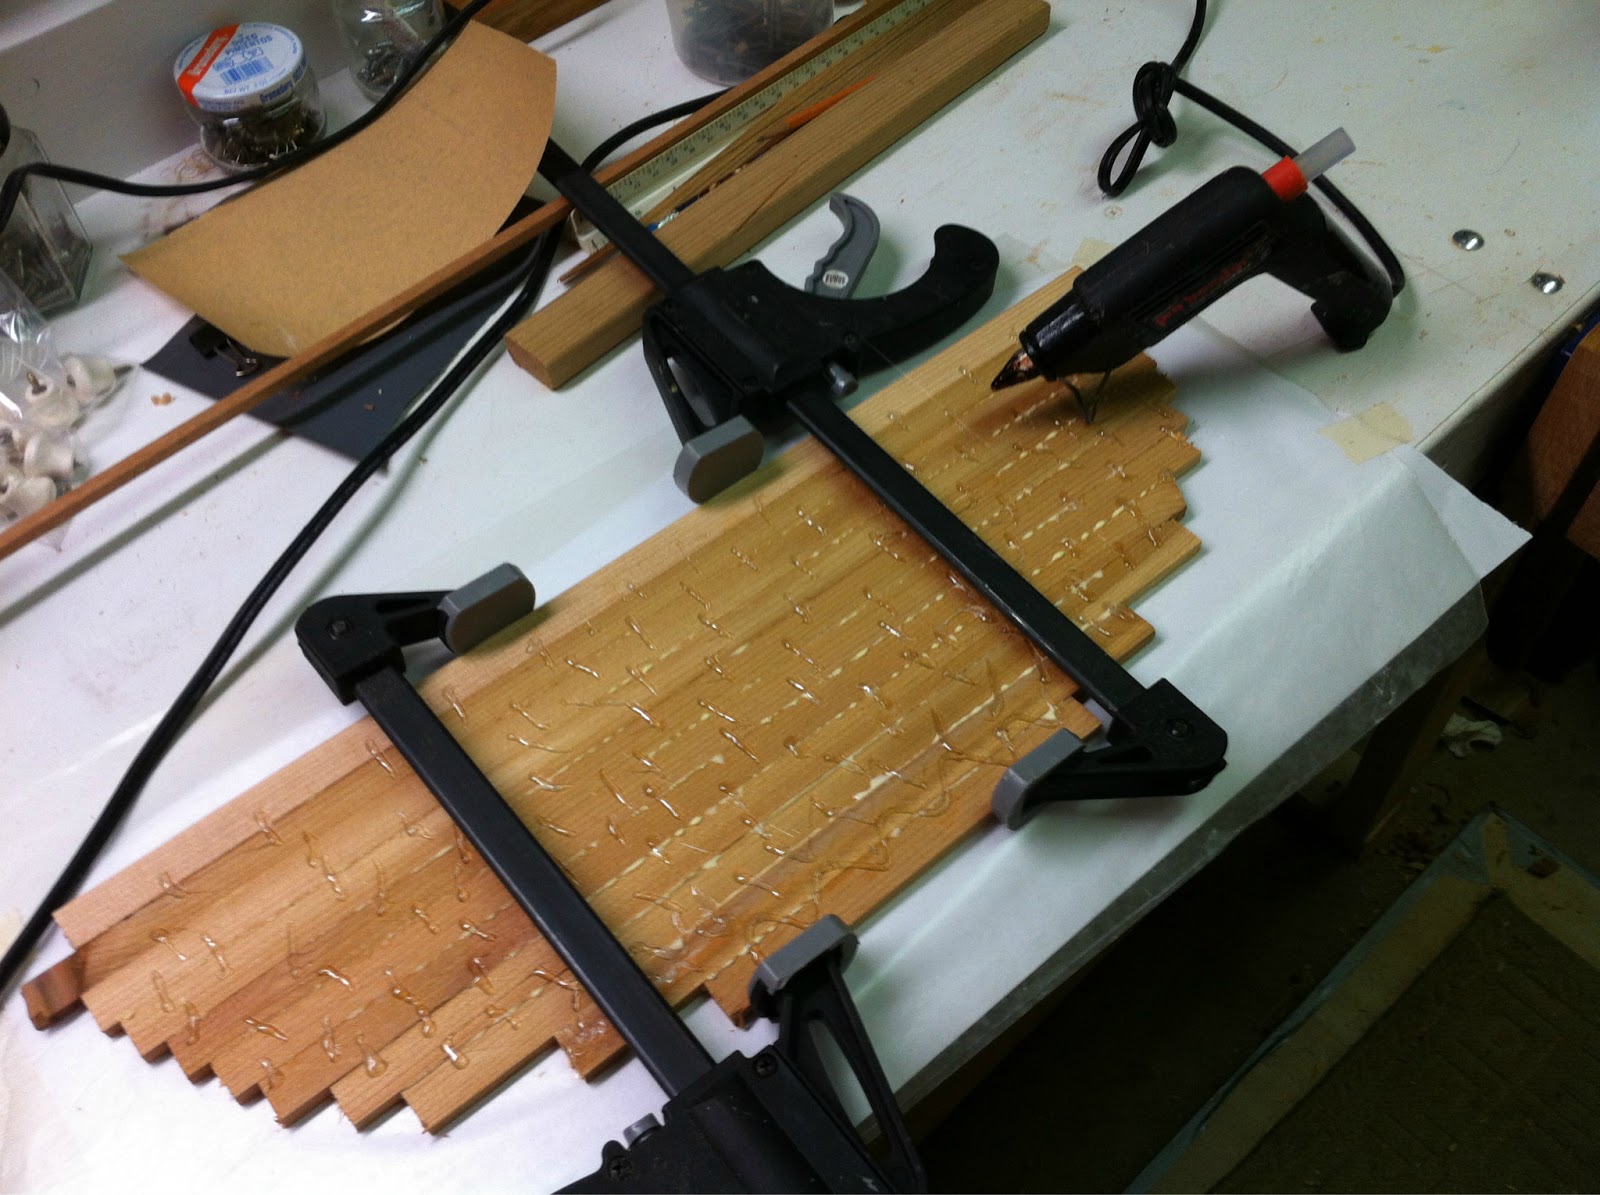
Thursday night, with the help of the “crew” that showed for dinner, we put the table saw back in the shed. It deserves better care than it has had over the past 2 months. I also thought any more cutting would be of shorter boards. As luck would have it, I ran short on strips and have been scarfing pieces together, but generally that went well.

The weekend allowed for much progress. Was expecting to complete the stripping, but we are still seven strips shy of a “full deck”. Ran out of time … and to some extent, energy. Slept well last night in spite of the time change. Having the extra daylight hour as the days get longer is going to improve productivity. Working in the evening with more daylight will definitely give a psychological boost. Sunday was by far the nicest day of the year thus far. the warmer weather has me eager for the 1st splash.

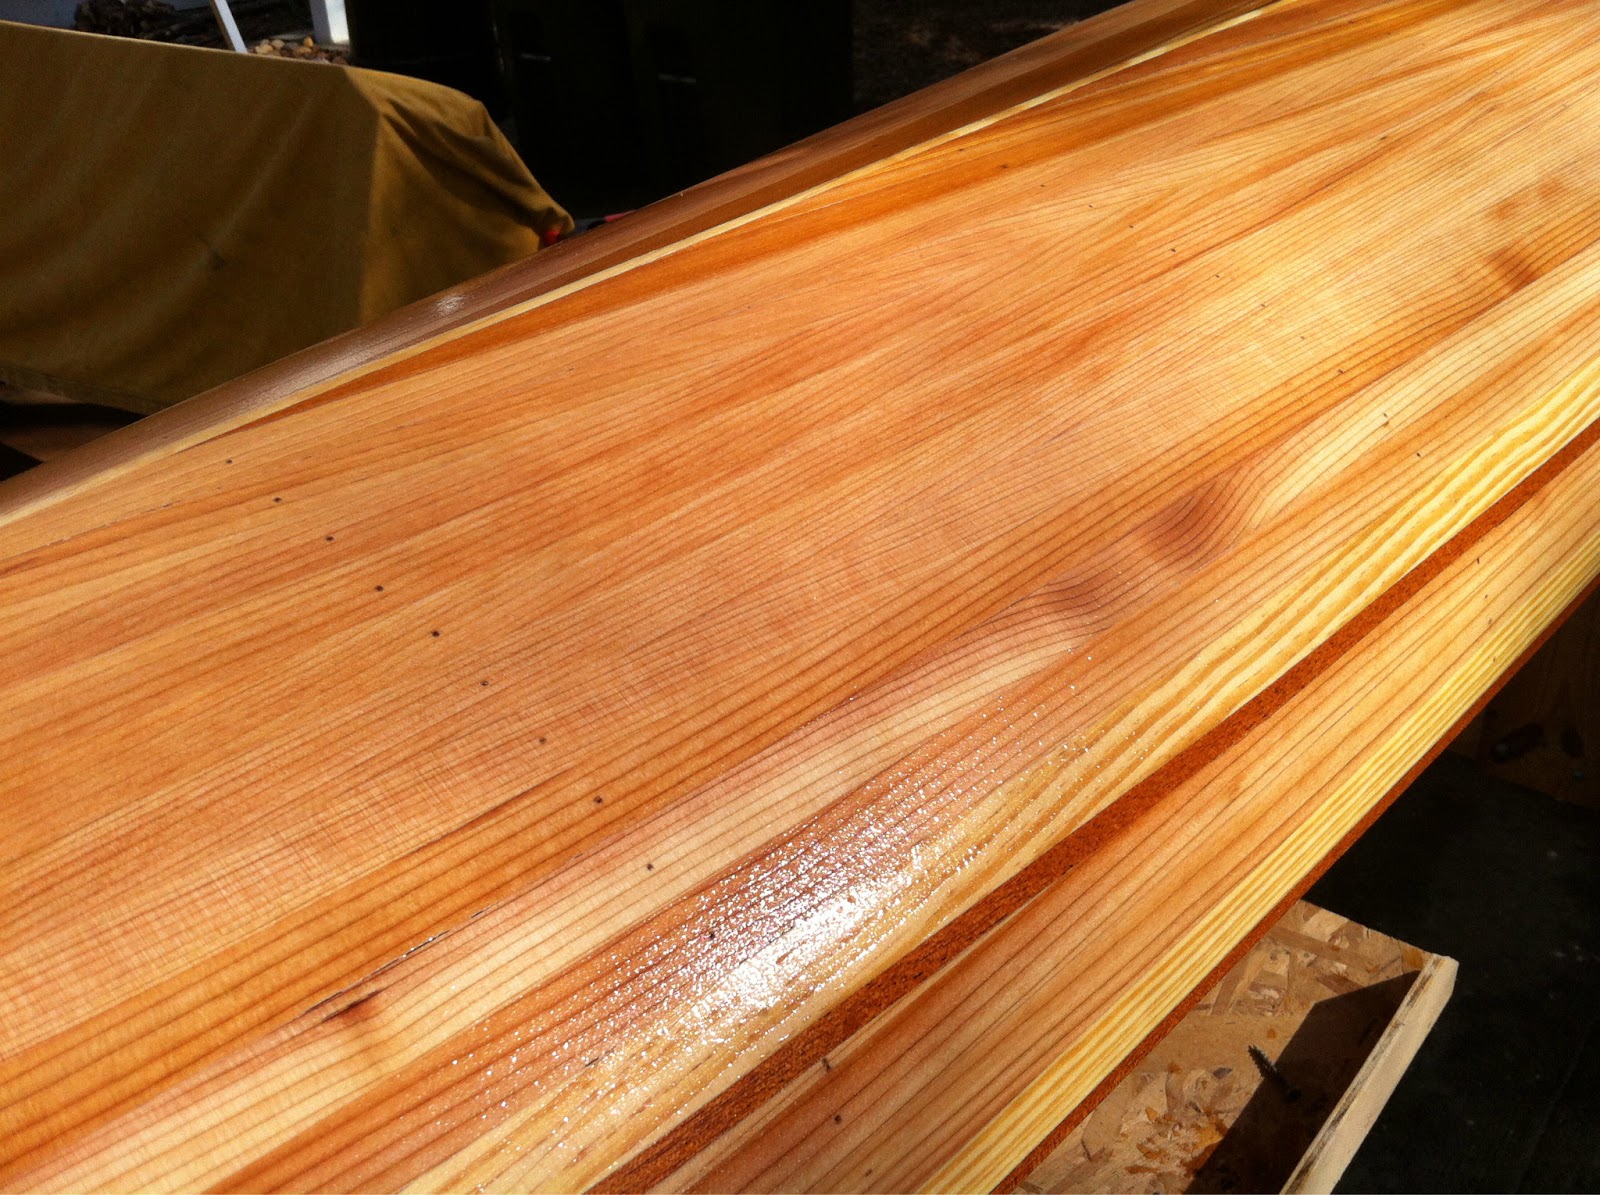
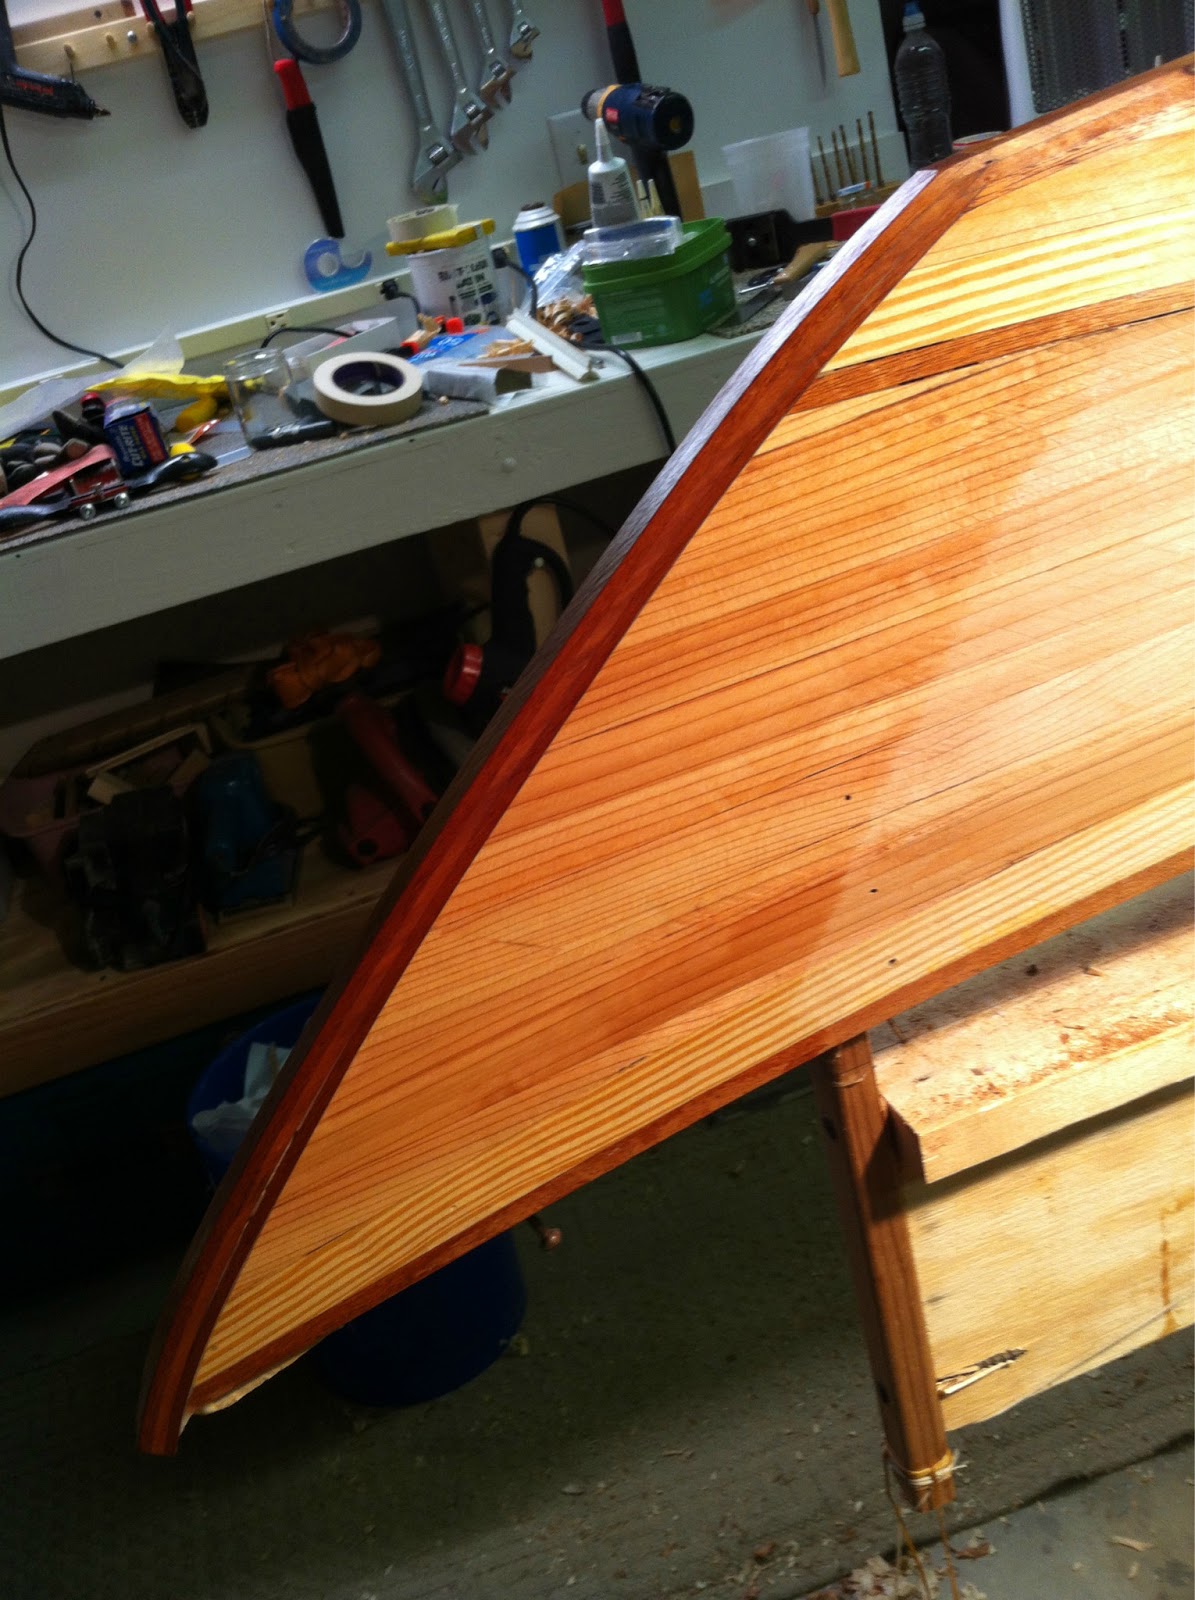
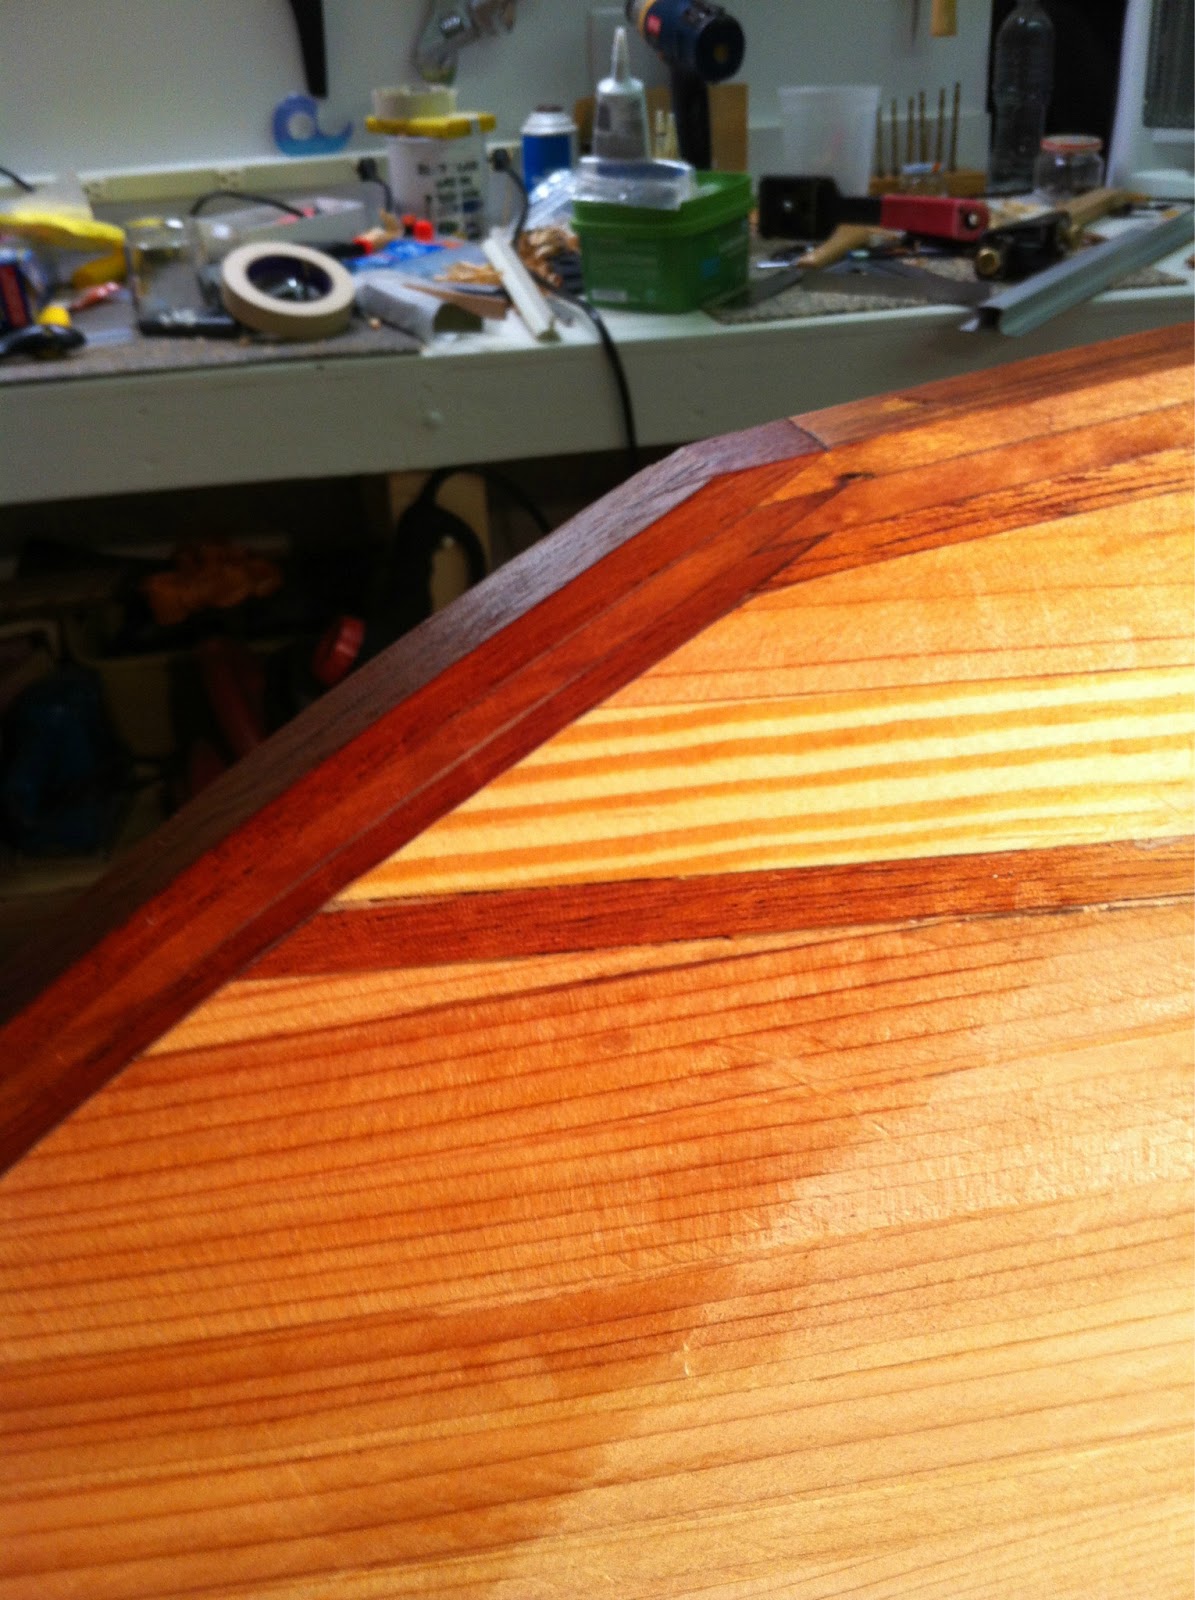
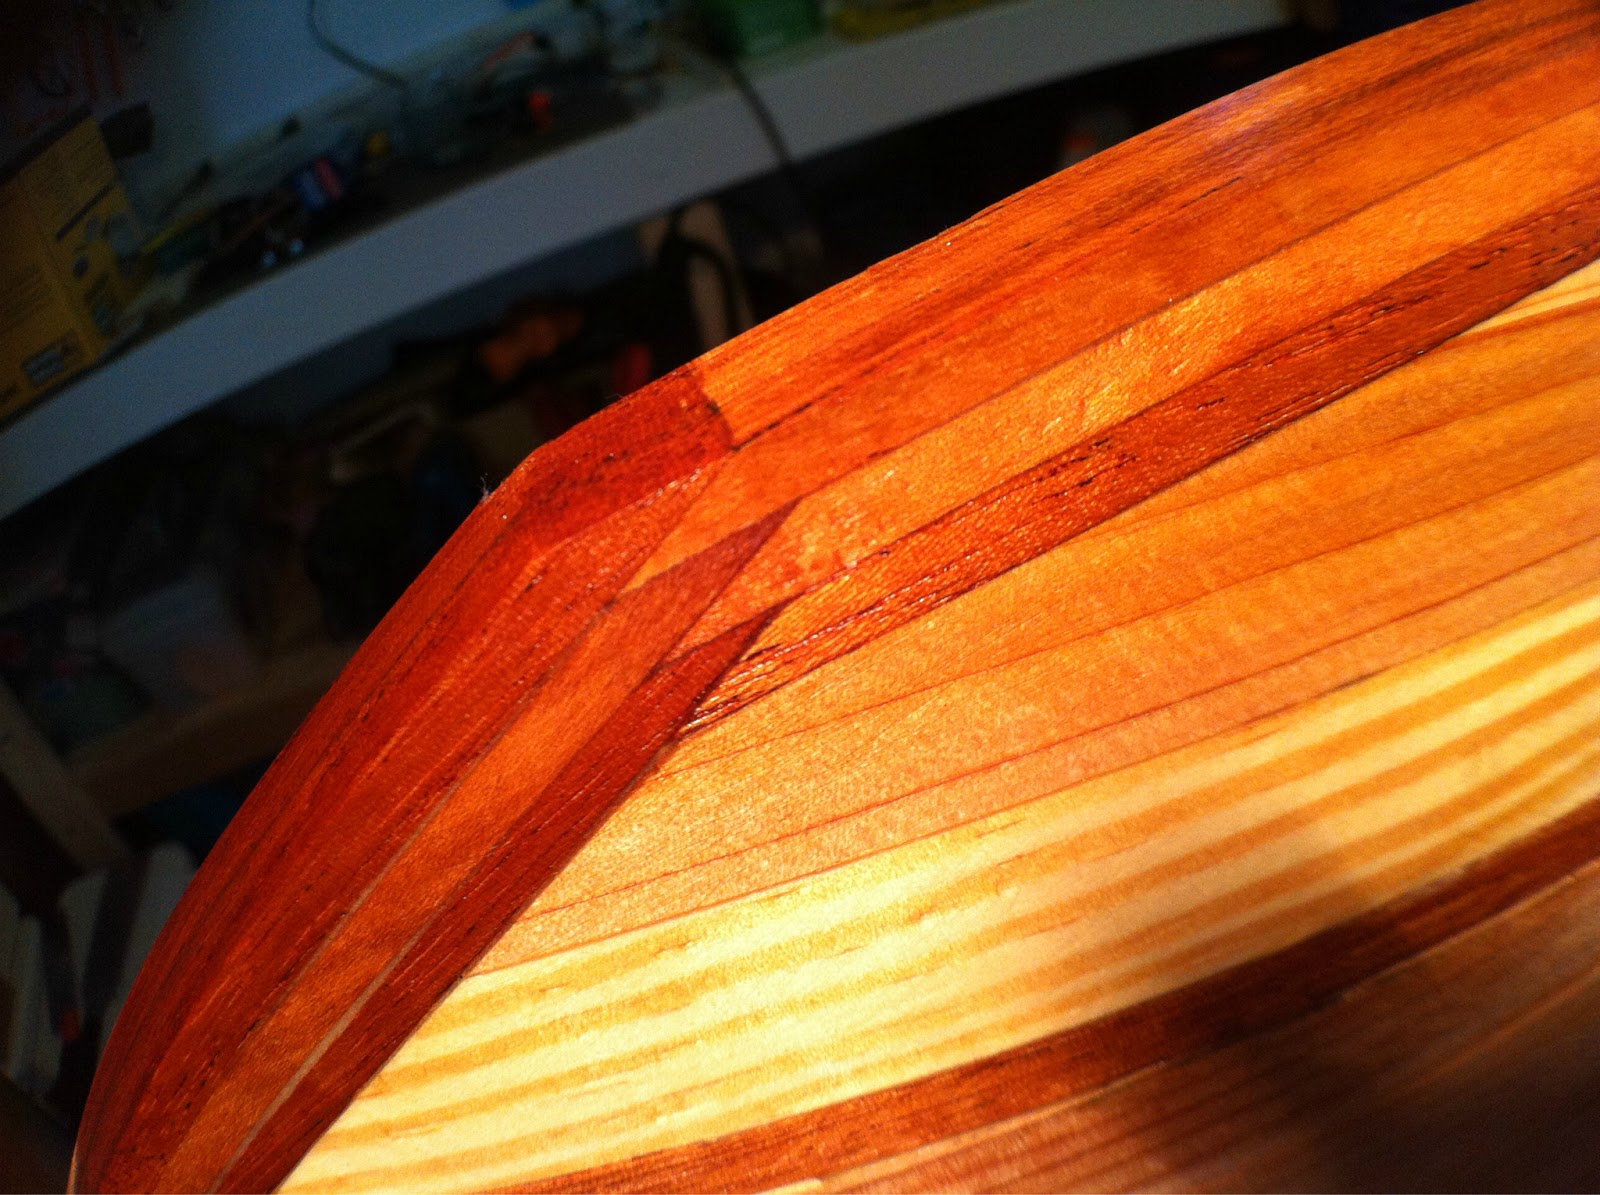
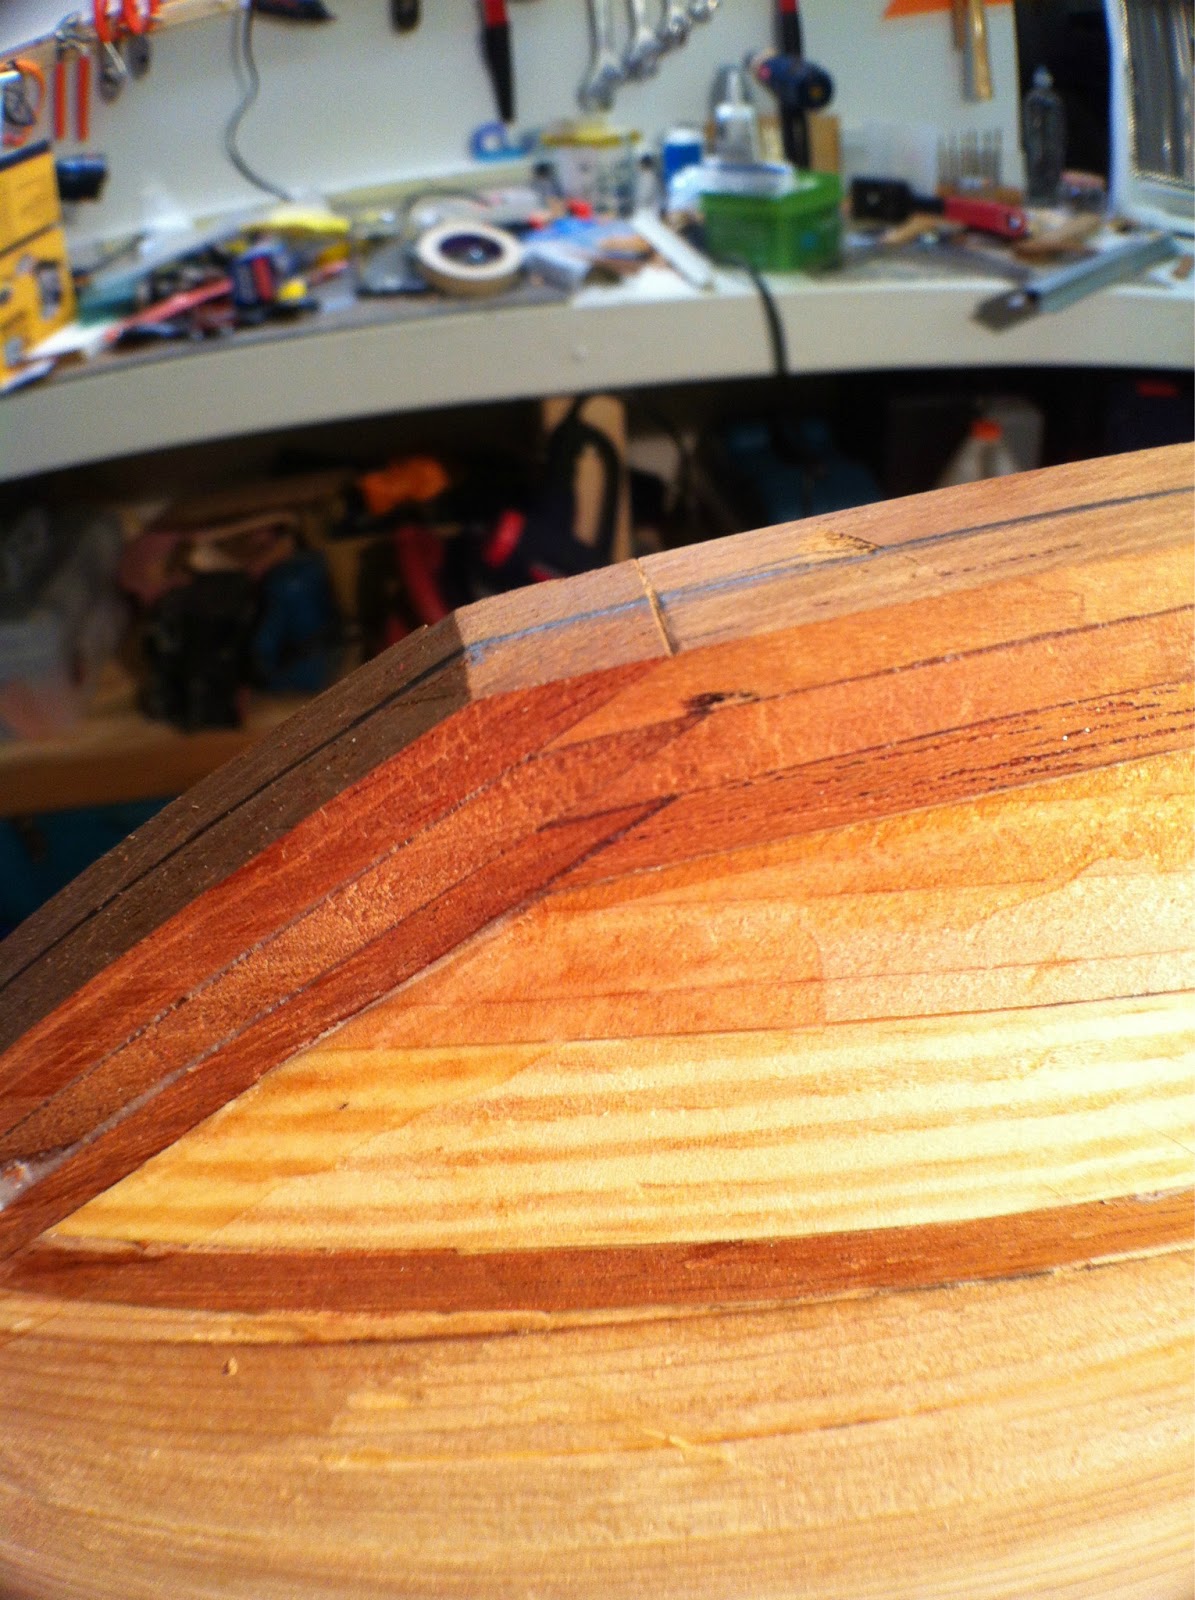
I had thought the deck would be easier than the hull. There is physically less of it. Yet, the strips are really tortured left and right of the cockpit. A tremendous amount of twist here requires using the heat gun to relax the ligaments in the wood. Additionally, there is a rolling bevel that must be shaved here to assure a nice joint. I think I’ve got it, but only later planing and sanding will tell. I’m certain the underside will show some misses. Thankfully that will be hidden.

Here are shots of the steps to fit a strip:

mark the cut

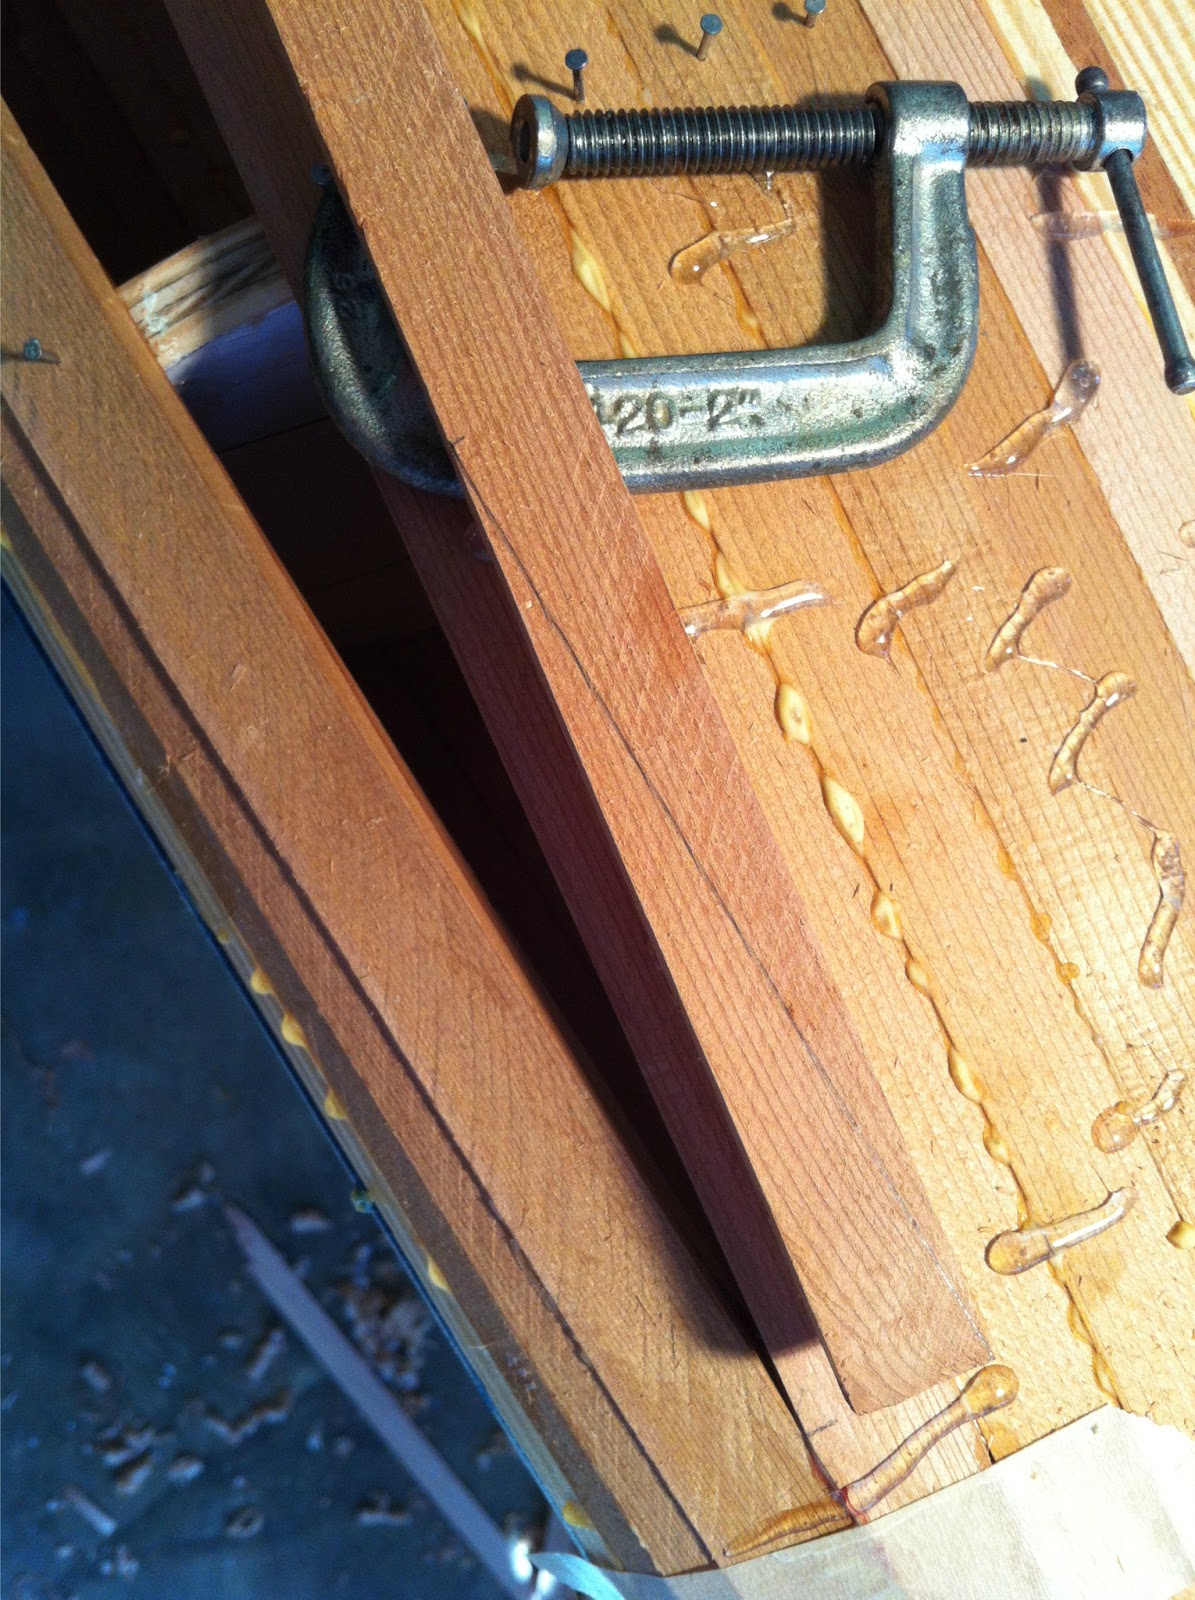
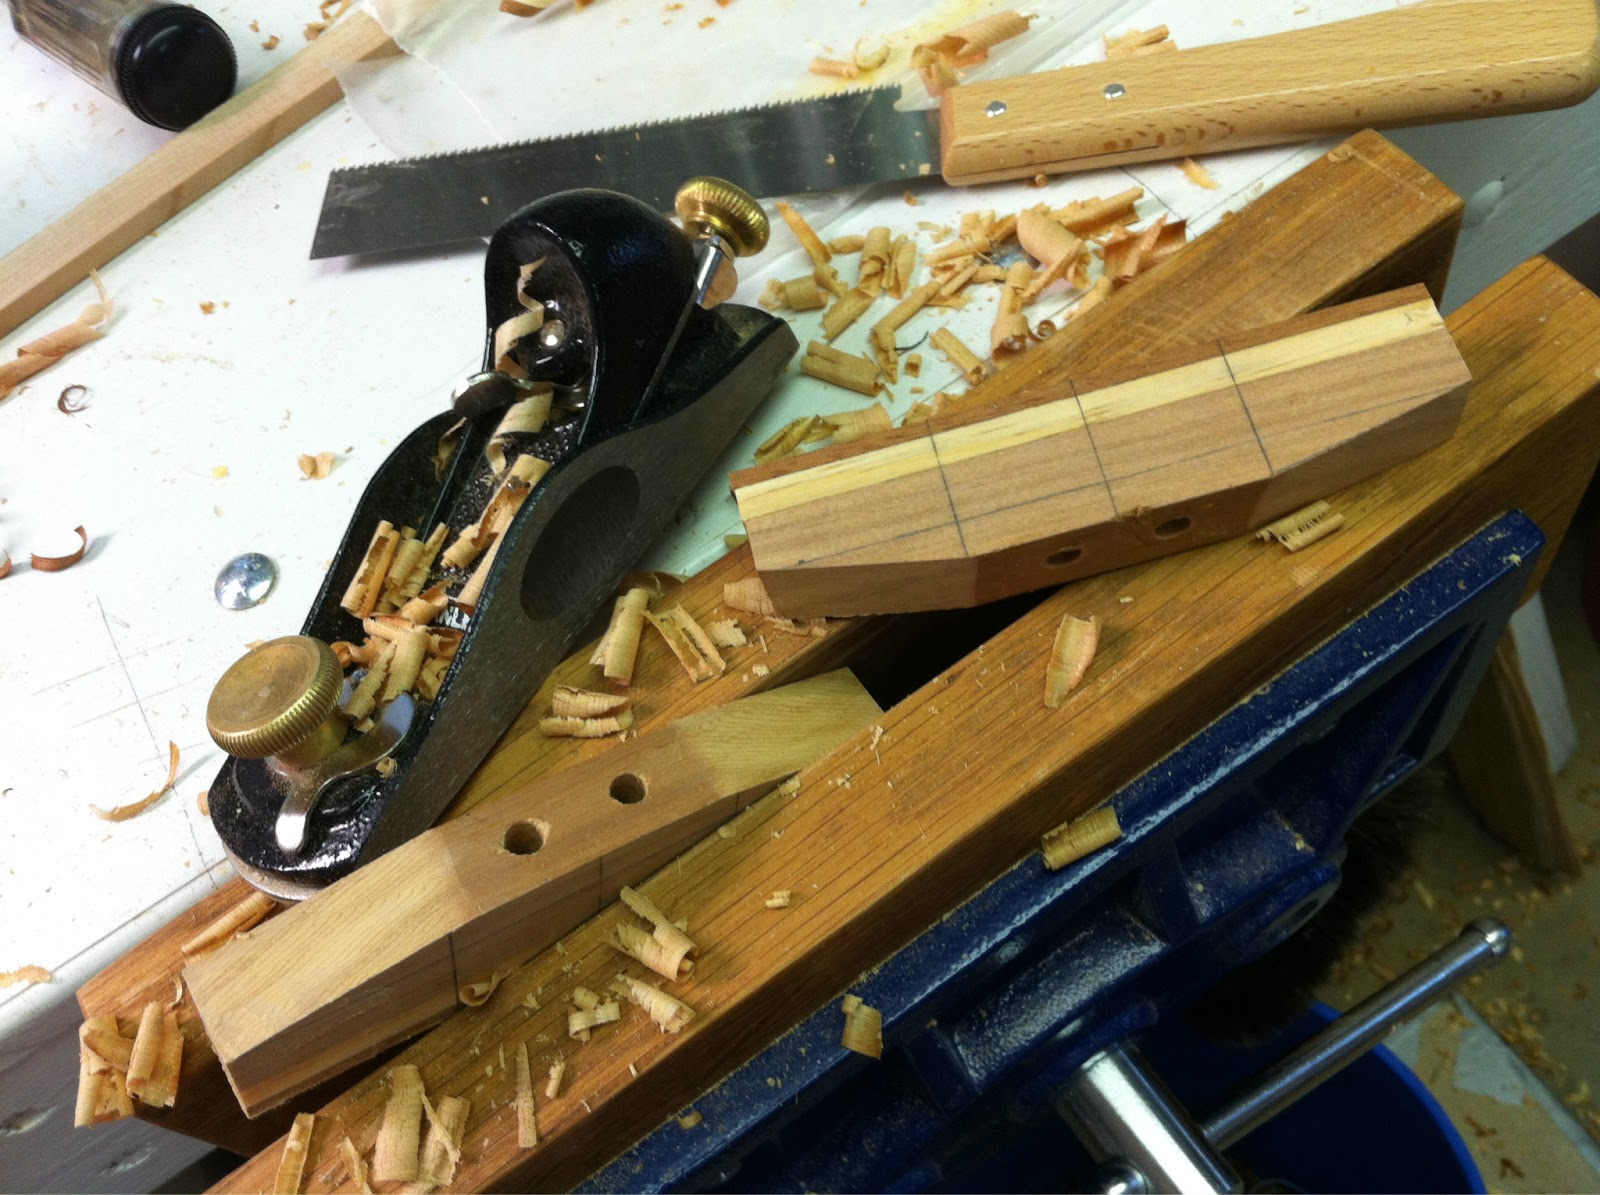
Step 1: lay the new strip in the opening and draw a scribe line from the start of the hole to where the strip exits the lower edge of the hole. If done carefully, you are 95% fitted.

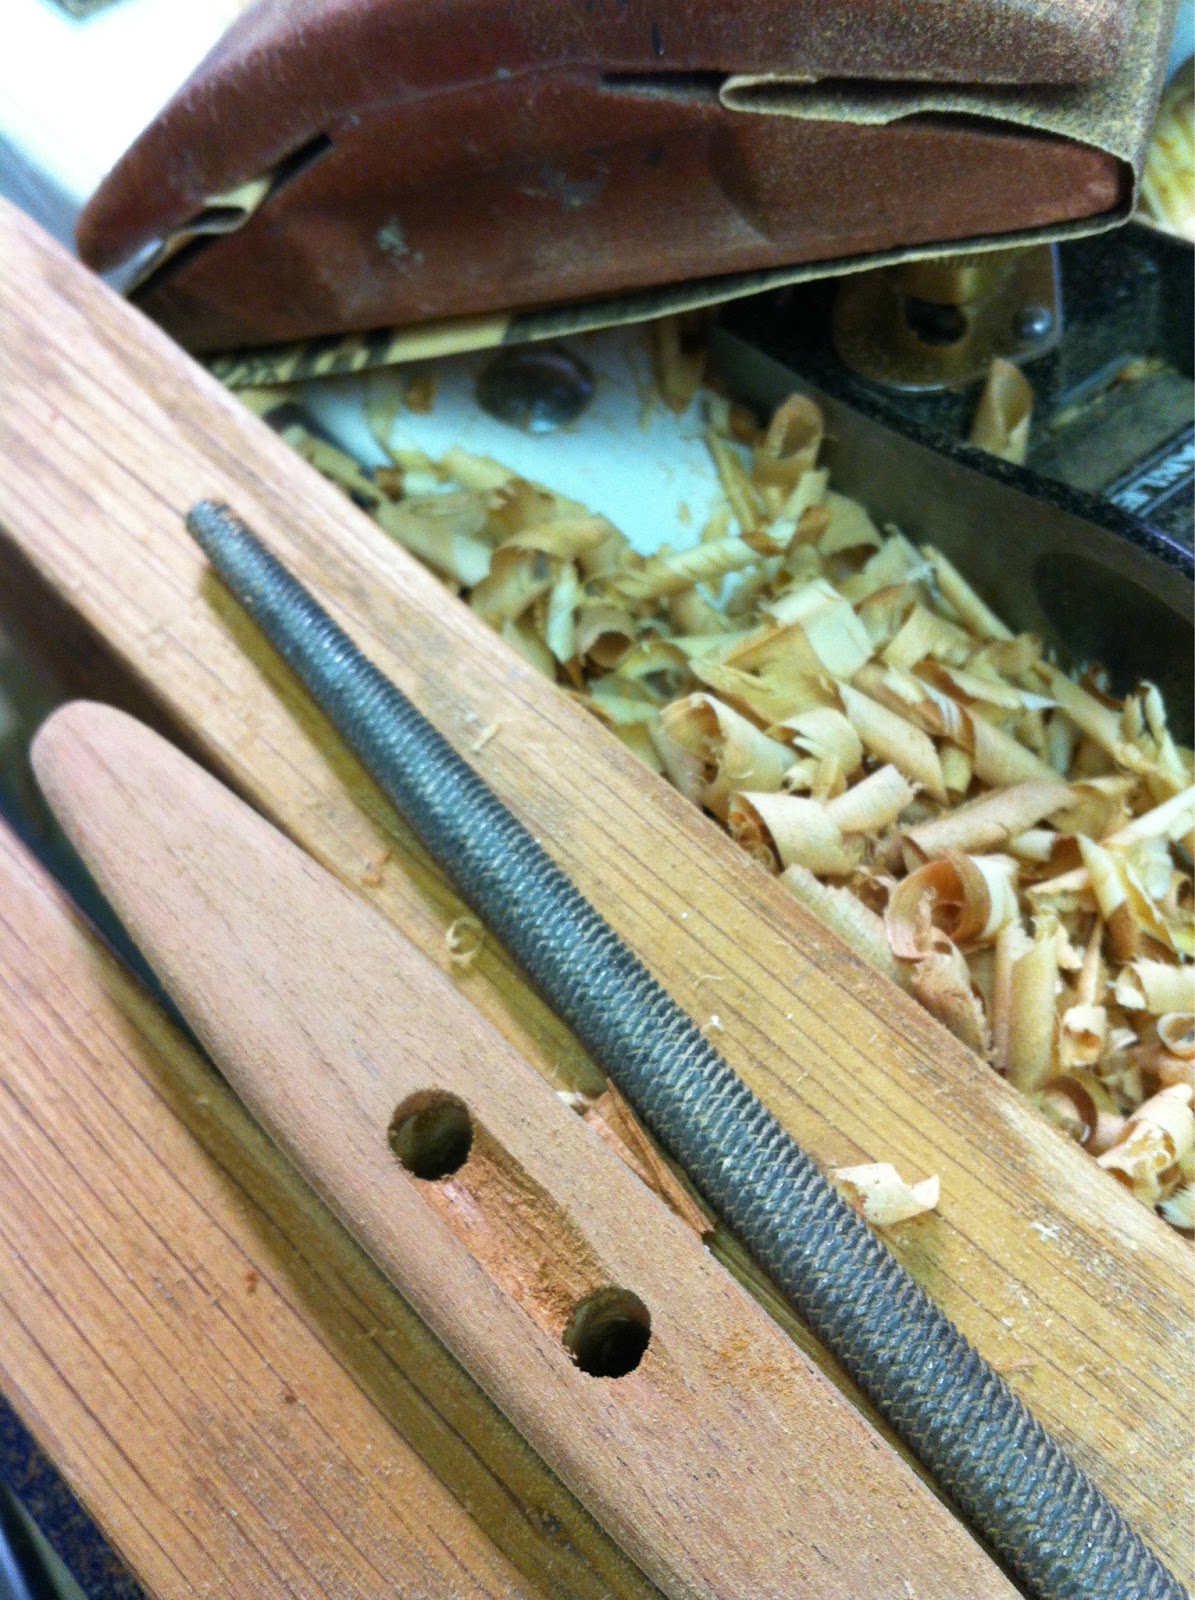
Step 2: whittle close (1/16″ removed) to the line.
A sharp stout knife works best for getting there quick.

whittle to line

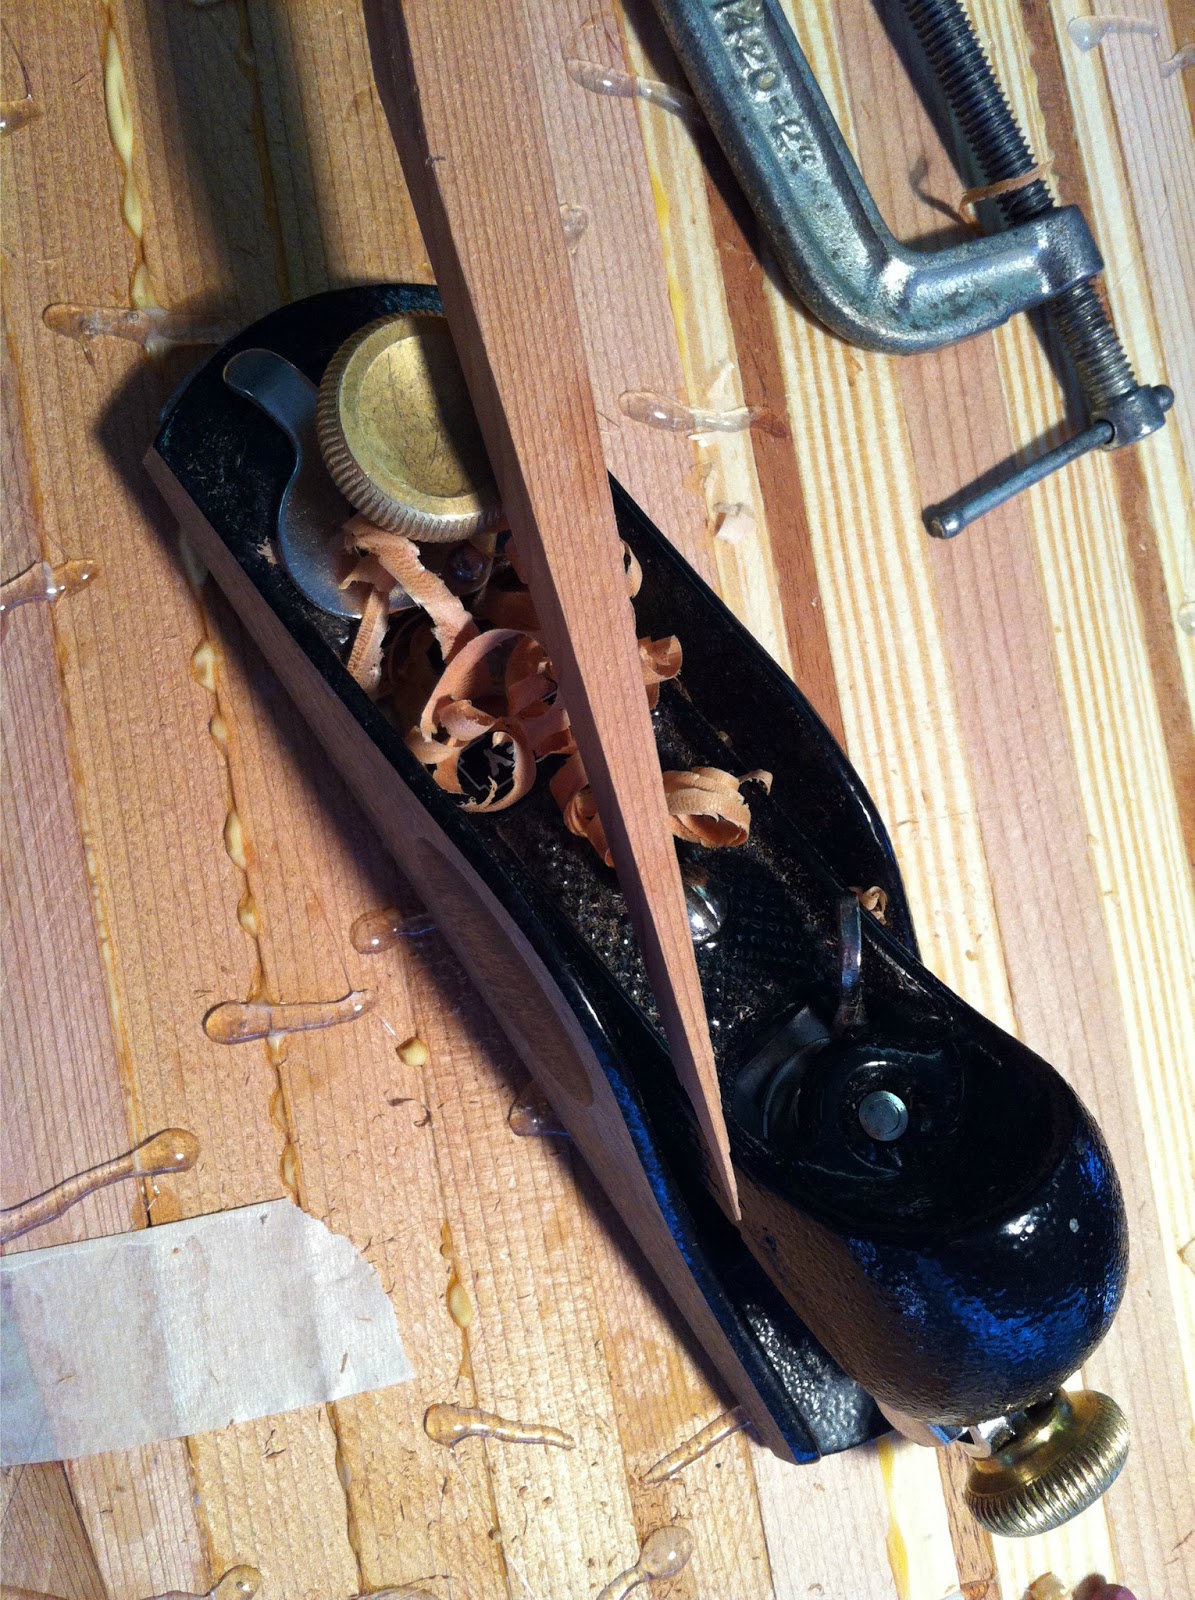
Step 3: hand plane to line.
Depending on the strip, a bevel may be needed.
Occasionally a slight sanding may be needed for the final touches.
Test fit several times to confirm a tight fit.

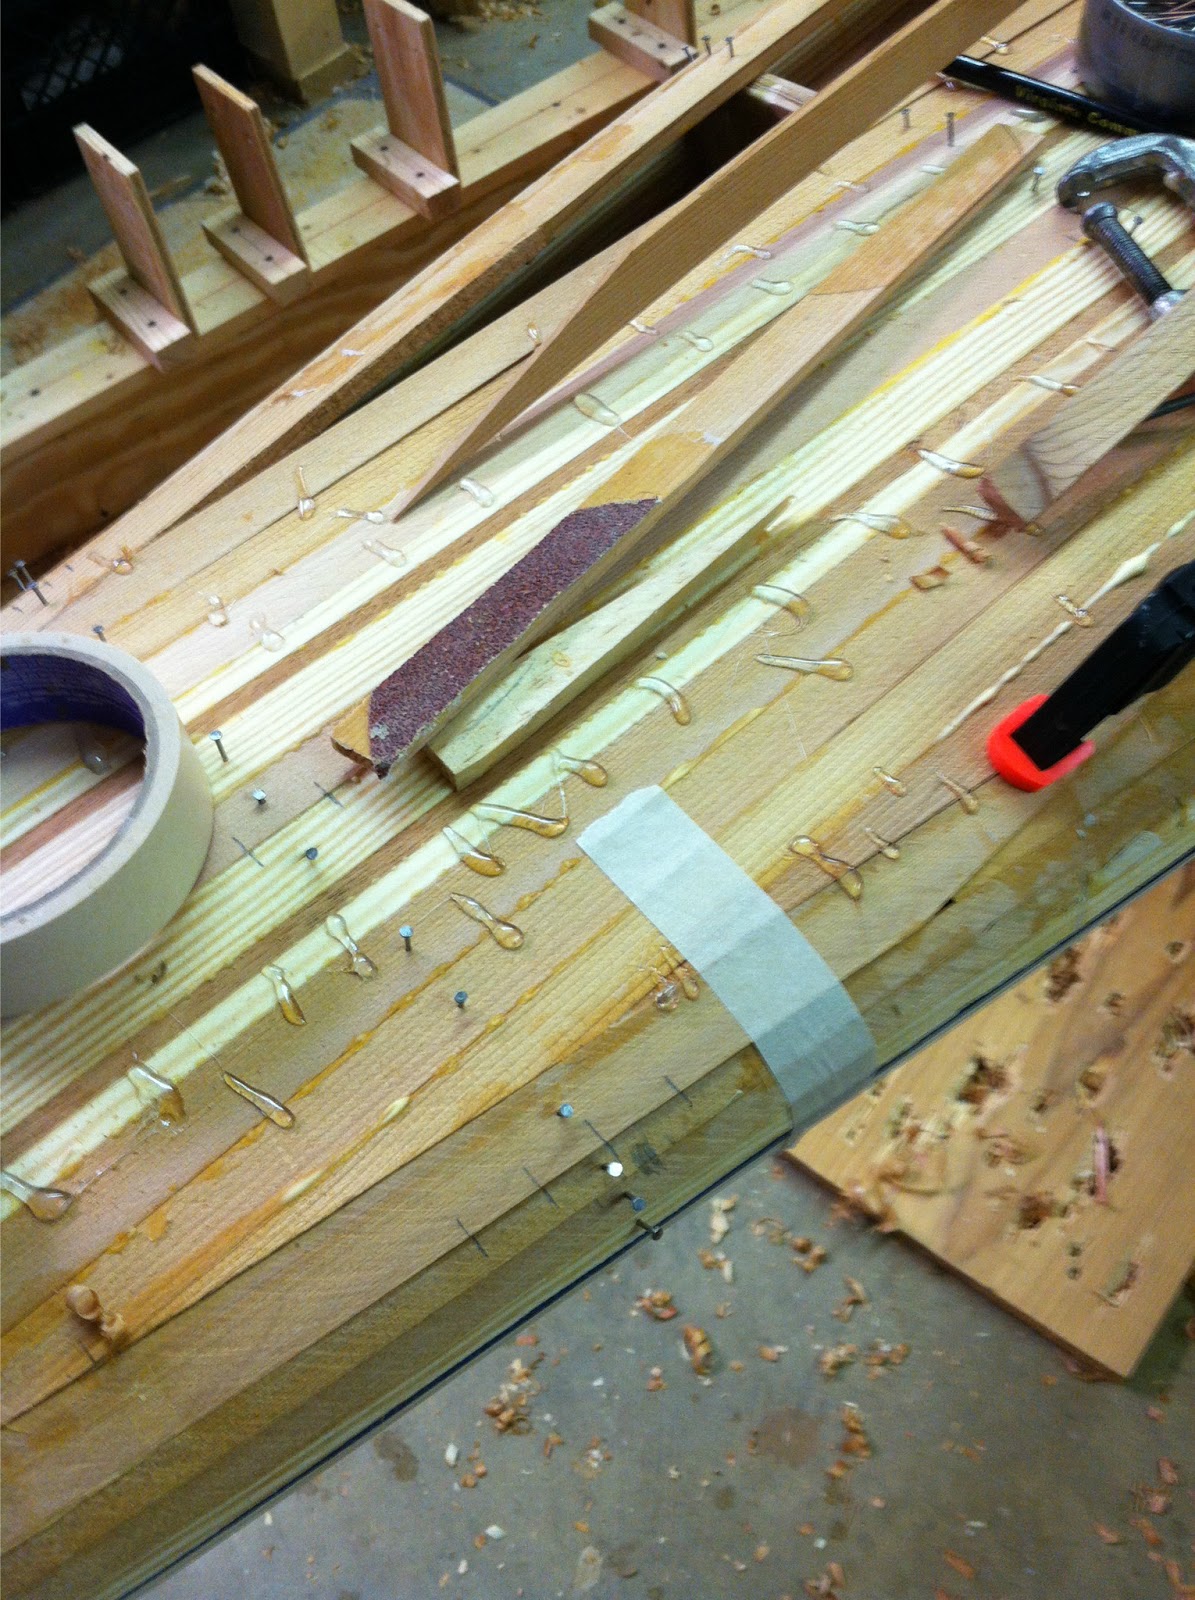
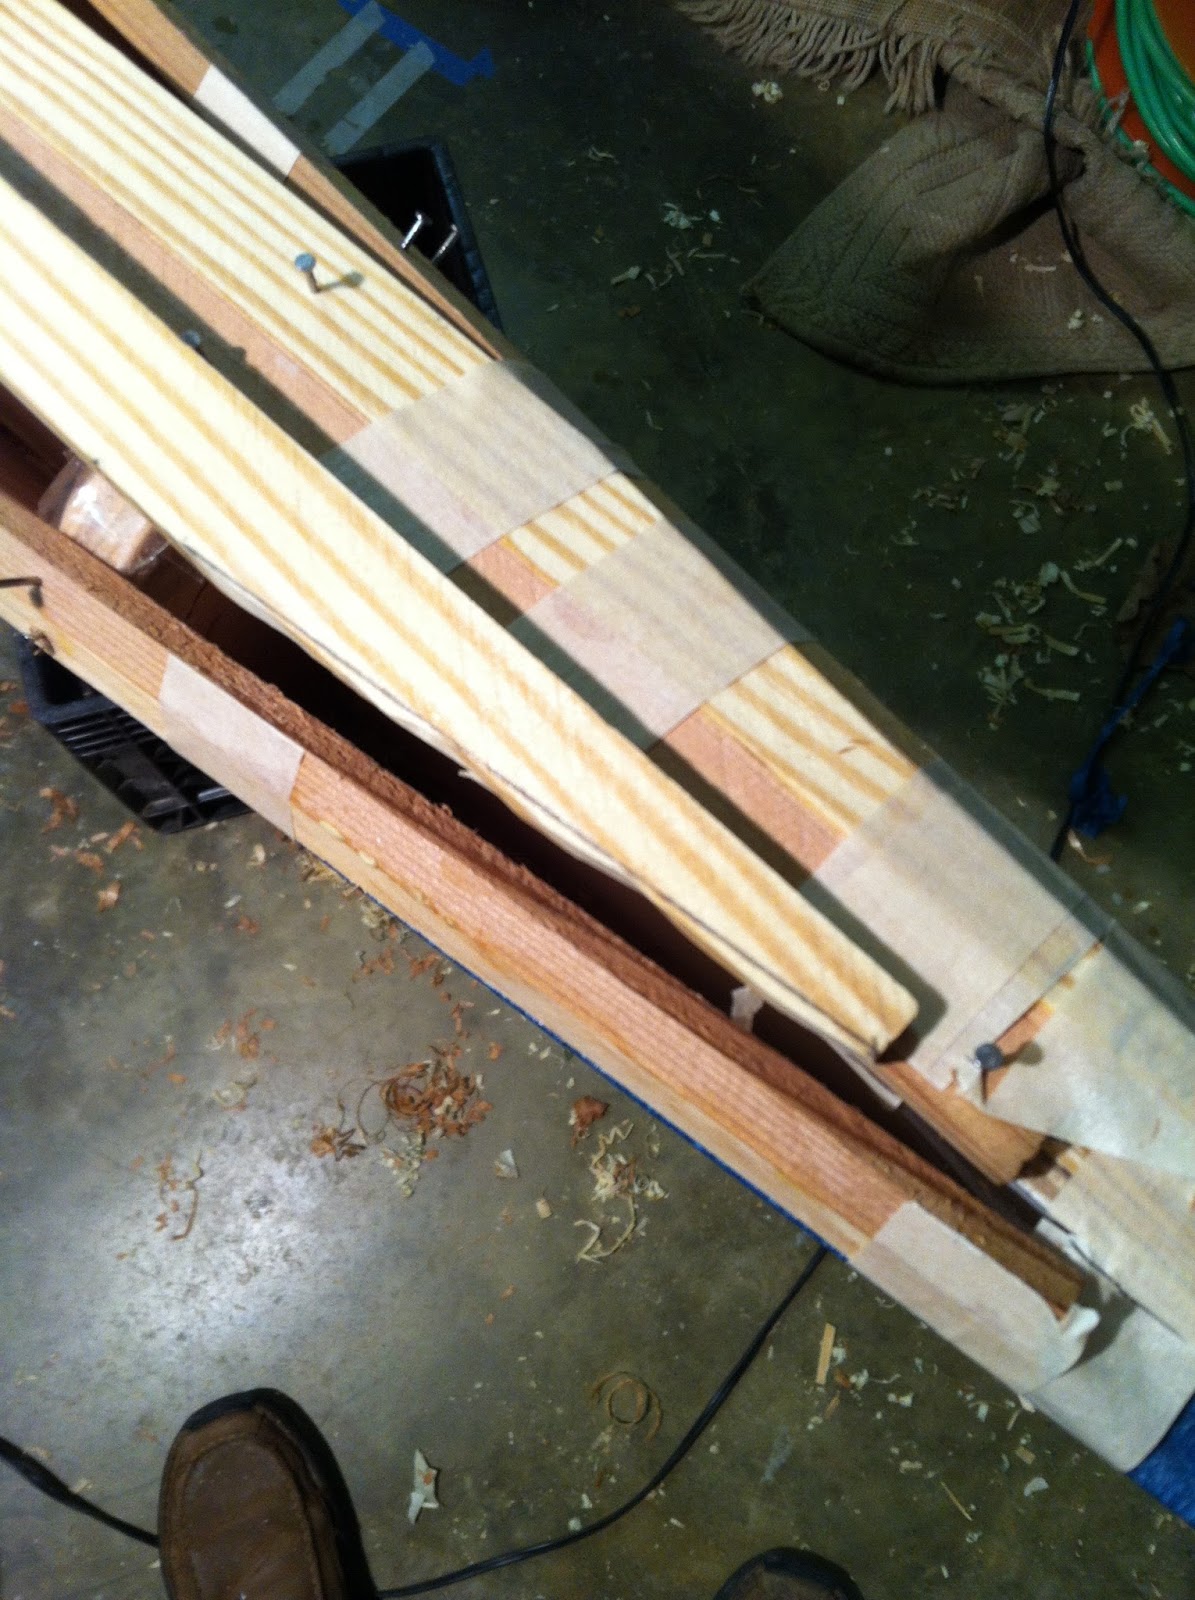
I’ll cast in the remaining pics for proof of work. Not much to add. I was getting short on full strips and scarfed several together. The ragged opening in the center will be the cockpit cut out so craftsmanship here went out the window. None required, unless you think the attitude reflects on the rest. So be it.

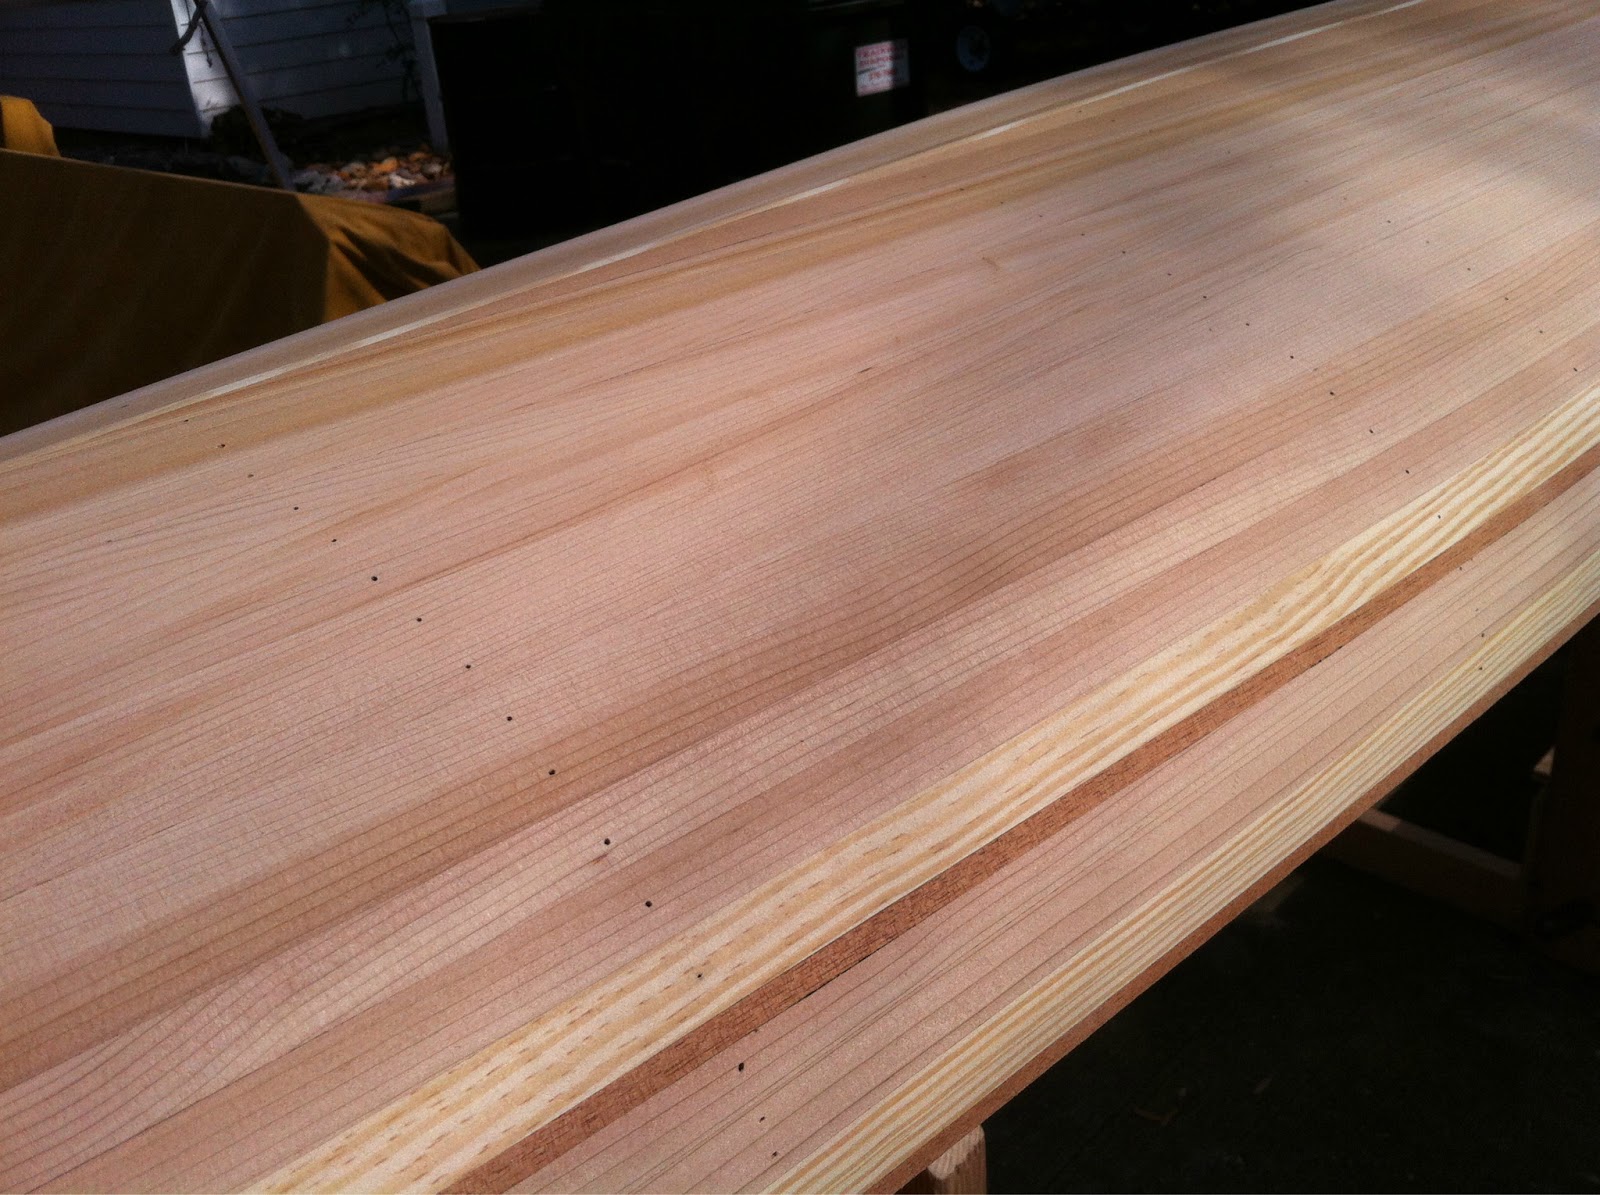
Those slant eyed holes became increasingly difficult to fir strips. Aside from the twist at the cockpit, the tapered ends grow longer. Again, sanding will tell.


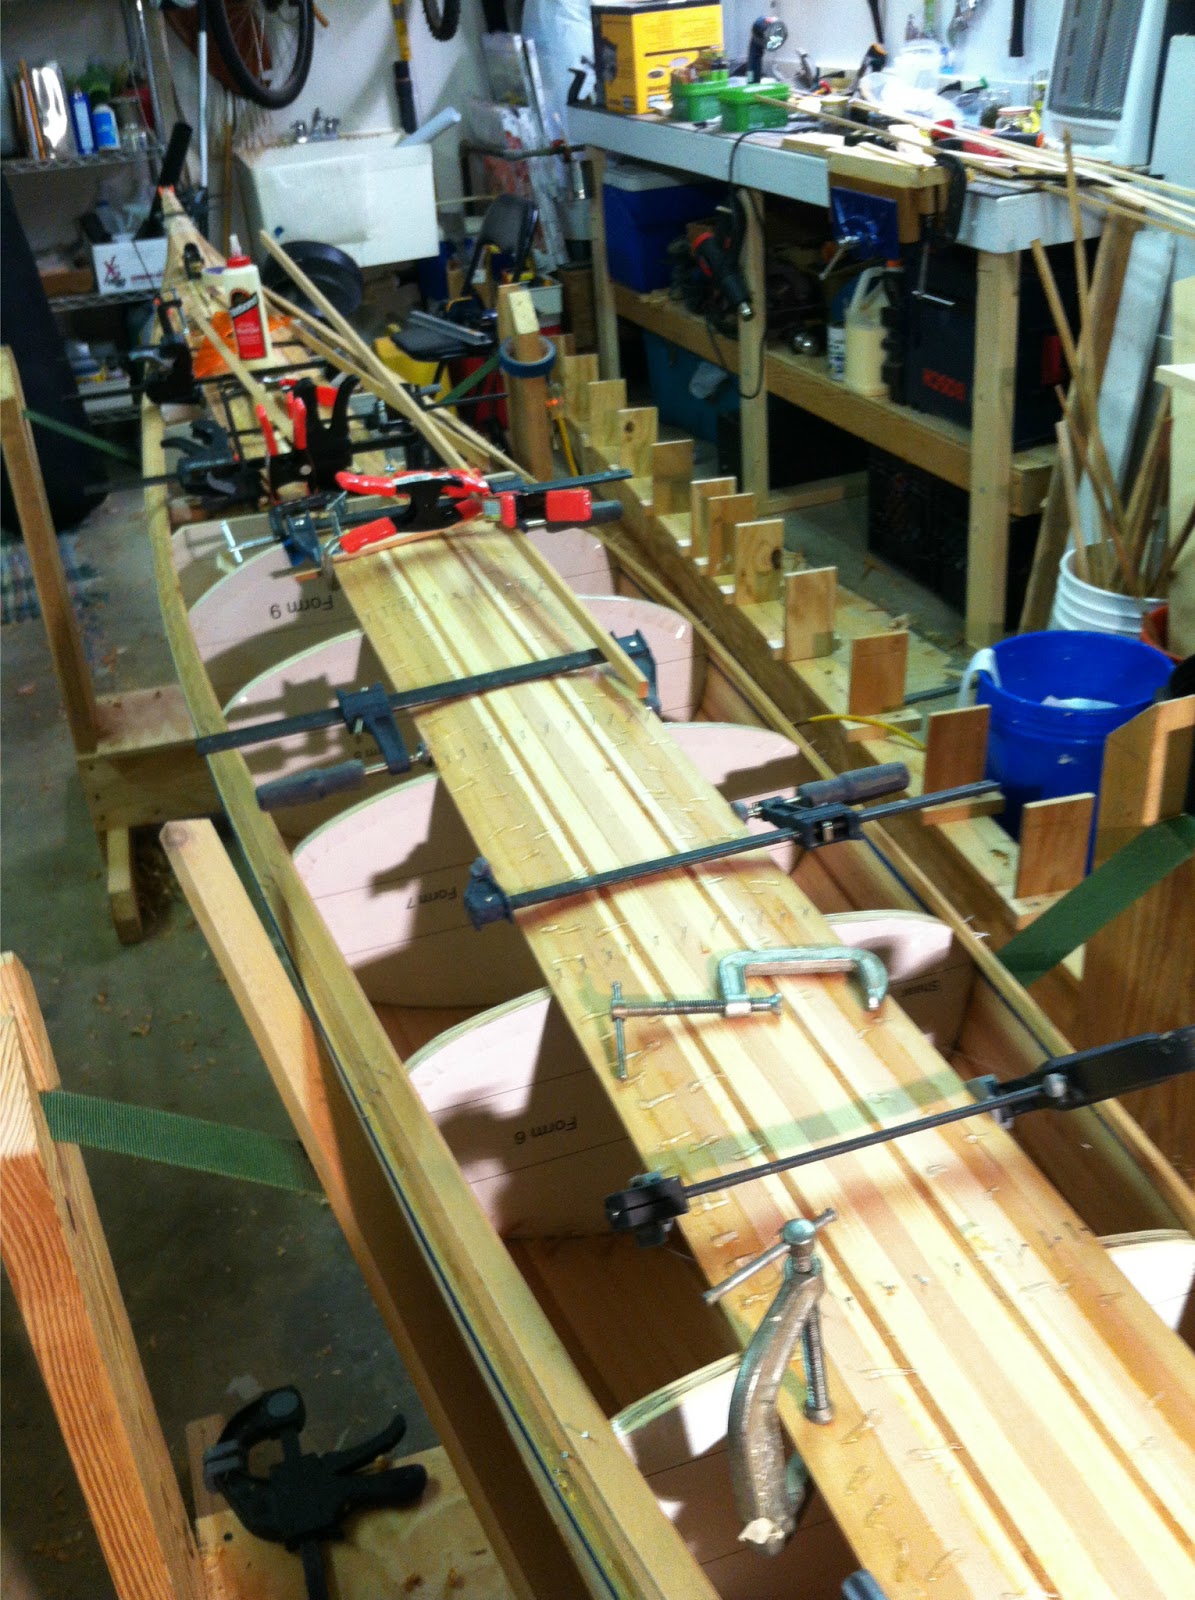
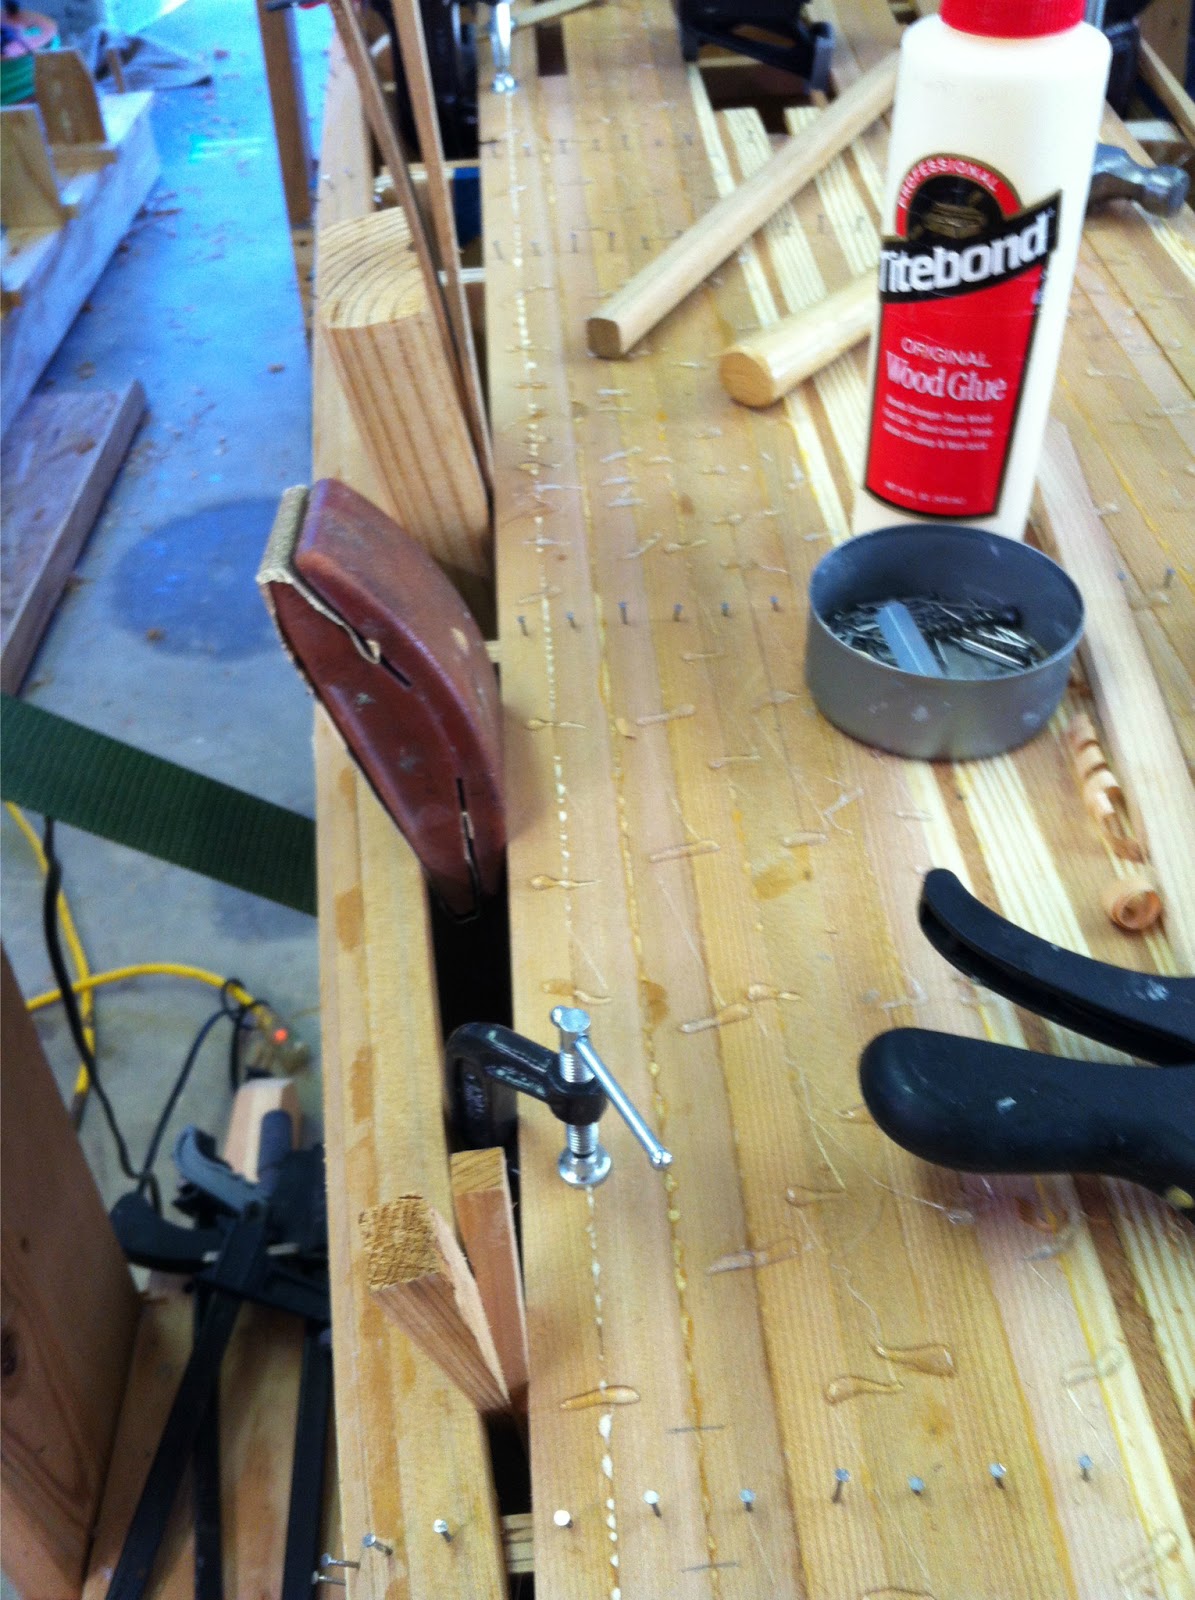
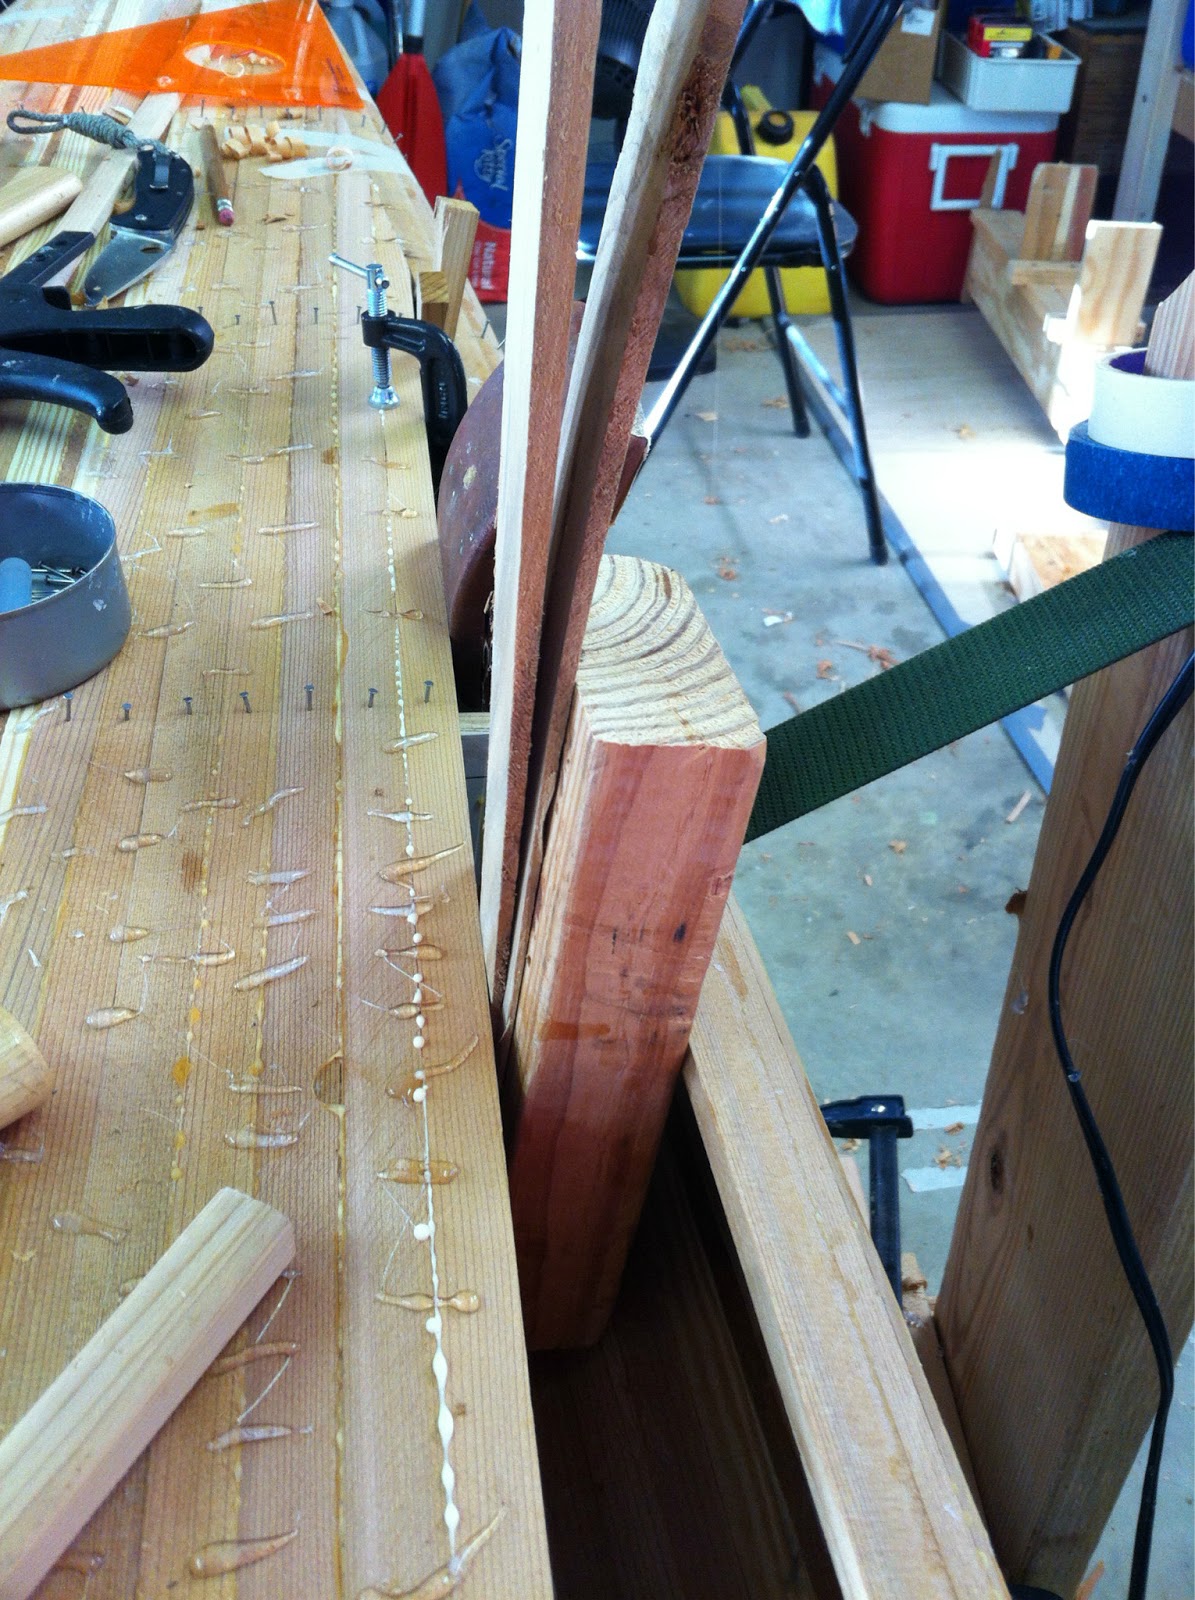
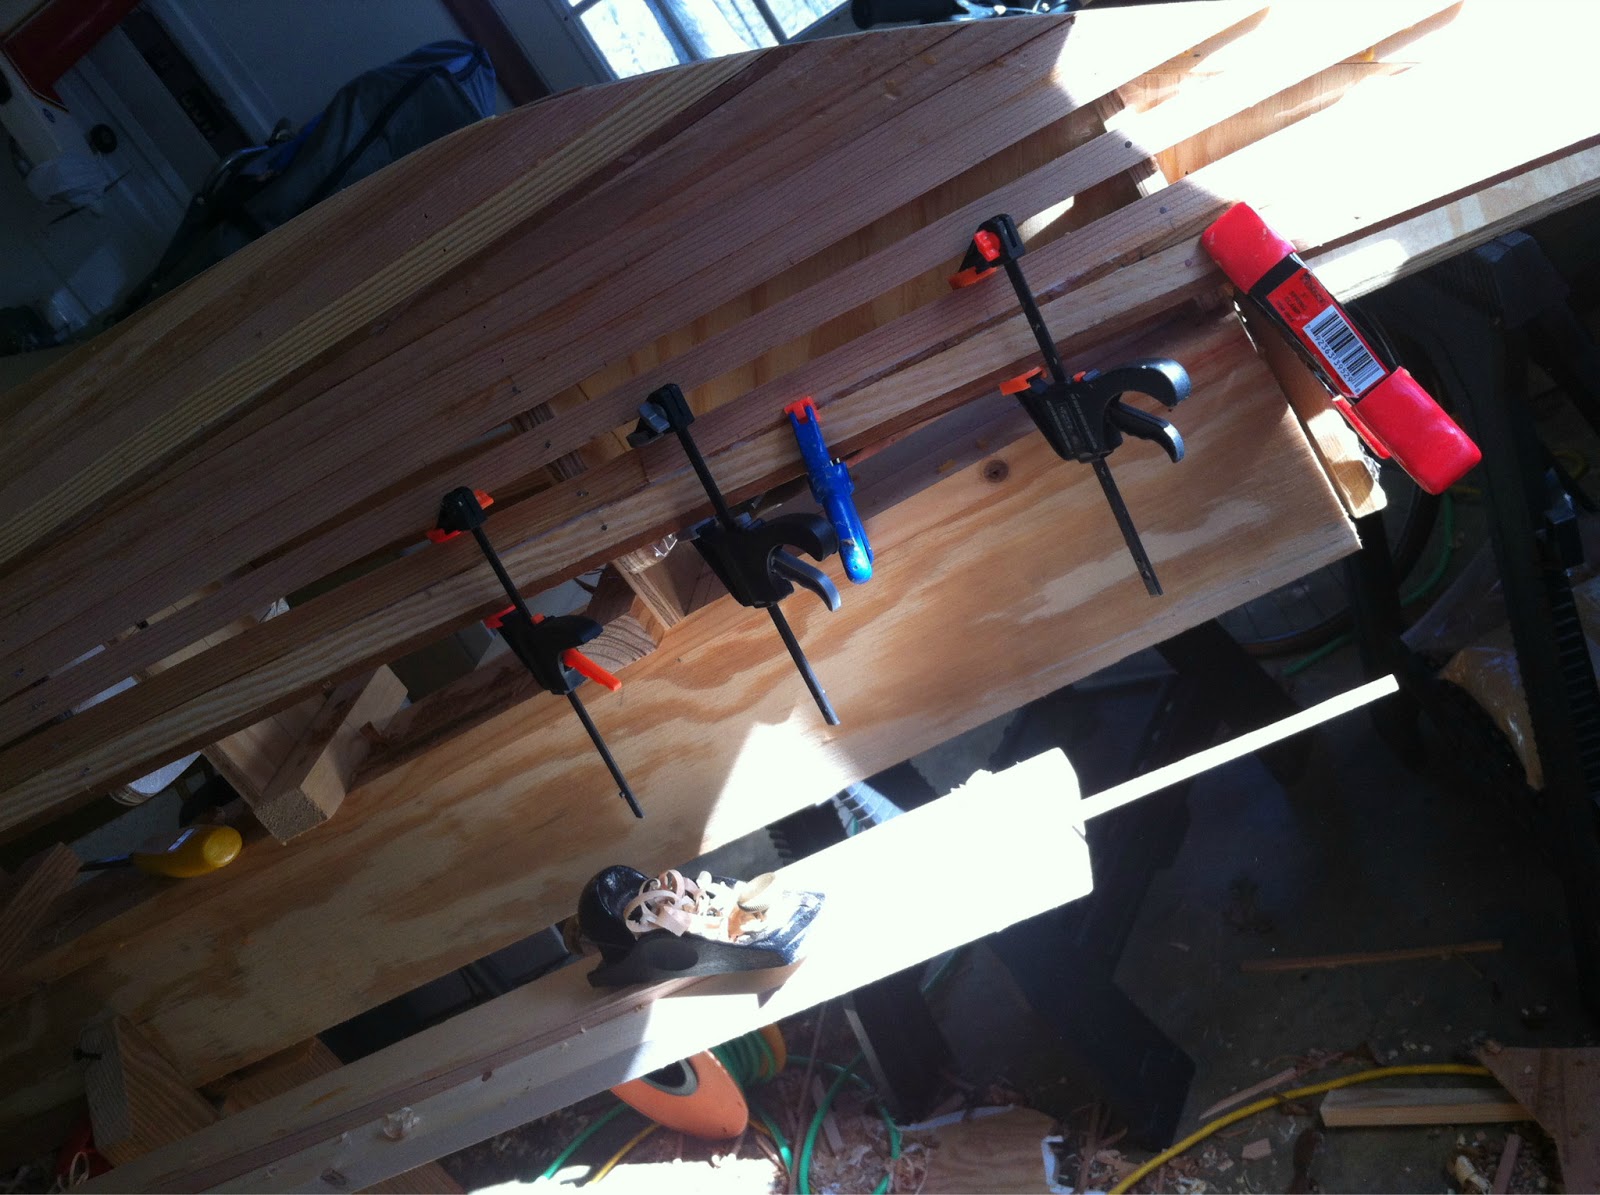
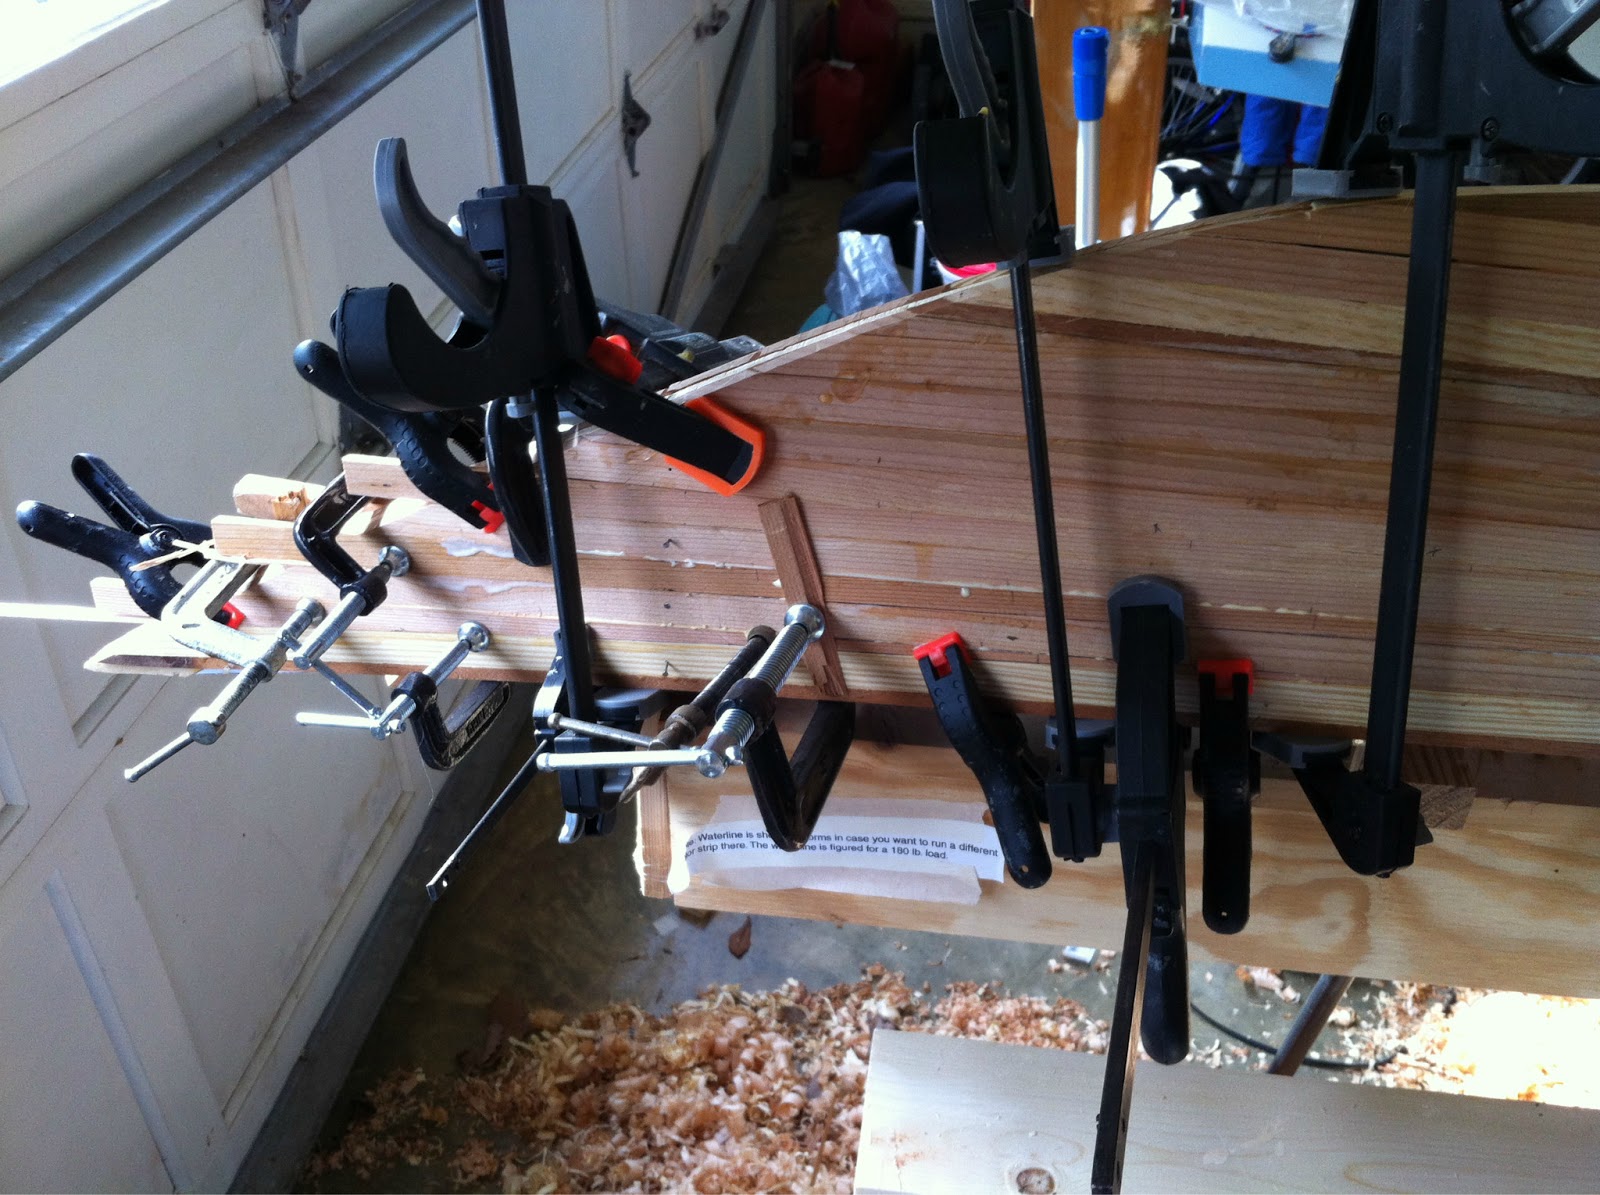
Eventually my bar clamps didn’t reach and masking tape wasn’t adequate. Thus, various and sundry “wedges” were employed.


Blogger is really protesting today. Photo organization and captioning isn’t working. I’ll have to try again later.

Taming of the Sheer

I’ve now 92 hours in actual building time here. Surprisingly, the rewards have far outweighed the struggles. I had suspected more drudgery to this. Honestly the worst part has been the sawhorse veiling and unveiling. That shouldn’t even be an issue with a larger space. So, I’m pleased. One of the benefits of building your own is the ability to customize the vessel to your tastes and wishes. Some are intended. Others are serendipitous. This goes beyond the boat’s shape, though some may play with that. I haven’t (at least not intentionally). The manual accompanying the plans is quite complete. However, I’ve studied the process enough to consider  a few changes on my terms. Some are in detail. Some in technique. Neither is necessarily better or worse, but perhaps more justly a chance to experiment. No 2 boats are alike primarily due to the nature of wood (no 2 trees are the same) and secondarily due to the fabricator.  I feel I’ve profited from a few accidents so far, but mostly this has all been a learning process. It’s nice to master some tools and techniques, at least on a competent basis.

Got the initial shear strips on at 1/2 width and have toyed with a racing stripe down the center line. I dug through my wood pile and located some mahogany scraps I can ripped to accent the stripe. Some scarfing will be required, but the tight grain makes it all but invisible. Look past all the clamps for a view of last night’s cobbling …

Racing stripe


1/2 width shear strips. blue tape prevents deck to hull gluing.

How Blogger arranges these photos I can’t figure. the post rarely reflects the draft.  this last pic shows mostly tape, but also a strip after cut by pocket knife to approximate bevel after which hand planing gets it true and then, …  lots of tape. the stems have such an upward sweep that the strips have yet to stay put. I hope additional adjoining strips will force compliance.

Bow with a roll of masking tape!

Hit the Deck

In my opinion the worst part of any job is the cleanup. There is no exception, even in a labor of love. To make a simple rip cut requires much disassembly of my table saw’s “homeless shelter”. I now have 2 tarps and a portable tent guarding my saw from the elements. While the temperature and humidity are relatively the same in the shed, the rain and snow we’ve had do compromise the saw. I now hear “rust” when it rains. The shed is too short for kayak lumber. I’ve considered putting a window in the end opposite the door to accommodate long boards. Hopefully we can put the table saw back in her home in a week. I hope to have all the strips for the deck in place soon. having to uncover and then cover with each use has been an excuse not to work.

Nonetheless, the robes came off the saw yesterday and the decking began. It feels good to be moving on the project again. I elected to forgo glassing now, glue the forms back on the hull, unscrew it from the strongback, and cradle it all between slings nailed to the sawhorses.

You can see the sweet flow of the deck now.

boat in slings.


“Schmutz” patches on the bow.

I had some concern that I had a couple flat places in the hull along the shear where the strips were pulled too tightly, primarily just aft of the cockpit. Thankfully, those seem to have smoothed themselves out once the hull was released from the forms. However, I had hot melted the hull back on all but the stem forms and apparently missed the keel alignment by 1/8″. So, I broke the middle 6-8 forms out and repositioned. This also gave me the opportunity to  examine the joints in the strips on the interior. With a few exceptions in the bow and stern which need some of what Nick Schade calls “dookie schmutz”, they all looked pretty good. I’ll list his book(s) and other resources at some point. aside from the wondrous online knowledge, there are some very well illustrated expert sources. Nick also has a number of YouTube videos that are instructive too.

Not pictured are the few strips I’ve added to the deck. the shear is a real tight bend and I ripped the typical 3/4″ strip in half with a bevelled cut for 2 usable strips. This is likely the toughest part of the boat as these shear strips twist quite a bit fore and aft requiring patient hand planing for a proper snug fit to the hull and each other. Now that I have some of the technique down it is fun.

Lastly, I had considered making 3 cradles to support the hull back in the strongback as the height in the slings is back breaking, but a chair is working for now. Once sanding is needed, I think I’ll resort to forms. We’ll see. It may be a diversion at some point and simple to set up.

Over & out-

Dust and Illusions

Finally the stars aligned, the rain stopped, and I had time to sand. To my surprise it was not so painful. After almost 2 hours I can’t say it was enjoyable, but it was rewarding. The boat is looking great. The Makita ROS does relatively quick work of the task. 1st sanding used 60 grit disks. The technique is to keep the sander moving over the hull in 6-8″ circular motions. I won’t belabor the issue, but moving in a line will only reinforce any flat areas left by the planer. There is a good sanding descriptive on Laughing Loon’s Shop Tips. So, here are some pics showing the hull both sanded and wetted out (with water). The kayak really starts to show its color.

Hull on gangrenous deck.
wet
inner stem prior to inside sanding. I’ll add an epoxy fillet.
sanded close up
wet close up. Nail holes look fine.
port bow


Illusions of the final color. Wet port bow.


Well, we are getting somewhere now. Progress is measurable. A final sanding with 120 grit will be done after she dries. The temperatures are not likely to reach 70 degrees any time soon, so I’ll have to devise some sort of tent over the hull once back in the garage. Space heaters under the hull will hopefully get the temp to epoxy range. I’d like to glass the hull prior to building the deck.

Toggles and the Blue Ridge

Not much to report on I’m afraid. We took last weekend off to enjoy a trip to the mountains. Here are a few photos to get the idea of the place.

Before the afternoon snow.
Very effective fireplace. Oak left hardly any ash.
Old cabin window


Old porch.


Marriage of old & new cabins. Well done.

Kept the fireplace going non-stop. Did some target practice. Ate too much and had a morning hike (too short to offset the good food).

House chores have slowed progress this weekend. I did manage to carve out a pair of toggles for lifting the boat bow & stern. I had laminated scraps from the build thus far with carpenters glue.

Toggles blocked out for planing.

Laminations are of Mahogany, Yellow Pine and western Red Cedar. Holes were drilled on the press prior to any shaping. I’ve become a great fan of planes. They make quick work, no dust and eliminate sanding for the most part.

Filed recess for the line.

After a slot was chiseled, the round file got us close for a slight recess. Sandpaper wrapped around the file did the rest.

Shaped and ready for varnish.

These are no great design, but are an evolution from the 2 previous sets I did for the SOF yaks. Simple, handy, and functional.

with 2 coats of varnish

These will be the colors in the kayak. Used Petit’s Z-Spar gloss varnish. I don’t know if it is still true, but I’ve always thought gloss is harder than satin. I’ll let this 2nd coat harden and put a final coat on later.
Otherwise, I hope to try some epoxy & glass on the 2 bulkheads I glued up previously. the temps are not likely to be warm enough for glassing the hull anytime soon. I may consider making some sort of plastic tent over the boat to trap heat from an oil filled radiator heater. I want to get on with this project. Spring and sailing is coming!

PS: yes that is apencil line across one toggle. I don’t mind a bit of the hand left in the construction. Like the nail holes, I see it as “character”. I’m not looking to have a piece of furniture though I’m sure that 1st scratch will hurt.

A Start …

You can’t blame everything on your parents, but this one thing I am certain I can: my love of “messing about in boats”. Early memories evoke summer evenings at age 3 or 4 lying in the bottom of a small sloop as she slid across the Lafayette River. The warm sea air, the sparkling reflection s of shore lights, and perhaps most infectious, the hypnotic movement of a vessel on the water. This all conspired to lure me in.


Fast forward many years and countless such evenings, I now find myself these recent evenings in a cluttered garage 100 miles from the ocean. The purpose? To dream childhood memories and build a boat. Not just any boat (certainly not an Ark), but one of the 3 boats this “sailor” has concluded fit his boating needs. They are an 18′ touring kayak called an Outer-Island, a small 14′ sailing skiff named the Melonseed, and 25′ keelboat known as the Nordic Folkboat. I’ve no illusions of building the latter and have whiled away hours staring at the skiff. However, I have finally put strips to forms for my kayak.


How long will it take? A guess would only be that. Others have approximated 300-400 hours. that alone intimidates. Where does it come from? Do you include the unrecorded hours of investigation, correspondence, gathering of tools and materials, and the dreaming? Surely not, but nonetheless, I have begun to record the actual build time. It all makes no sense … unless you are a romantic, and I was hooked as a baby boy.


So, enough of the “why”. I don’t have an answer, don’t want to be a writer (much less a poet), but I do desire to record my progress and process in hopes that it will force a finish and paddle up some river or across a small bay. I too feel some indebtedness to the many folks who educated me regarding this build and to those who’ve kept me from drowning early on.


30 hours. That’s actual cobbling pieces together for you accountants (who aren’t likely to be so touched as to build a boat). I’m nuts and am going to do this contrary to notions of being reasonable. After all the studying, the learning begins. And so, as I continue to figure things out, … this … is … a start.

Reason for a Toast

This evening I spent about an hour shaping the outer bow stem. I had hoped to have done so yesterday prior to the Superbowl, but the epoxy between the laminations was not setting. Oddly enough it wasn’t until I took this shot tonight that I realized … I HAVE A BOAT! So, with a little help I popped the hull off the forms. Nothing cracked. She weighs 18 lbs 8 oz. This is prior to any scraping of the interior or sanding at all. I expect to lose a few pounds still (from the boat that is).

I am absolutely thrilled. This is cause for celebration. The last pic speaks for itself. Cheers!

Starboard bow


Interior looking aft
Port stern quarter


Port bow. A beauty.


It’s a  Blue Moon!


Fairing, Stems & Promise

Bulkhead #11

It is good to have different parts of the boat to work on as a diversion. The making of the selected bulkheads was quick and simple. Over waxed paper that protected a full scale form outline the varying strips were glued, clamped, and held with hot melt. While that sets another strip is cut and edge glued. Repeat until form outline is covered. Finally the clamps are removed and the whole is weighted on a flat surface for carpenters glue to cure.

Bulkheads 6 & 11 trimmed & scraped.


Bow with top cheater strip glued & clamped.

Once cured the hot melt is scraped off and the entire surface is planed smooth. Then the paper form is spray mounted to the bulkhead, trimmed close with a hand saw and finally hand planed to the paper outline. Yesterday I ordered 3 gallons of epoxy (Raka’s UV Inhibited). It claims to be ” second to none in its ability to resist blushing, UV breakdown, color change< white clouding and water spotting”. We will see. ” Also purchased was 32 yards of 4oz cloth and 50 yds of 2″ tape. While 2 gallons should be adequate, I did not want to be caught short … and at a 2:1 ratio of epoxy to hardener, smaller quantities were almost the same price (surprise).

These 2 bulkheads will serve as practice for glassing. Some use foam instead of hard
bulkheads. The theory being that a hard landing on a rock will be more forgiving as opposed to a potential shear point with a hard bulkhead. More people tend to use hard bulkheads and I do not intend to go white water kayaking in this touring boat.

Sometimes 1 clamp won’t do.  Last cheater in!


Added the 6 cheater strips to the bow. I now have the technique down. The 1st one on the stern took over 2 hrs and was poor at best. The last here took maybe 20 minutes and filled the taper quite well. The trick? Cut a strip a couple inches longer than the wedge to be filled. Make sure the grain is smooth and runs across and away from the pointy end. This eliminates the chance of cracking off part of the cheater (guess how I know. Twice!) Since the wedge is curved in reality you must take a half dozen measurements of the gap at roughly 3-4″ intervals and make them on the trim piece. Use a wood batten to connect these dots. Grab your sharp sturdy pocket knife to trim close to the line and finish with the plane. Test fit and plane some more. I left a slight bevel toward the inside of the hull. I think this allowed for some error in a spot no one is likely to ever see. Ah! one more thing: having a smooth board nearby and a chair to sit in as you address the work area makes all this more pleasant than arduous, well, at least eventually. It is all about learning.

Stern stem laminating.

Now for the outer stems. I chiseled a “chin” off the keel to accept two 1/8″ strips of mahogany and cherry laminations. Why both woods? Because that is what was in my scrap pile in the shed. The heat gun will allow for these strips to bend along the stem easily. Once the stem is planed and sanded square to the keel, thicken some epoxy and slather it on. Masking tape helps hold the strips in position for clamping. You must get good epoxy squeeze out, but don’t clamp so hard as to make the joint dry. Make sure the clamps remain in place. I left the garage for an hour and returned to see a clamp on the ground. This resulted in the joint opening in that one location. Fortunately it is small enough to be filled with dust & epoxy later.

Stem ready for shaping.
Shaped stem with hit of color.

After 3 laminations on the stem, I shaped with a plane while being careful to reference a pencilled center line so as not to remove too much wood. I had to spread a little mineral spirits on the result to get an idea of the final look. Fantastic! even with the nail holes, which again, I think I’ll leave.

Chin detail.

Nice saw joint on the chin. While I hate working with the yellow pine, it does look good here against the mahogany.
On to the bow stem … the lines don’t have this chin, so it should be easier. I’ll post a final pic on that. Now at the 80 hr mark and almost ready to sand. Snowing this morning so we’ll wait for better weather as I want to keep the dust outside.

Wide angle close up

I bought a $5 wide angle & macro lens for my iPhone and have played a little with it. Here is a wide angle shot followed by a macro and then a macro of a mini fish souvenir from sailing in Maine. Lens works well I’d say.

Macro: closer still
Macro: glass fish. 1/4″ tall.


Bulkheads

Outer Island lines: low res

As the hull structure is near complete, I decided to find tasks to do while I wait for epoxy & glass to arrive. I’ll build the bulkheads with scrap strips from cut offs. These too will be glassed. To make things easy I will use forms at position 6 and 11 for templates. This will allow some leg stretching and small cockpit storage behind the seat. I’ve looked also at a simple “racing” stripe to adorn the deck. Deck hatches will be flush and circles as opposed to ovals or ready-made rubber hatches. Lastly, I may mock up the cockpit as it is a wee bit smaller than those on my SOF yaks.

Bukhead #11 glued up.

I set wax paper over a full scale print of the form, cut strips to appropriate length glued, clamped, hot melted, and repeated. Went quickly, 30 mins? After the last strip I removed the clamps and set some heavy weights on bulkhead as the carpenters glue set overnight.