Sunsets or 30 Knot Winds

Had a short, but wonderful cruise this past weekend. Sadly, most likely listened to NOAA’s “chance of showers and thunderstorms” warnings and stayed away. This is the final line to just about every single report on the Chesapeake Bay during the summer months. Had we accepted the “prediction” we would have missed this wonderful sunset over Sarah Creek off the York River. Instead we nearly had the place to ourselves.

It was fresh sailing all weekend. We did some fishing, had enjoyable swims, ate too well, and gazed at a near full moon.


Of course there is sailing, and then there is broad reaching in 25+ knots apparent sustained. Gusts hit 30+. Couldn’t resist posting a video from a 10 day trip taken back in May. Here we made a personal, and perhaps boat best, of 70 nautical miles in 10 hrs with a 7 kt average. The 1st 2 hrs were spent bashing our heads against the gale force winds out of the Miles River, but once we turned into Eastern Bay and out into the Chesapeake … we rolled! Saw 9 knots regularly (turn down the sound). We flat out boogied.

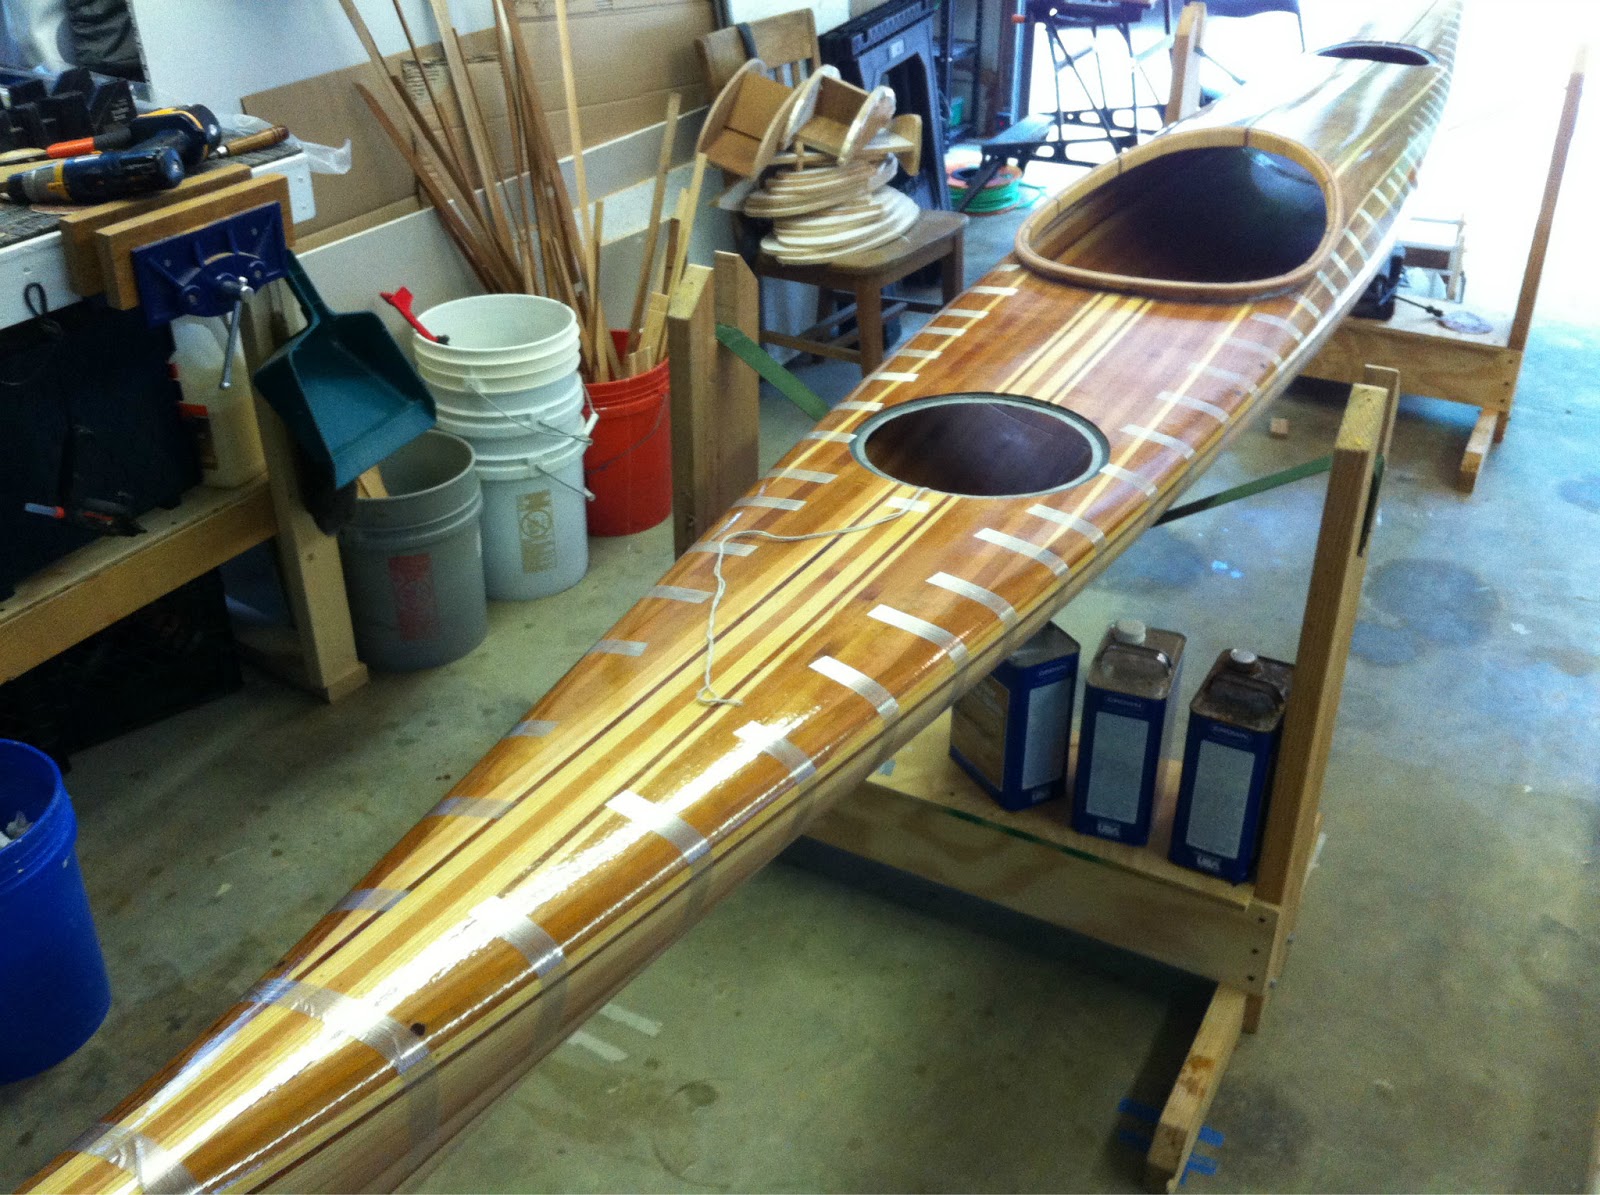
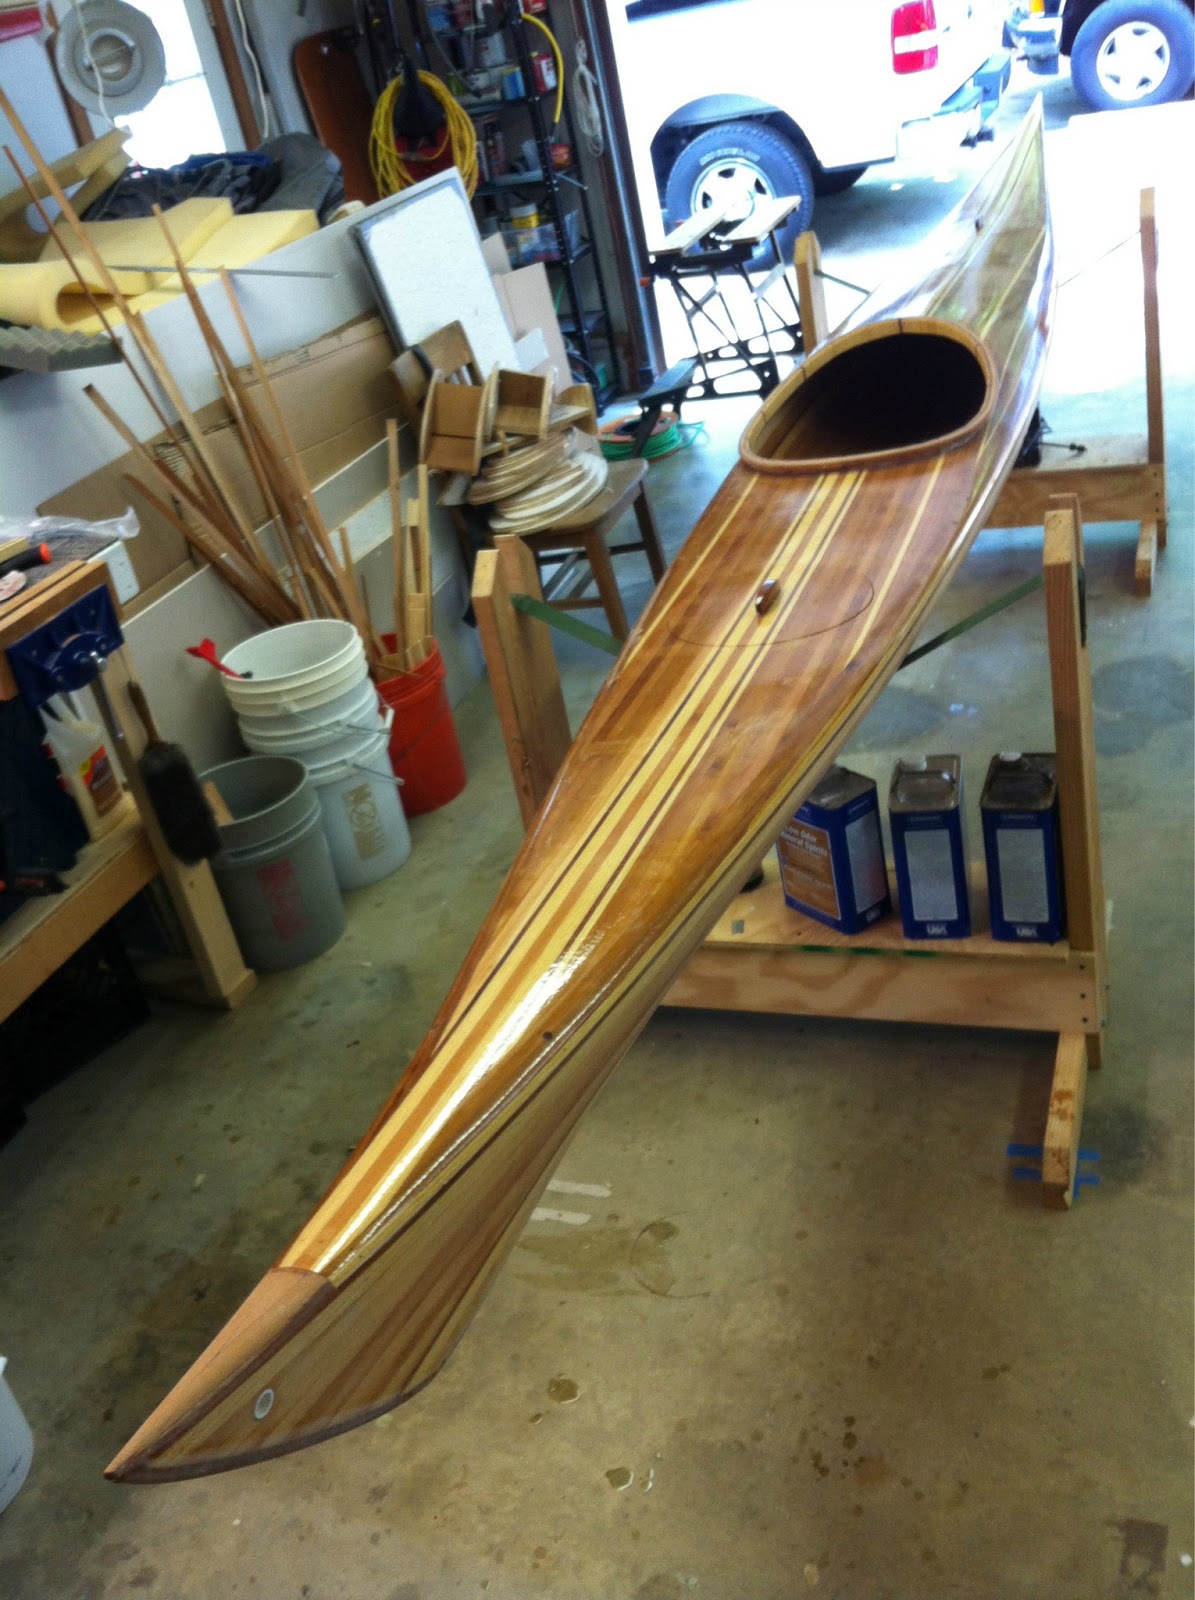
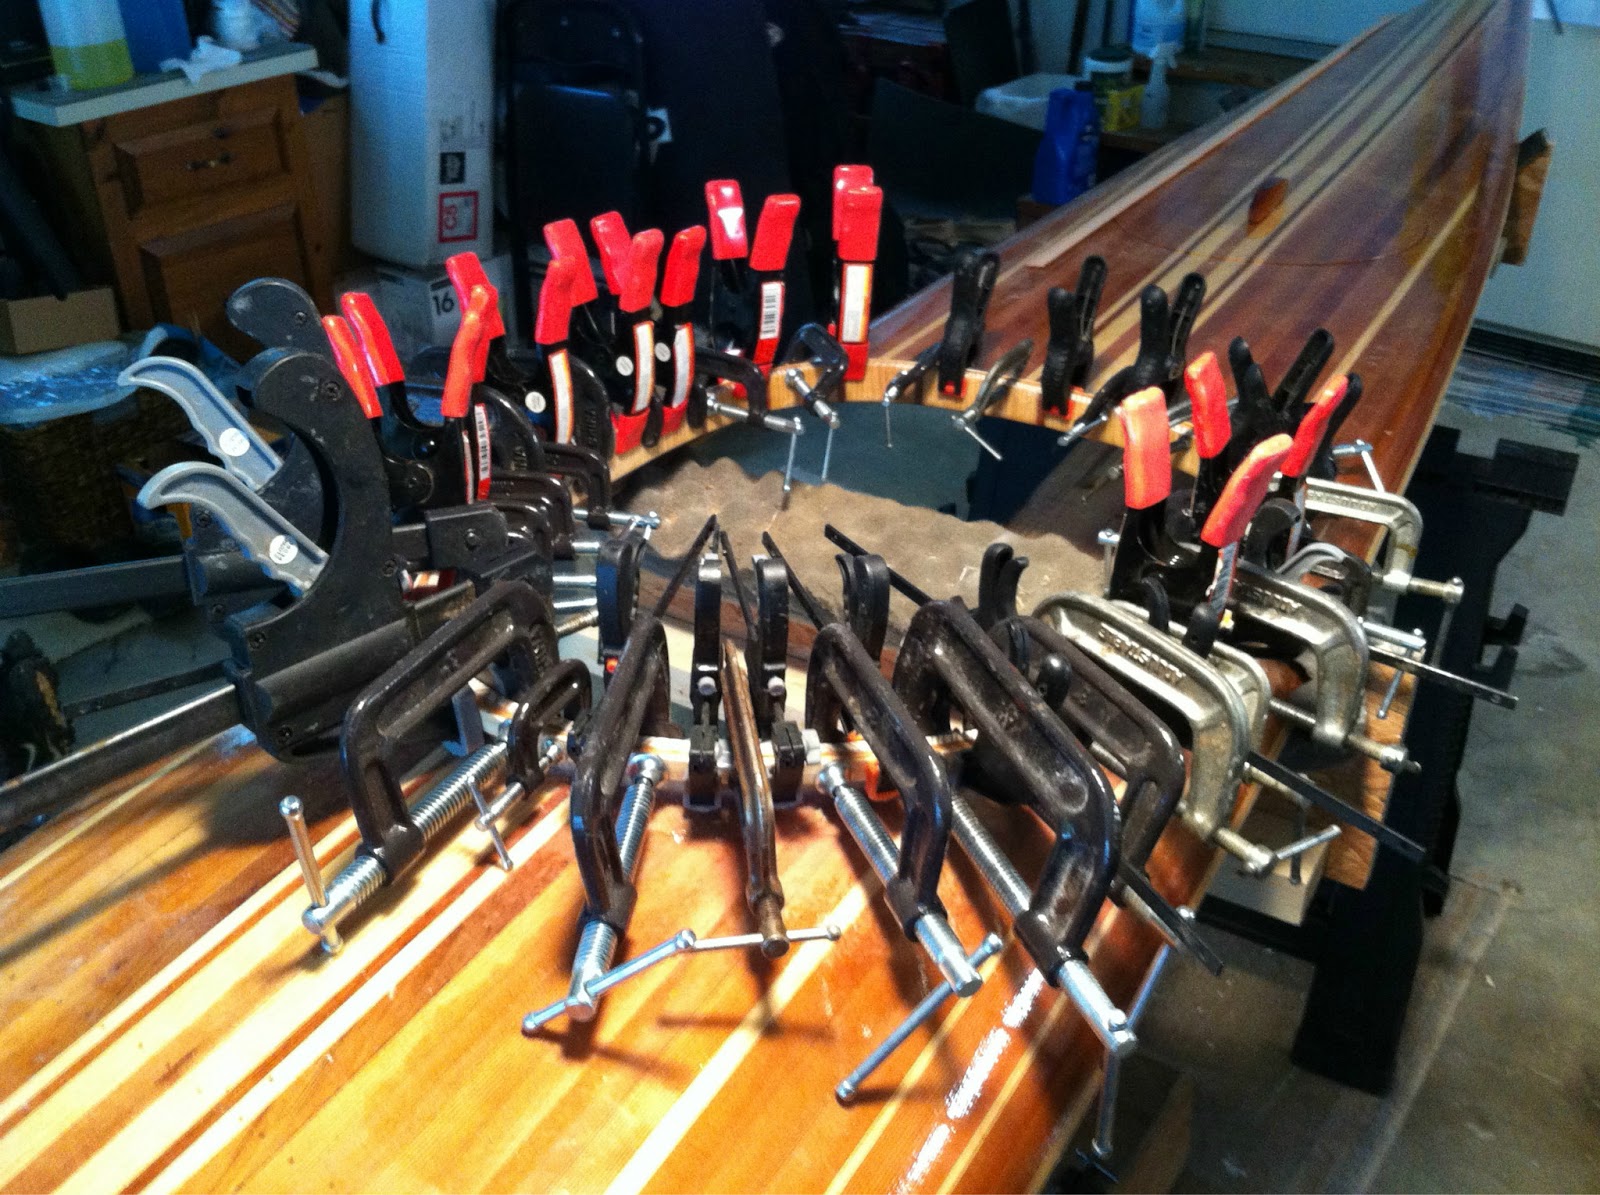
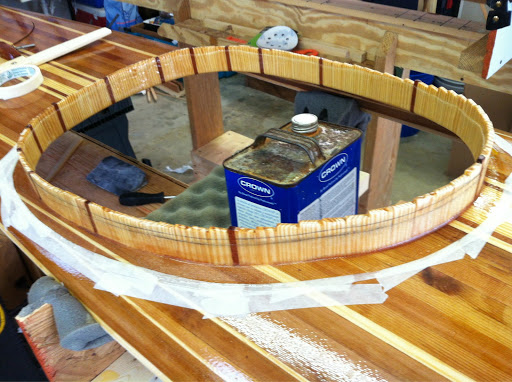
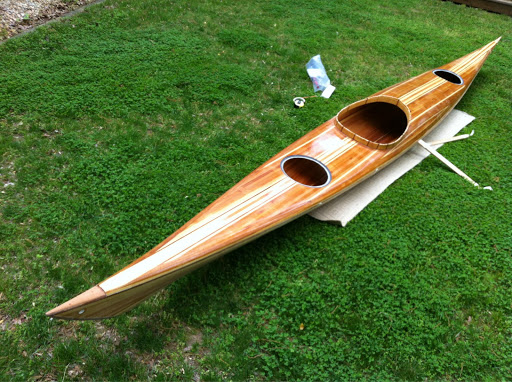
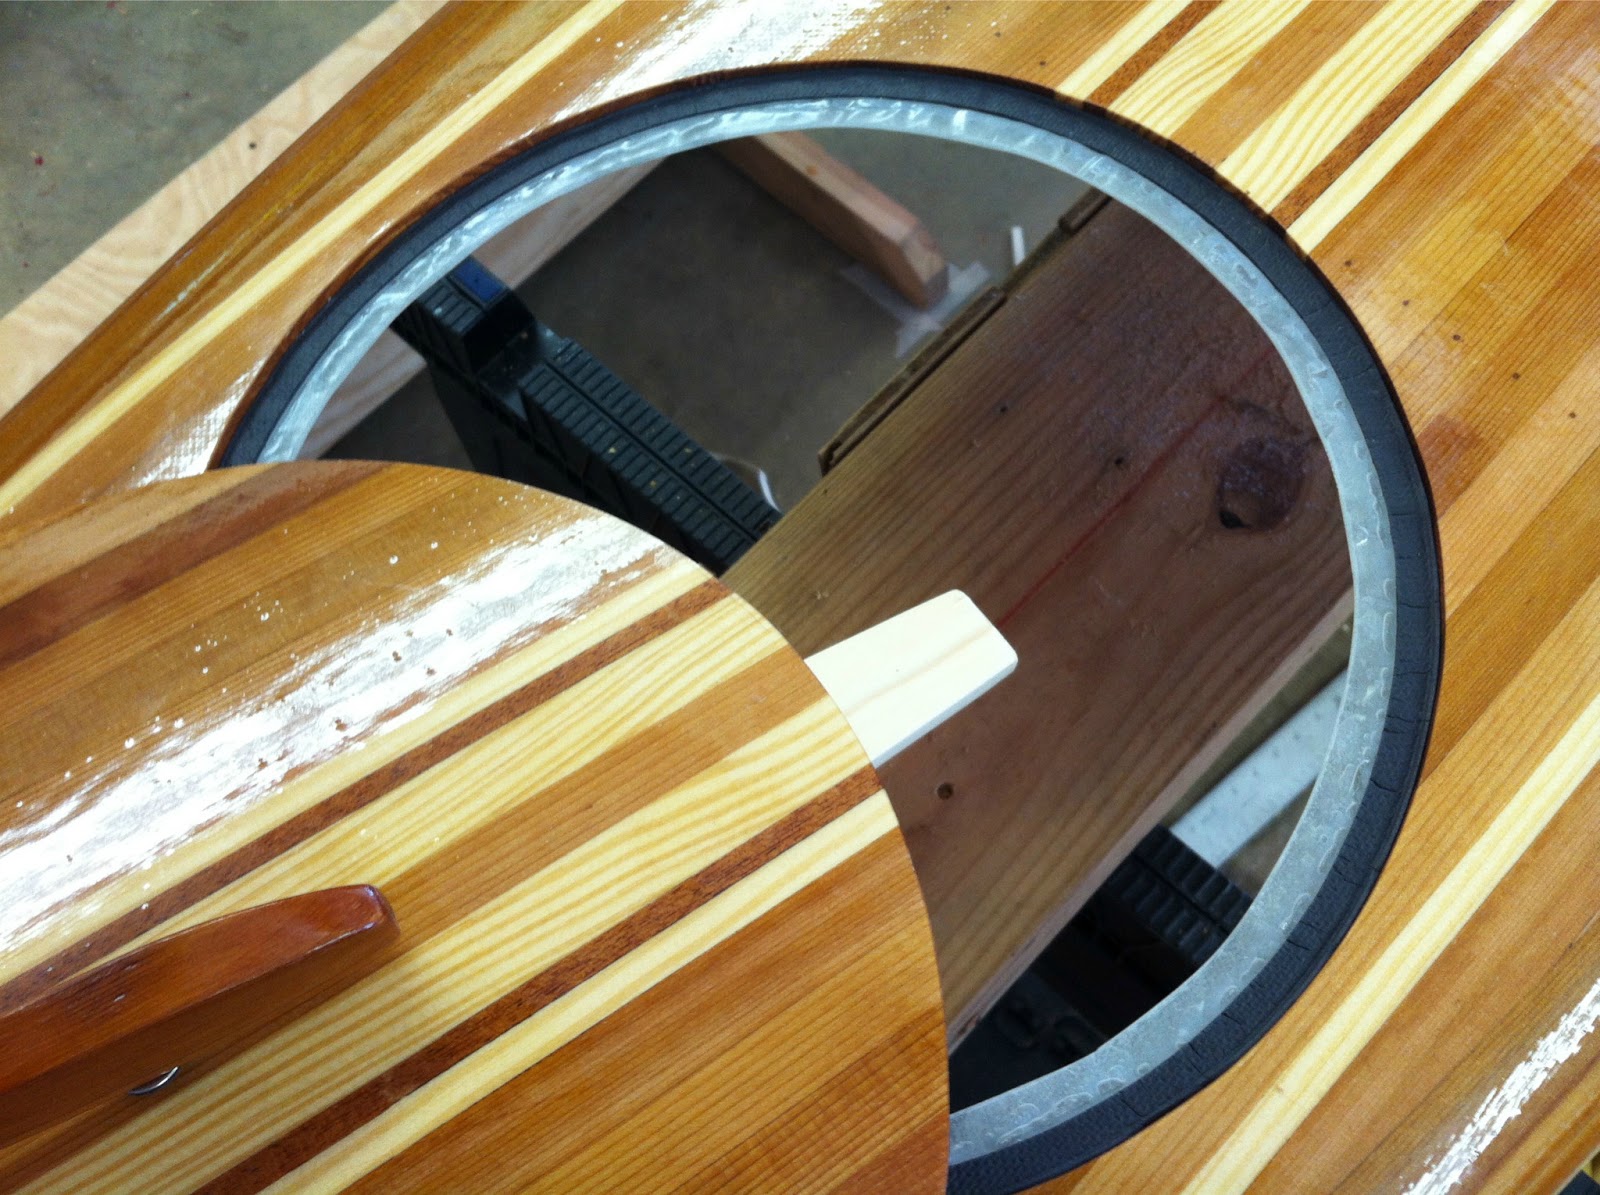
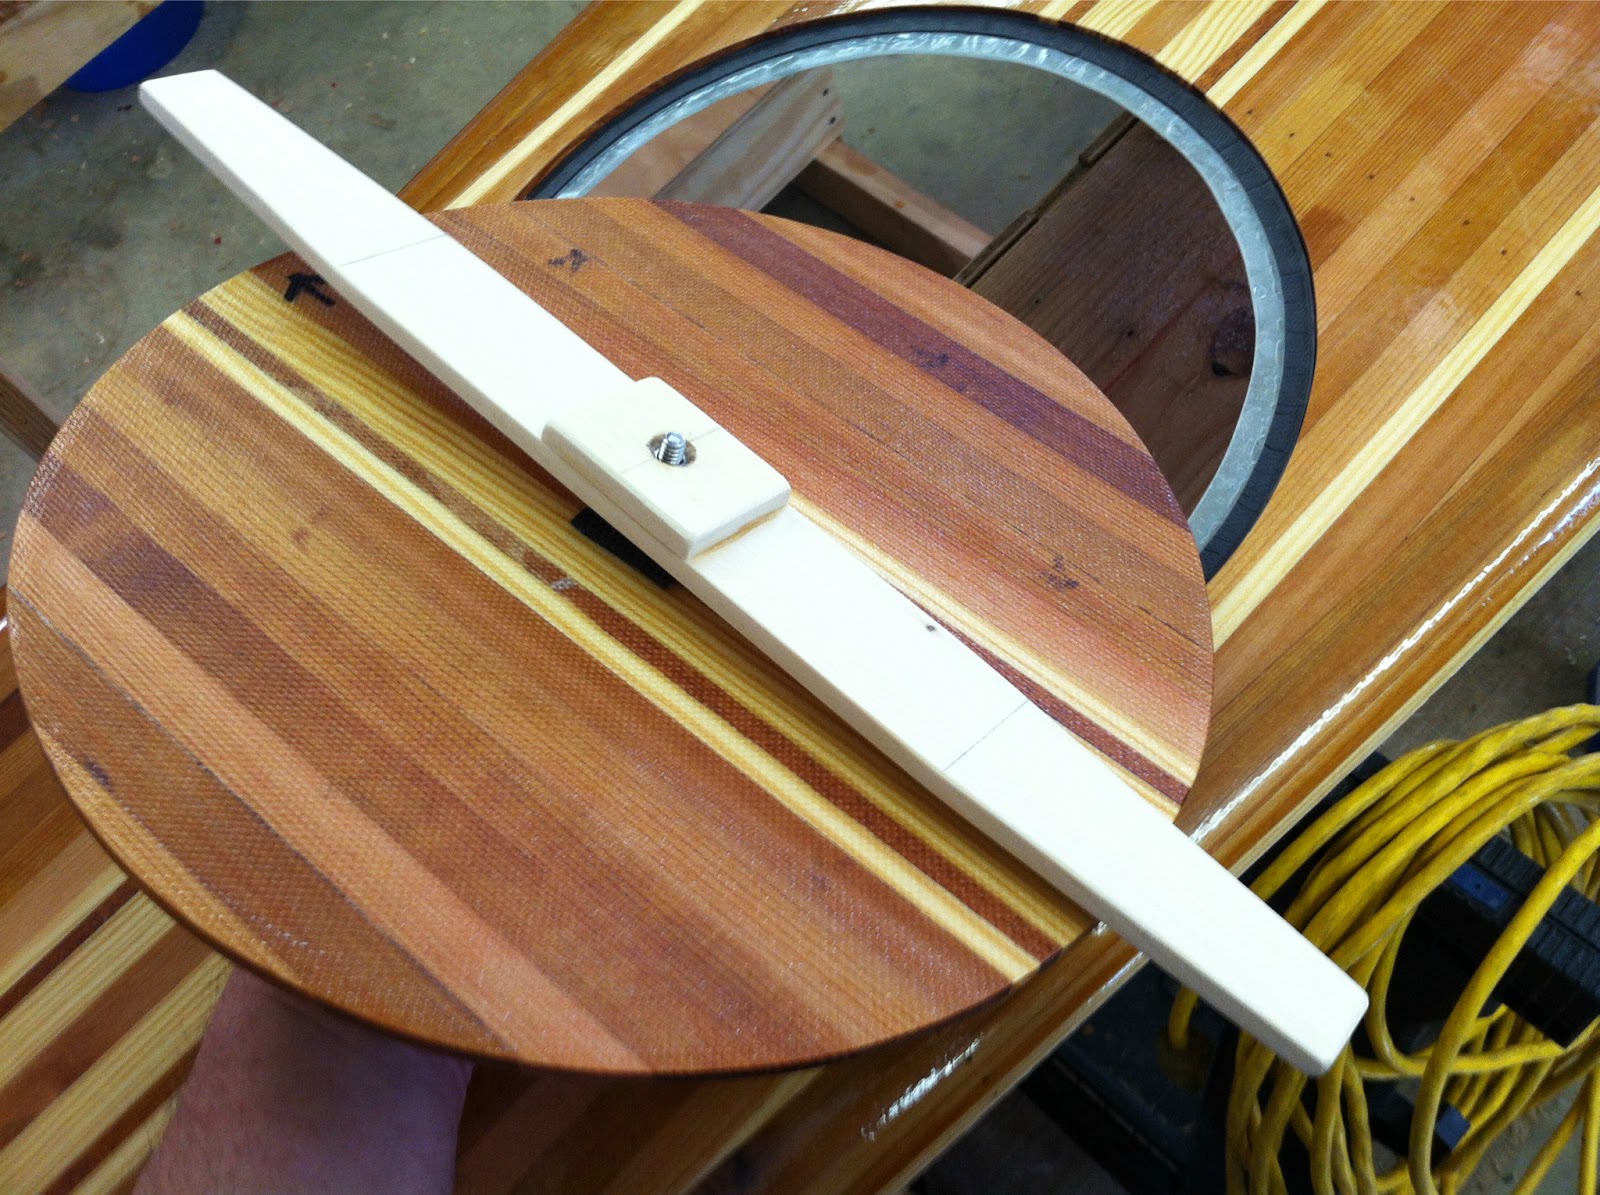
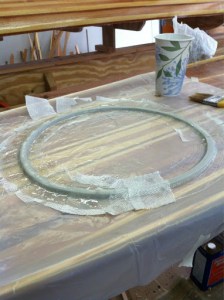
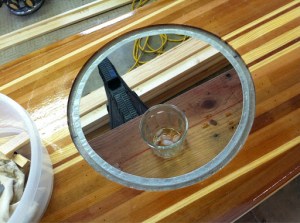
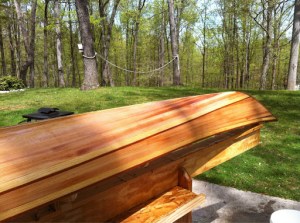
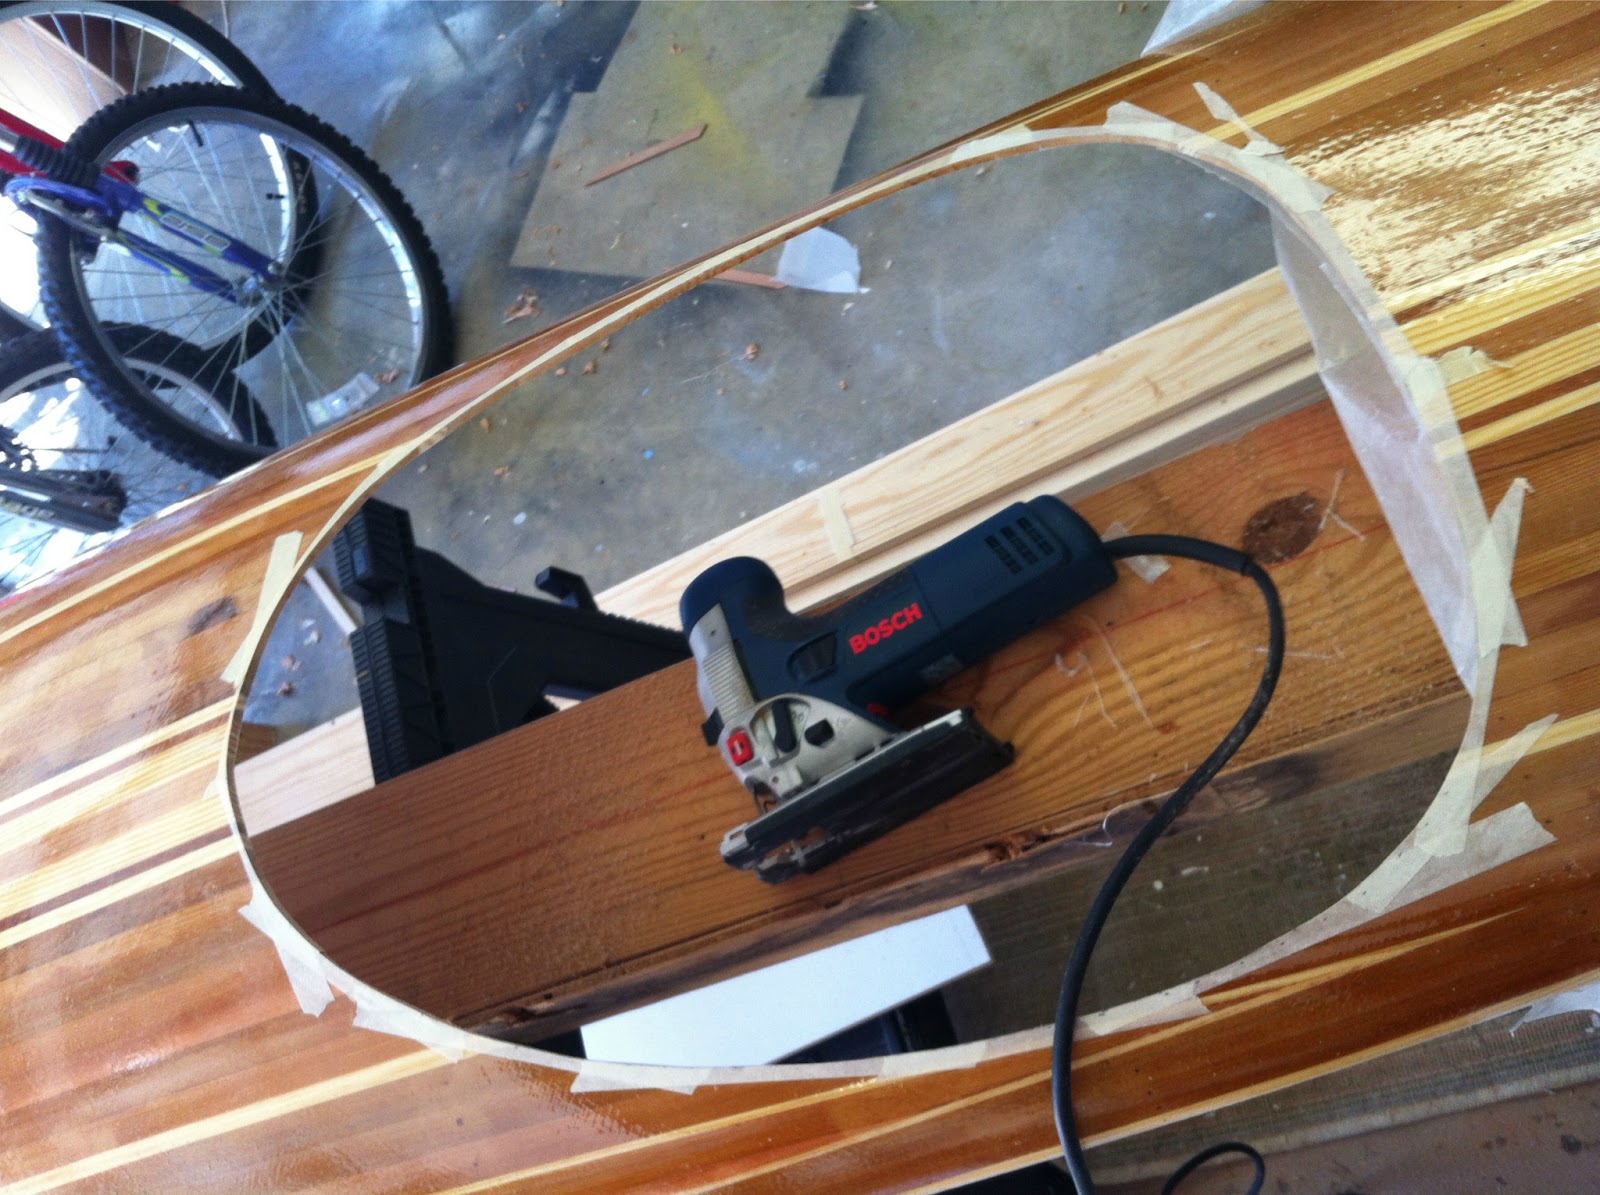
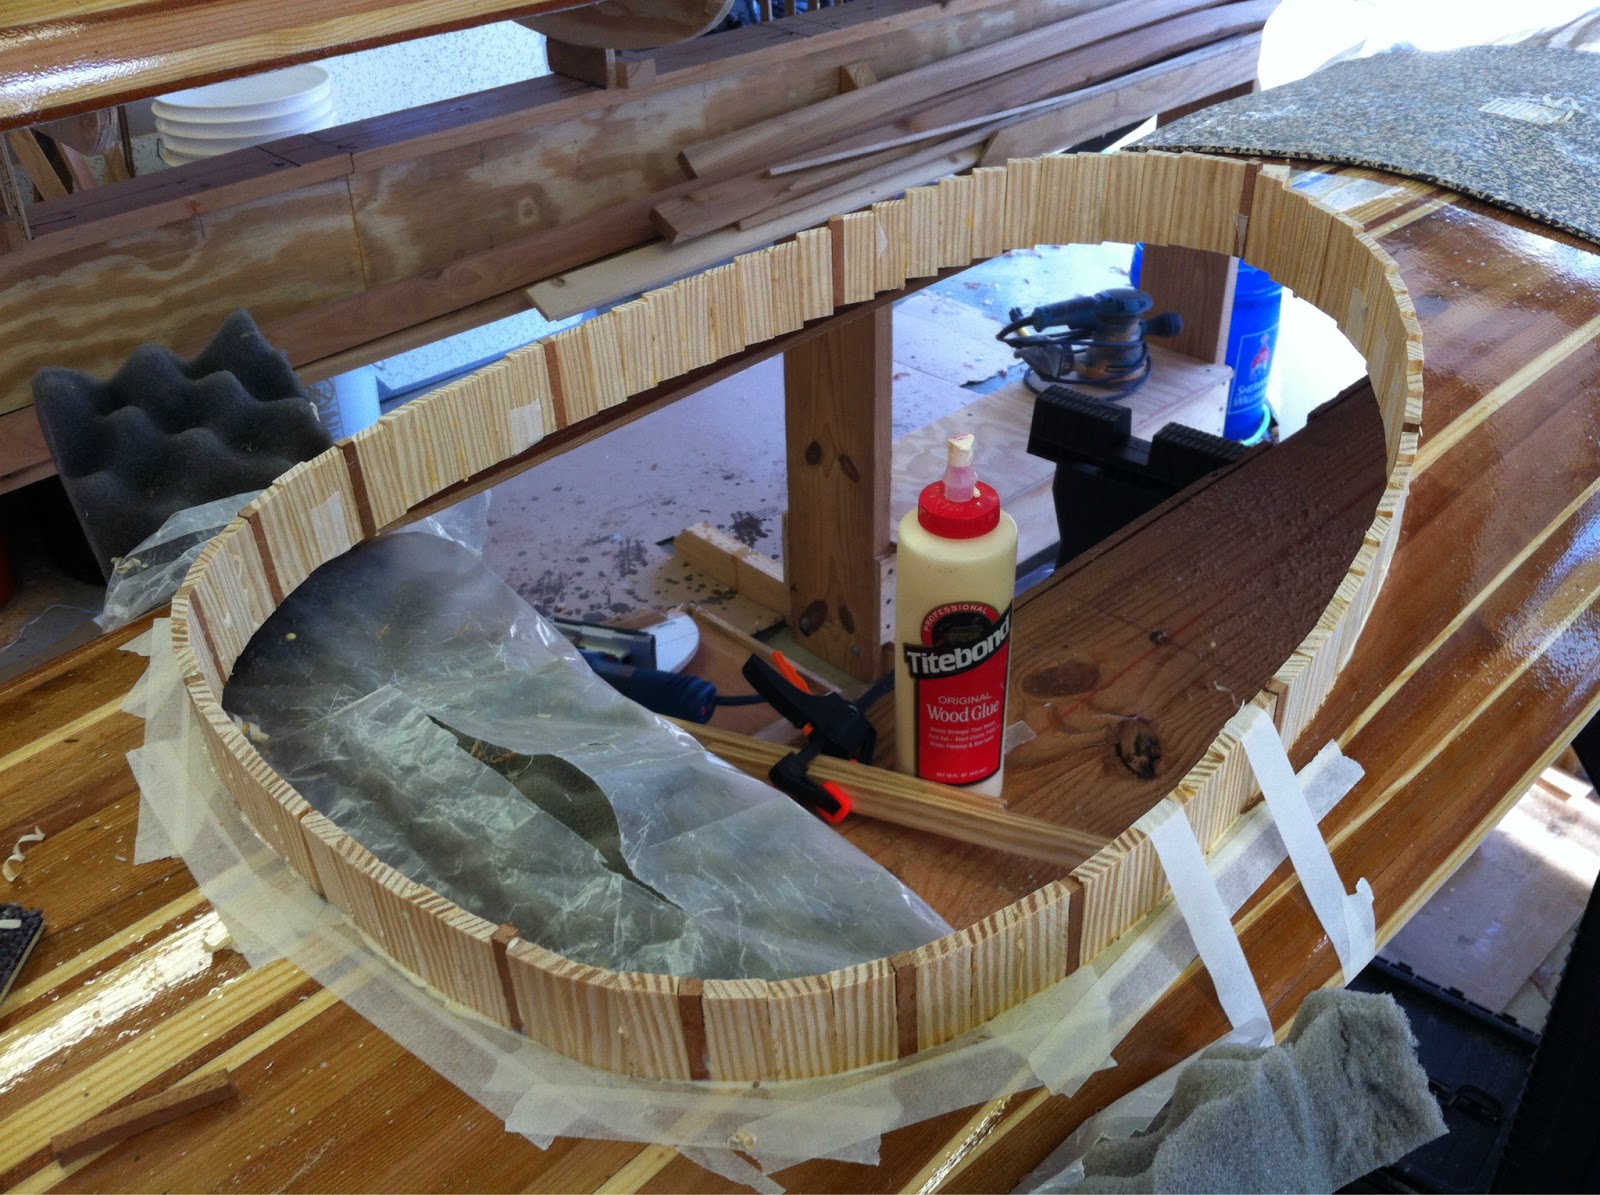
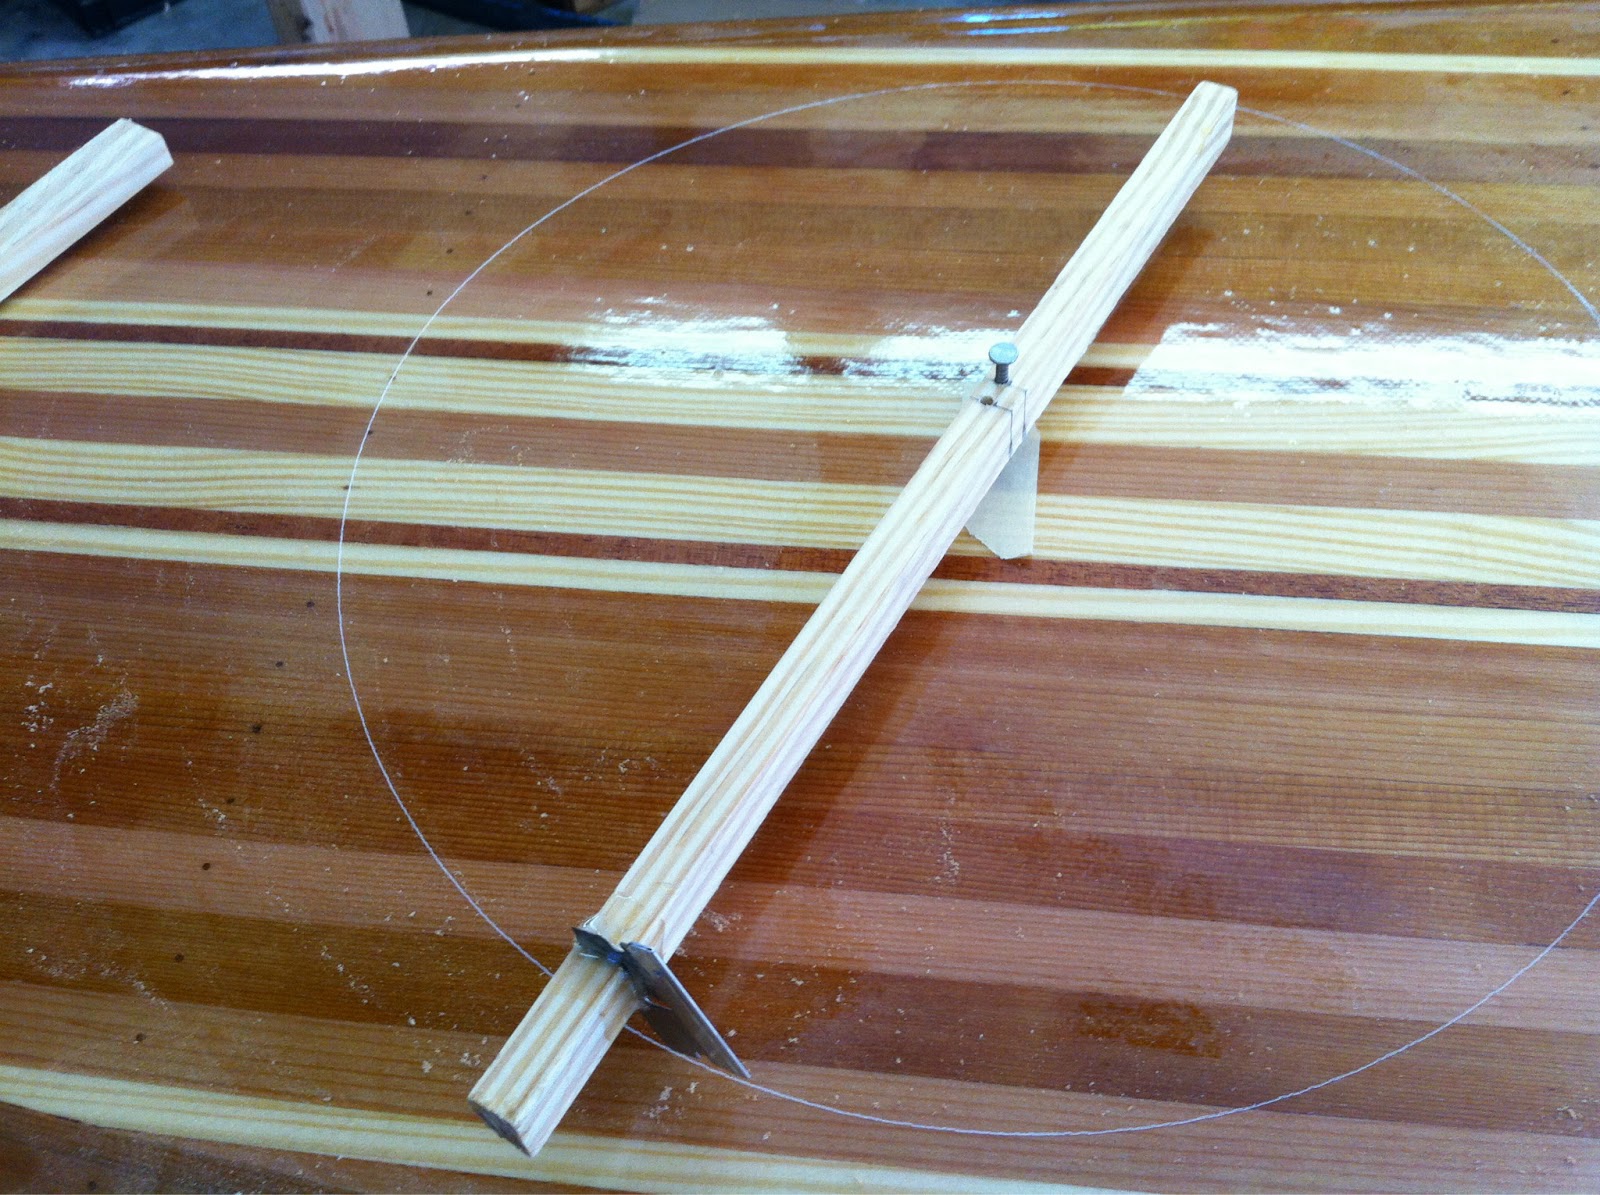
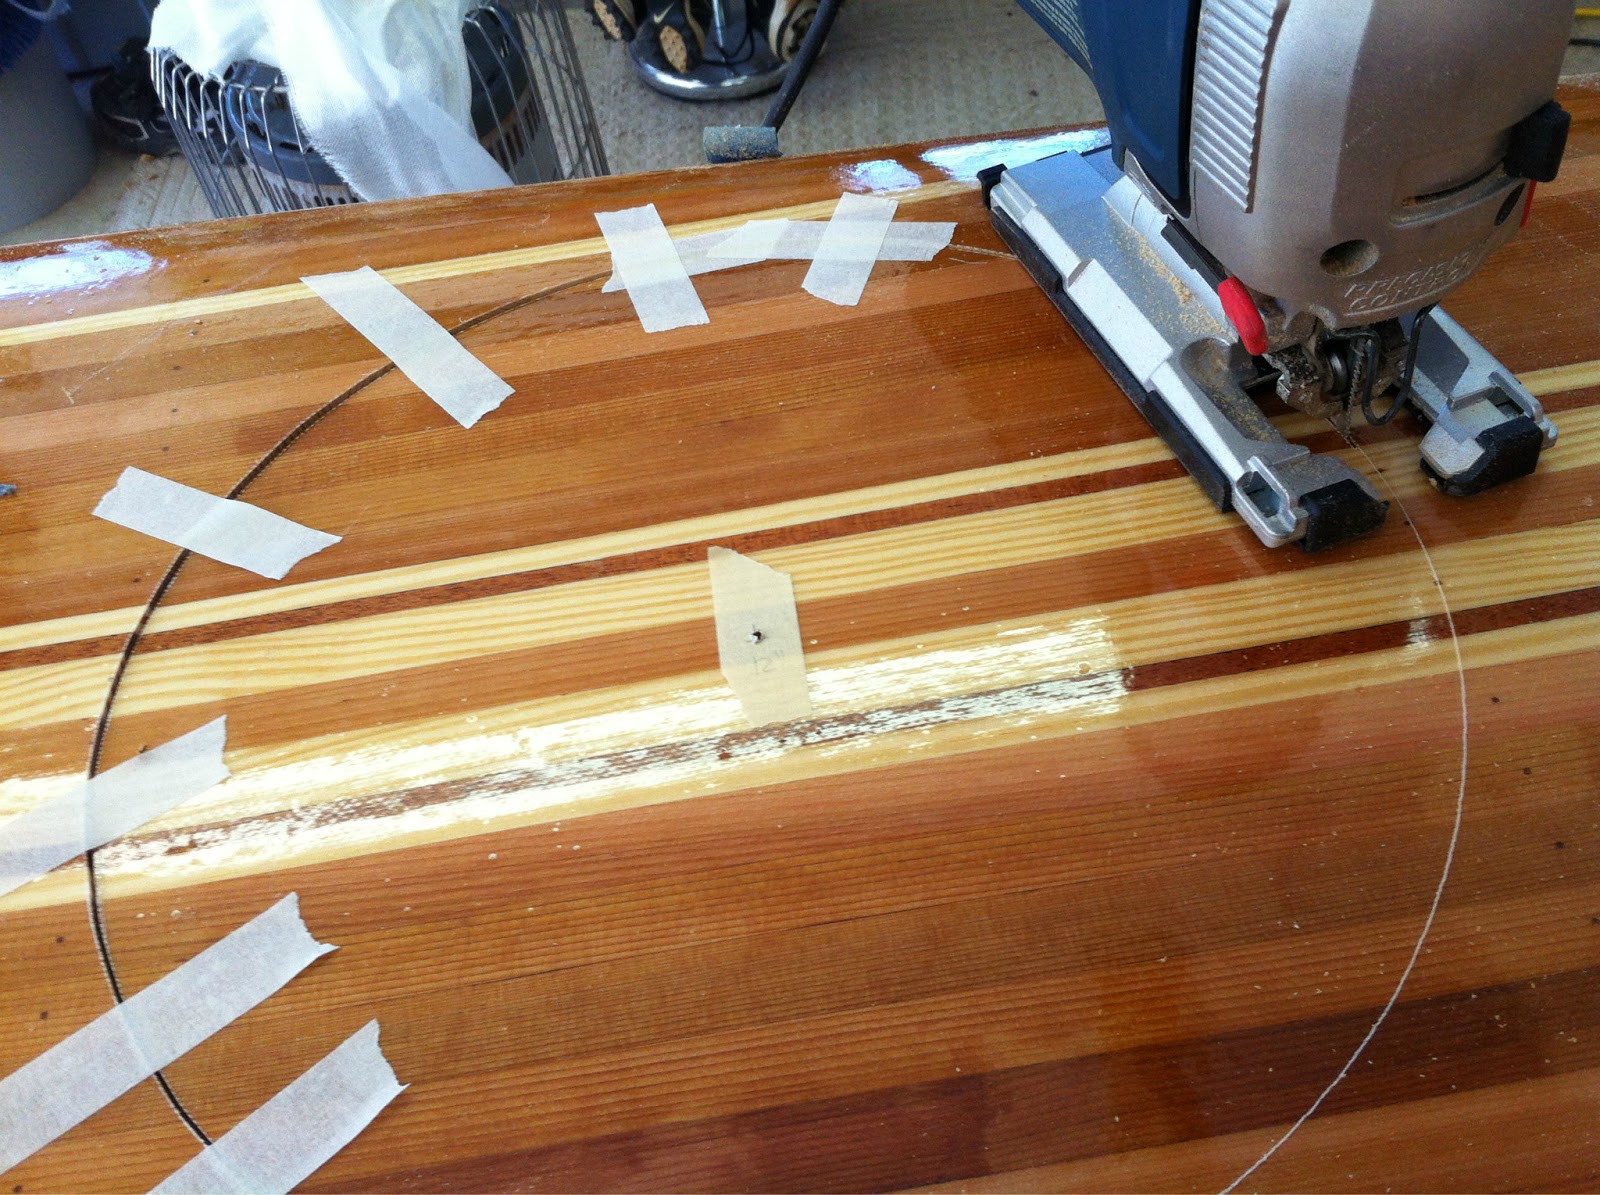
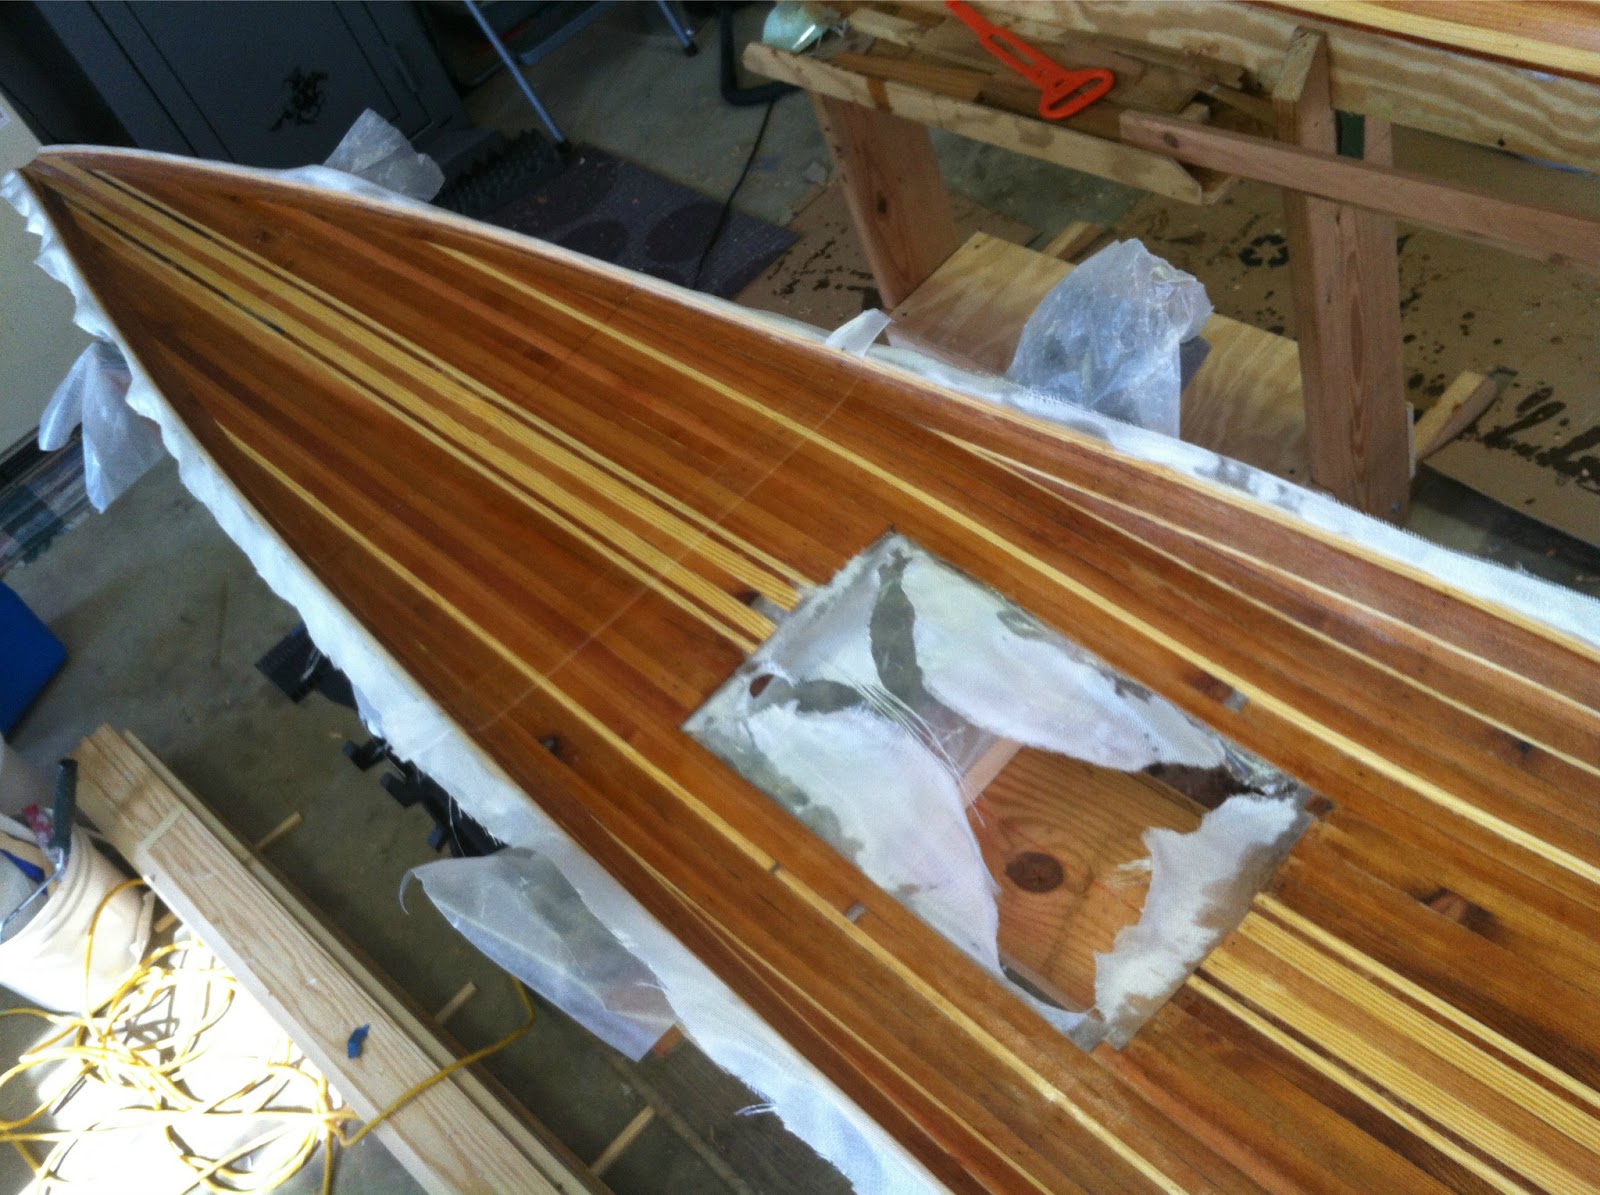
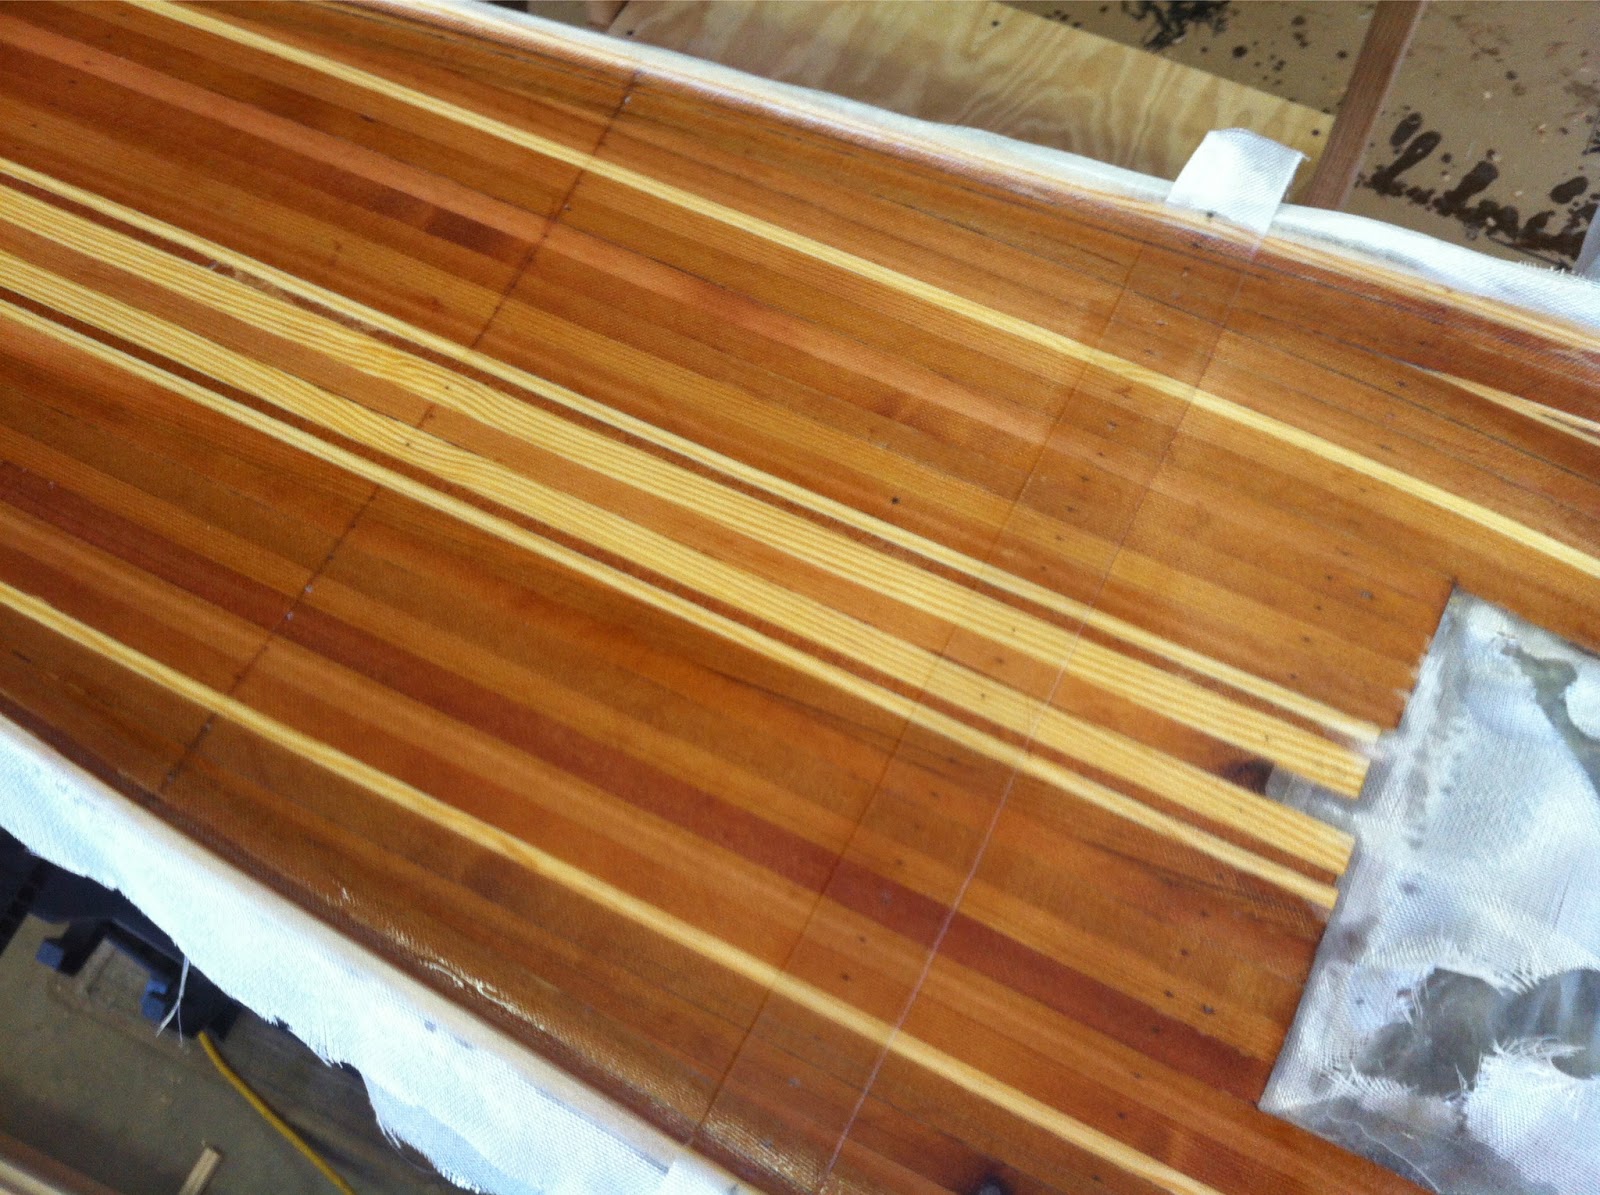
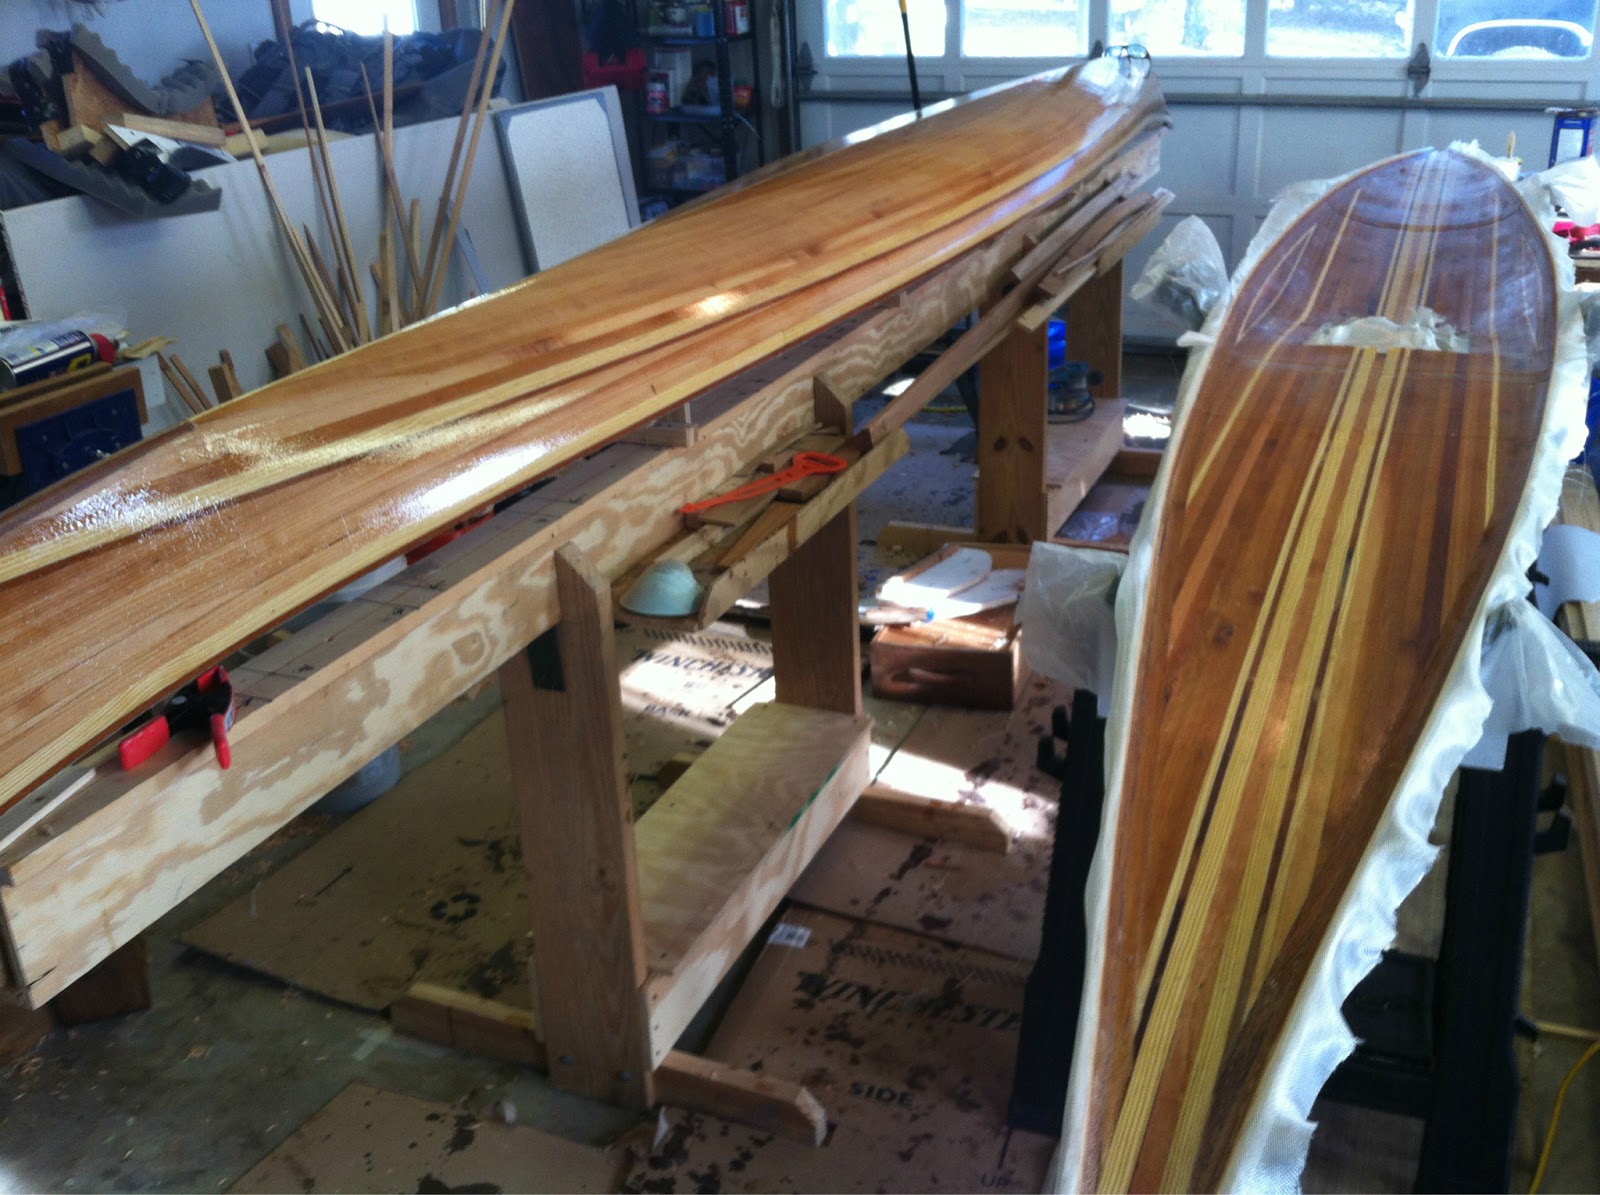
This weekend may offer time to make some kayak progress. I’ve scrubbed down the garage in preparation for varnishing. All sanding from here on out will be done outdoors. More sooner than later-

I like boats, especially this one.

I’ve been away from my dear boat for far too long. She has patiently waited in her cradle, alone in the garage. Too many distractions of late have stopped any progress of note. Setting up a new business has dominated my time. However, we did sneak down to the nearby “members only” lake for a “swim”. We trespassed, and despite the protest of a policing neighbor “member”, we quickly took a dip. It was ever so brief, but I now have a report. The kayak’s motion was steady, graceful, straight and effortless. In fact, I was pleasantly surprised how well the strong turn of her bilges provided good secondary stability when heeled.

There is still much finish and accessory work yet to be done (seat, back rest, deck lines, toggles, and much varnishing), but … wow … what a lovely craft she is and deserves a proper name. Suggestions are welcome. I simply couldn’t resist a taste of future paddles today. Had it not been for the lake patrol, I might have stayed out there for hours, just me and my boat. What a delight.

And here are two rough videos with some herky-jerky camera action. We will do better on the true maiden trip.

and more …

Closing the Joint

Began the joining of the hull to deck yesterday. This was after the cockpit coaming was faired, sanded and glassed (looking back on that, a laminated glass or carbon rim may have been easier and quicker).

coaming and epoxied holes for deck lines.

The joint was sanded to a slight bevel toward the interior for a tight joint. The fit was good and very little prodding was necessary to make the halves flush. Strapping tape holds the halves in check for glassing the interior joint with 1″ glass tape and then 2″ over  tape.  A run of plastic tape along the seam keeps the epoxy from oozing out.

taped & tight.

I strapped the boat on edge to lay in the tape. A small cup and brush glued on the ends of sticks aided in spreading and brushing the epoxy. It went well, but I may try wetting the tape prior to rolling it out on the opposite side. A pointed stick also aided in positioning the tape on the joint. Another helpful technique was to use tape only half the length of the boat which kept control of the rolls.

tools

spooled tape rolls cut to 1/2 boat length.

illumination needed for far dark reaches.

One side down!

Essential Tips

It has taken practically an entire boat, but I finally have gained some competence in working fiberglass cloth and epoxy. All of my observations are readily available in other blogs and largely in the Gougeon Brothers’ book “On Boat Construction”, but I’ll list a few tips that have made huge differences for me:

  1. Make certain the surface to be glassed is completely clean of dust and debris. Whatever you leave behind will be there entombed forever on your hard won boat.
  2. Take especial care to keep the fiberglass cloth clean. Given the coarse weave of 6 oz. cloth, it readily picks up all sorts of trash in the shop if set on the wrong surface or left out too long to collect whatever is floating in the air. Be sure to keep glass in a plastic bag to safe guard it from dust & trash. I’ve also read to wear nitrile gloves in handling the glass as oil from your paws can contaminate the weave. Personally I have not been so conscientious and haven’t noticed any imperfections as a result.
  3. I do wear the blue nitrile gloves in handling the epoxy. Its nasty stuff to have to remove with thinner or acetone. I’d recommend wearing a size smaller then normal. With a tight fit you hardly realize you have them on and you can work unconscious of the fact they are on.
  4. There is a huge difference in the setting time of epoxy based on the temperature.  Raka epoxy will set almost 4 times faster at 85 degrees F vs 65-70 degrees. I’d recommend starting your job with smaller batches of epoxy until you have a good feel of how much you can work before it thickens & sets. Epoxy is “liquid gold” and waste here can be costly. Other than time, it is the single largest material cost to your build.
  5. Keep a small amount of acetone and clean cotton rags available to clean your chip brush, vinyl scraper, and the inevitable drip or spill of epoxy.
  6. Keep your eye out for large cardboard boxes. While hardened epoxy can be chipped off the garage floor, why mess with doing so? Cardboard placed on the floor is more durable and cheaper, if found, than heavy craft paper. On side can be used up, flipped for the second half of the project, and tossed when done.
  7. Biased cut glass cloth is a heck of a lot easier to mould around compound curves than square cut. This is never more evident than when trimming out the cockpit coaming.
  8. This is a big one. Aside from large areas to be glassed, wet out strips of glass on waxed paper over a flat nearby surface. This will eliminate much of those pesky “hairs” that inevitably find their way into the work. Placing the cloth dry on the boat and working epoxy into the weave with a chip brush can make a horrible sanding job later (guess how I know).
  9. Keep any successive epoxy fill coats close enough so sanding isn’t necessary. Read the manufacturer’s literature. All brands are not the same.
  10. At 10, it becomes too long a list. Suffice it to say as a newcomer, the process seemed overwhelming. Taking it slow and attending to your work will make all the anxiety fade away. My biggest fear in the build was forming this wonderful strip vessel and then botching it with a rotten glass job. Save for some shadows from using epoxy to fill nail holes, the process moved along just fine. Be patient, work with deliberation, and your boat will be beautiful. I sound like a pro now (far from it).
Now we’re ready to glue the halves.

This and That

Production has slowed of late. Life has its distractions, but some details are taking shape. One item here is actually new seat backs for our 2 SOF kayaks. This can be considered a prelim to this build’s back rest. A couple previous solutions didn’t deliver comfort, so we’ve cedar stripped a couple backs, glassed both sides and laminated 1″ Minicell foam on the seat side. Slotted holes are on either end and fiberglass loops are on the back for boat installation. Varnishing still remains to be done, but you can get the gist here.

Both back rests. One still on jig.

The jig was traced from the rear of each cockpit with a 1″ offset. The rest of the construction was just like those forms defining the hull.
Minicell back. Indents of clamps will disappear.

The loops will help hold the brace up and be adjustable to comfort.

Rear strap loops made from fiberglass laminates.

The cockpit rim was cut down to size and eight 1/16″ strips were laminated for an edge to attach spray skirt. This required a few clamps. Once dry, filing, belt and hand sanding allowed for the proper shape. Glassing still remains to be done for durability.
I added wooden stops to the underside of the hatches to prevent the “dogs” from spinning underneath. This arrangement is quite satisfactory and doesn’t clutter the storage area with shock cords. If anything, the on deck wing nuts could be reduced in size, but they are handy as is.  
After quadruple checking of measurements, holes were made for the foot pegs.
Finally, I’ve ordered some 3/16″ soft double braid line to try as deck lines. Should that fail, Latigo leather straps should fit the same holes to be drilled.

No, that isn’t all. Took a windy journey in my son’s kayak last week. Short clip here:


Minicell foam may be too thick. We’ll see. Contact cement grabs quickly, so be precise.

Yak, yak, yak

I’ll be brief. Used a popsicle stick to draw a fillet around the coaming, set biased glass all around the rim, and tape kept epoxy off rest of boat.  Will epoxy 1st rim lamination before trimming coaming.

Tape protects from epoxy ooze. Gives crisp edge when removed at 1/2 cure state.

bias set glass

Double layered glass at cockpit. Used separate pieces at stems with a 1.5″ overlap towards center. The interior really soaked up the epoxy. This may be due to the rougher sanding. Boat still seems quite light. No telling how much I removed in sanding the interior. It weighed 20# before sanding & interior glass. Will weigh again. Lay up went very well save for one small spot where I put spreader sticks to maintain the beam. This stick slid about a 1/4″ down and took the glass with it. No problems. This will be covered up in the seaming of the 2 halves. Timeline: 185 hours.

double glassed at the cockpit

epoxied with spreader sticks at odd numbered mould locations.

Took the hull into the back yard to locate the foot pegs. Here are some nice pics and one of a clown in a boat.

starboard qtr.
sweet lines

happy clown.

Dogs & Battens

Like most jobs, that last 5% seems to take half of the time. My best guesstimate before taking on this project was a conservative 300 hours to complete. I’m currently sitting at 175 hours invested. I say sitting because the last bit of “work” on the “yak” has been more studying than doing. The last details such as hatch attachment, deck lines, cockpit coaming, etc. really effect the look and many functional aspects of the design, and when it comes to drilling holes in the shell, I want to do it once and get it right.

I’ve resolved to use a modified version of Babina’s screw down hatches, but I don’t care for the chunky knobs he illustrates. Mine will echo the earlier fashioned carry toggles and will resemble small wing nuts that can readily be spun to dog down the hatches.

Toggle & new hatch handle. More sanding & varnish required.

A 1/4×20 stainless threaded rod is epoxied into handle. I filed a flat edge to the rod for a more secure bond to the handle. A sugar pine batten that is 5″ longer than the hatch diameter has an epoxied nut on the underside. I used some left over adhesive roofing material to capture a stainless washer between the handle and hatch and directly under the hatch to keep the rod from sliding up and down.

gasket installed in hatch rim.

pine batten dog.

I’ll use my “paddle soup” to finish the battens and I’ll add a slotted keeper to one end of the hatch to receive the batten and hold it still while tightening. Otherwise, we are done here. Pouring a good gallon or 2 over the hatch showed no leaks with very little tightening.

Aft hatch

Forward hatch

I’m thinking the deck lines will echo those commonly found on more traditional Greenland kayaks. I’ve read Latigo leather best resists the elements. I also suspect it will be more secure and less likely to give as shock cord does. Lastly, I think it is more in keeping with the traditional lines of this boat. However, since I can’t quite decide, we’ll move on to the cockpit coaming next.

Hatching Hatches

Was able to work parts of a couple days. Accomplishments: sanded and glassed inside face of cockpit coaming, formed both hatch rims (one installed), took a 1st pass at wet sanding the outside of the hull, and scraped the hull interior.

For the hatch rims I’ll point  you to One Ocean Kayaks. Their manual was well worth the investment. Sometimes it is good to have cross references on techniques. I generally followed this method except I used fiberglass cloth and mat instead of carbon fiber in large part to the fact I had it and didn’t want to add the cost to this boat. While ounces add up, there was very little to be saved for 2 rims.

One other difference was I used small blocks of wood hot melted to hold the hatch in place securely. Duct tape was too flexible. Also thicker gauge plastic works better than food wrap as a release agent.
So, here are the shots:

blocks hot melted to top of deck & hatch.
plastic over underside of hatch area.
I found that laying the strips of glass in a constant direction allowed for easier wetting and smoothing of the build up. Five alternate layers of 4 oz cloth and mat were used. I could have been more diligent about pushing out the bubbles.
filleted weather stripping & glass
wet sand placed over plastic to squeeze lay-up


rim after trimmed


rim epoxied in place

Here you should police the oozing epoxy and keep the weather stripped groove clean. It wouldn’t be easy to remove after epoxy hardens.

finished rim w/o thicker weather stripping

I haven’t decided on the method for holding the hatch down. Instead of some sort of mechanical dogging system, I’m favoring shock cord under the deck. I’d like to preserve the clean lines of the boat. I considered magnets as some have done, but I don’t want to cause problems with any compass I might use.

hatch resting on rim.
At this point, the real boogey man is joining the 2 halves. There is much sanding & varnishing to come, but we are well on the home stretch.
Here are a couple pics of the hull. I took the opportunity to do most of the sanding while it was still on the forms.
close up
hull with forms knocked out
scrapings.
What I noticed in glassing the underside of the deck is that if only one coat of epoxy is used, the finer sanding used on the exterior is not necessary. I will scrape, use the ROS with 60 grit and quickly smooth with 120. For the cockpit area, I am likely the use at least 1 extra coat to help in cleaning of sand, mud, etc.

Egg Shapes & Circles

Gorgeous day. Very productive. Spring has sprung.

finally the feathery lace of spring arrives.

Cut the hole for the cockpit and hatches. Started on the coaming. For the cockpit I made a template out of a 1x pine board representing the outside face of the coaming. Clamping this in place on the deck, tick marks were translated to masking tape by use of a framing square. These marks were faired with a light batten and cut to with the jig saw. I attempted to keep the blade vertical, but some truing was done with a file afterwards. Determined to make yellow pine behave, I glued up the coaming with 1/4″x 2″ pieces and accented with 1/4″ square mahogany.

1x template & tick marks

tick marks connected with a batten

jigged egg hole

coaming glued up to be followed by a laminated lip.

This was followed by scribing the holes for the hatches. I thought a simple circle would be better looking than an ellipse or some sided hatch. I made my own beam compass with a stick to which I glued a fresh razor blade and slid a nail through pre-drilled holes for a 12″ and 11.5″ diameter hatch. The center of the hatch was marked with a hole to receive the nail. The compass was then ever so lightly rotated to mark the deck. No attempt was made to cut. This would have resulted in the blade walking away from the circle and creating a mess. The jig was started by a succession of holes drilled along the cut line. The scratched circles were very easy to follow, better than any pen or pencil mark.

scratched circle

tape holds edge of jigged hatch.

I will fill the holes in the center of the hatches with a small dowel for accent. It’s fantastic when all goes to plan. I’m starting to feel like a pro! Hopefully it won’t be short lived. The joining of the deck & hull lingers out there.

Down Under

Well, I am “glassy-eyed”. Awoke at 4am to put 3rd fill coat on hull. The deck took only 2. I guess because it is mostly horizontal. 2″ glass tape was added to the stems for potential wear resistance.

Sacked out until breakfast and then began the scraping, planing, and sanding of the underside of the deck. I wish I had weighed it because quite a bit of wood was removed. I paid a price in labor for using a few less than perfect strips. These were thinner in some portions and while flushed out topside, they left a few foot long depressions down under. At the time, the thought of pulling off the tarps in the snow and ripping a few more strips was not appealing. I also hated to waste those strips. Excluding labor, I will have about $750 invested in this boat when that splash finally happens. This is boat materials only. No tools or strong back which are reusable.

Spent maybe 1.5 hrs fairing. Since it is really unseen, I focused in the areas where hatches are going. Otherwise, I let the glass and epoxy do their thing. All in all, results appear good. An extra layer was added across the deck for 16-18″ just aft of the cockpit to take stress as paddler (me) slides into the boat. 2″ glass tape was also added where the bulkheads will be sealed in. I’m hoping this helps distribute any shock load should the boat land there.

underside of deck from cockpit to stern

At this point I’m tired of fiberglassing. The hull still remains to be done. I may take a detour and work on the cockpit coaming and/or deck hatches and allow the hull to really cure before tackling it. It requires a little more attention than the deck. Good portions of it are exposed. Not that the deck underside is bad at all, I just need to be in the right frame of mind to do it justice. For now, I’m all sanded out.

reinforced area behind cockpit with 2″ tape at bulkhead placement

matched pair

The hull will take some wet sanding. There are stipples here and there. Still, its coming together.