Hatching Hatches

Was able to work parts of a couple days. Accomplishments: sanded and glassed inside face of cockpit coaming, formed both hatch rims (one installed), took a 1st pass at wet sanding the outside of the hull, and scraped the hull interior.

For the hatch rims I’ll point  you to One Ocean Kayaks. Their manual was well worth the investment. Sometimes it is good to have cross references on techniques. I generally followed this method except I used fiberglass cloth and mat instead of carbon fiber in large part to the fact I had it and didn’t want to add the cost to this boat. While ounces add up, there was very little to be saved for 2 rims.

One other difference was I used small blocks of wood hot melted to hold the hatch in place securely. Duct tape was too flexible. Also thicker gauge plastic works better than food wrap as a release agent.
So, here are the shots:

blocks hot melted to top of deck & hatch.
plastic over underside of hatch area.
I found that laying the strips of glass in a constant direction allowed for easier wetting and smoothing of the build up. Five alternate layers of 4 oz cloth and mat were used. I could have been more diligent about pushing out the bubbles.
filleted weather stripping & glass
wet sand placed over plastic to squeeze lay-up


rim after trimmed


rim epoxied in place

Here you should police the oozing epoxy and keep the weather stripped groove clean. It wouldn’t be easy to remove after epoxy hardens.

finished rim w/o thicker weather stripping

I haven’t decided on the method for holding the hatch down. Instead of some sort of mechanical dogging system, I’m favoring shock cord under the deck. I’d like to preserve the clean lines of the boat. I considered magnets as some have done, but I don’t want to cause problems with any compass I might use.

hatch resting on rim.
At this point, the real boogey man is joining the 2 halves. There is much sanding & varnishing to come, but we are well on the home stretch.
Here are a couple pics of the hull. I took the opportunity to do most of the sanding while it was still on the forms.
close up
hull with forms knocked out
scrapings.
What I noticed in glassing the underside of the deck is that if only one coat of epoxy is used, the finer sanding used on the exterior is not necessary. I will scrape, use the ROS with 60 grit and quickly smooth with 120. For the cockpit area, I am likely the use at least 1 extra coat to help in cleaning of sand, mud, etc.

Egg Shapes & Circles

Gorgeous day. Very productive. Spring has sprung.

finally the feathery lace of spring arrives.

Cut the hole for the cockpit and hatches. Started on the coaming. For the cockpit I made a template out of a 1x pine board representing the outside face of the coaming. Clamping this in place on the deck, tick marks were translated to masking tape by use of a framing square. These marks were faired with a light batten and cut to with the jig saw. I attempted to keep the blade vertical, but some truing was done with a file afterwards. Determined to make yellow pine behave, I glued up the coaming with 1/4″x 2″ pieces and accented with 1/4″ square mahogany.

1x template & tick marks

tick marks connected with a batten

jigged egg hole

coaming glued up to be followed by a laminated lip.

This was followed by scribing the holes for the hatches. I thought a simple circle would be better looking than an ellipse or some sided hatch. I made my own beam compass with a stick to which I glued a fresh razor blade and slid a nail through pre-drilled holes for a 12″ and 11.5″ diameter hatch. The center of the hatch was marked with a hole to receive the nail. The compass was then ever so lightly rotated to mark the deck. No attempt was made to cut. This would have resulted in the blade walking away from the circle and creating a mess. The jig was started by a succession of holes drilled along the cut line. The scratched circles were very easy to follow, better than any pen or pencil mark.

scratched circle

tape holds edge of jigged hatch.

I will fill the holes in the center of the hatches with a small dowel for accent. It’s fantastic when all goes to plan. I’m starting to feel like a pro! Hopefully it won’t be short lived. The joining of the deck & hull lingers out there.

Down Under

Well, I am “glassy-eyed”. Awoke at 4am to put 3rd fill coat on hull. The deck took only 2. I guess because it is mostly horizontal. 2″ glass tape was added to the stems for potential wear resistance.

Sacked out until breakfast and then began the scraping, planing, and sanding of the underside of the deck. I wish I had weighed it because quite a bit of wood was removed. I paid a price in labor for using a few less than perfect strips. These were thinner in some portions and while flushed out topside, they left a few foot long depressions down under. At the time, the thought of pulling off the tarps in the snow and ripping a few more strips was not appealing. I also hated to waste those strips. Excluding labor, I will have about $750 invested in this boat when that splash finally happens. This is boat materials only. No tools or strong back which are reusable.

Spent maybe 1.5 hrs fairing. Since it is really unseen, I focused in the areas where hatches are going. Otherwise, I let the glass and epoxy do their thing. All in all, results appear good. An extra layer was added across the deck for 16-18″ just aft of the cockpit to take stress as paddler (me) slides into the boat. 2″ glass tape was also added where the bulkheads will be sealed in. I’m hoping this helps distribute any shock load should the boat land there.

underside of deck from cockpit to stern

At this point I’m tired of fiberglassing. The hull still remains to be done. I may take a detour and work on the cockpit coaming and/or deck hatches and allow the hull to really cure before tackling it. It requires a little more attention than the deck. Good portions of it are exposed. Not that the deck underside is bad at all, I just need to be in the right frame of mind to do it justice. For now, I’m all sanded out.

reinforced area behind cockpit with 2″ tape at bulkhead placement

matched pair

The hull will take some wet sanding. There are stipples here and there. Still, its coming together.

The Glass Slipper

I think I’m on the downhill side of this build. With the exterior glassed and filled we are at 140 hours. The interior remains to be glassed, coaming & hatches to be fabricated, deck lines to be added, and  halves to be joined. The hull looks great. Looking back on it, I’m glad I started with the deck.

After a thorough sanding of the fill marks on the hull, the short on glassing of the hull was as follows:

  1. the extra layer on the “football” (bottom) was placed diagonally on a bias. This allowed for the cloth to lay down more easily.
  2. I used a razor blade stuck perpendicular on a stick which I marked about 2′ from the waterline. I wish I had taken a picture. I came up with this device after I lost track of the seam I was following as a reference. The 2 strips merged in contrast.
    Football glass is barely visible under top glass
  3. laid the second layer over the whole. The only caution here is that you mustn’t finish sand through the top layer of glass. After wet out, the edge wasn’t perceptible. There also was no cutting of cloth at the stems since it sat down so well. Very nice.
  4. take a deep breath and wet the boat out. This requires some additional patience as saturation takes a bit longer, but given enough epoxy, it does happen. Proding with a chip brush can help on the more stubborn areas.
  5. I started in the center on one side and worked toward both ends simultaneously to always have a wet edge to work from. No problems.
  6. The remaining squeegying (is that a word?) goes as planned. 2 fill coats and you are done.

I will say the lower temps (low 60s) after starting at 75 do seem to stretch the fill coats to about 8-10 hrs apart. Also, the flash point of the epoxy is mellowed too and not so abrupt. This worked fine for me. Coat 1 was at 8pm and the second 6am with final near 5pm. Recoating before the epoxy gets hard is critical to avoid sanding. I haven’t done it and don’t want to.

Sooooo much nicer then before & just 1 coat. I like the “stitches”.
after 2 fill coats
Unlike the deck, I added a 3rd. now it looks right.

Not much to show in the pictures aside from a noticeable and dramatic difference. Yeah, I’ve impressed myself and my hat no longer fits. Hey hey hey …

Different Strokes

As long as you exclude yard work, car washing, house chores, etc. (or anything else you don’t want to do) it is good to have small tasks to fill in the wait while your epoxy cures. I decided my new boat needed her own paddle. I prefer a  Greenland style to a Euro. Greens are much easier on the shoulders, can have lower windage punching to windward, and just feel so much nicer slicing through the water. You can actually “throttle” the blade’s drive in the water. They also have a grace missing from the Euros I think. Additionally, you separate yourself further from the plastic rotomolded riff-raff. You may fly over the waterfall into oblivion, but darned if you don’t look good doing it!

This is actually my 3rd attempt at paddle making. The first was hacked out of a knotty white pine 2×4. It was to be practice and never to see the light of day, but it turned out to be quite functional. Coating the loom (center grab area) with polyurethane (or varnish)was a mistake as the coating promotes blisters. I say hacked, because this was before I read up on the proper tuning of a block plane. I assumed a brand new plane was sharp. I fairly bludgeoned the stick to compliance and had to trim the edges in mahogany to cover major errors.

1st at top. 2nd at bottom.
1st & 2nd up close.

Not too discouraged, I happened to see a nice stud grade spruce 2×4 lying in the rack at the big box home store and snagged it for $1.75. With a sharpened plane, this go was much more to my liking. It is finished with a soup of equal; parts pine tar, mineral spirits and linseed oil. Stinks, but the smell grows on you, and perhaps becomes a part of you. There is a spline of mahogany epoxied on this one. Weight: 2 lbs 10 oz. and straight.

Now to #3: I wanted a nicer and hopefully lighter paddle. I also added an inch to the previous 87″ stick. Strips of 3/4″ x 1 1/2″ western red cedar is laminated with Titebond III waterproof glue to 3/8″ x 1 1/2″ sugar pine to approximate the overall shape at 6 pounds.

round 3 in the rough.

There are some knots I expect to be removed in the shaping process. Paddle is over 6 lbs at this point. Heavy. Glue seems to be super hard and leaving a scrap in a cup of water showed no glue discoloration or softening. Certainly less expensive than epoxy. The drips were scraped and the whole assembly run through my old Ryobi 10″ surfacing planer to 1 7/16″ thickness. At this point it more represents a frat paddle. “thank you sir! may I have another?!” you either know the reference, or you don’t. If not, consider yourself lucky. Now the the real shaping begins.

fraternity paddle
The edges were cut with a Japanese saw. I used a circular saw on the flats. My Workmate portable bench secures things well. Use scraps of wood in the jaws to avoind dinging the paddle itself. Cedar is soft. The hand plane trims the cuts to a fair line.
one edge cut.

 Over 1/2 of the initial blank is trimmed away. Weight now 2# 10 oz. This time I decided to add shoulders at the end of the loom as references or indices when paddling. After a series of planing and sanding (the fairing boards came in real handy), and a final sanding with 220 grit, it looks like so –

# 3 sanded & ready for the “soup”.

At 2 lbs and 10 oz, this third try weighs a whole pound less than #2. I may have to test it out this weekend. The blades are thinner and should slice the water better. The site below notes less turbulence with a more oval cross section than a flat or squarish section. Mine is between the two for quick execution. We’ll see how it compares to #2 which is more “flat”. In the meantime a coat of soup will be applied everyday. I just slop it on with a clean rag, let it soak in for an hour or two, wipe off any drips, and re-coat in 6-8 hours.

For more in-depth on this style of paddles:
www.seacanoe.org/grnpadle.htm

shoulders on #3
3 coats of “soup” and the satin finish is starting to come through. I know of one fellow who has pitched using varnish products and wipes on this mix on his brightwork at the beginning and end of each season. It is thin and it does appear to soak in well. Each successive coat deepens the hand rubbed look.


 Saw THIS this morning. The pain of those blips are starting to melt away. After a few coats of varnish, I expect the exasperation will be gone. I have it on good report from Barry Long that these blemishes will fade as the varnish (not applied yet) and wood darken. I trust he’s correct and welcomed the comment.

Forest for the Trees

While I have fiberglassed pieces and repaired parts of boats in my history, none of that quelled the anxiety of fiberglassing a whole boat for the first time. Nonetheless, to finish requires continuing on. Though Spring hadn’t really sprung, this past Saturday did offer temps in the 60 degree range allowing me to use both quartz and kerosene heaters to reach 75+ degrees in the garage.The glassing process sounds simple: have your tools ready (chip brush, stirring sticks, paper mixing cups, foam “hot dog” roller, squeegee, etc.), lay out the glass, smooth it with a soft brush, mix epoxy, pour that onto the boat, and distribute the goo by brush and squeegee. After all the build up, it was time to take the plunge. So, we began on the deck. I had decided a horizontal surface was perhaps the best way to begin. I worked the epoxy around the cockpit and had perhaps 1/3 of the deck surface wetted out before stepping back for a peak.  At 1st glimpse I was happy with the results. I still nervous about the epoxy pot life and having a wet edge to continue with, but the glass was translucent, brush hairs had been captured, and there were no white areas from too little epoxy. None of this concern was really necessary as the Raka material is very patient, and at the temps I was working with, it allowed for plenty finessing. The whole operation was going well. I even began to relax, when to my horror, I saw a faint color difference where I had previously patched nail holes. Had the epoxy not soaked in there? No, I apparently hadn’t sanded the residual epoxy entirely off the boat when filling those holes. As a result there was a slight barrier preventing the fresh epoxy from fully soaking in. I can’t tell you how bummed I was (and still am to some extent). After all the prep and what I thought to be conscientious studying, I had this disappointment. The thought of pulling off the glass and trying to remove the epoxy proved too daunting so, I elected to continue on, all the while kicking myself. I even debated on not posting this report. Strategic photos could hide the screw up. My middle son was quick to say it is hardly noticeable. I don’t know. I see it, and to know it didn’t have to be really irks me, especially after I tried both water and mineral spirits on several of these areas to satisfy myself that the filling could stay as is. Well, bad analysis there. It is done. No structural flaws and the remaining 2 fill coats worked fine. The 3 epoxy coats were separated by 8 hrs hardening time or at least until no longer tacky so that the coats will bond to each other without sanding.On with the show. Here are the photos.

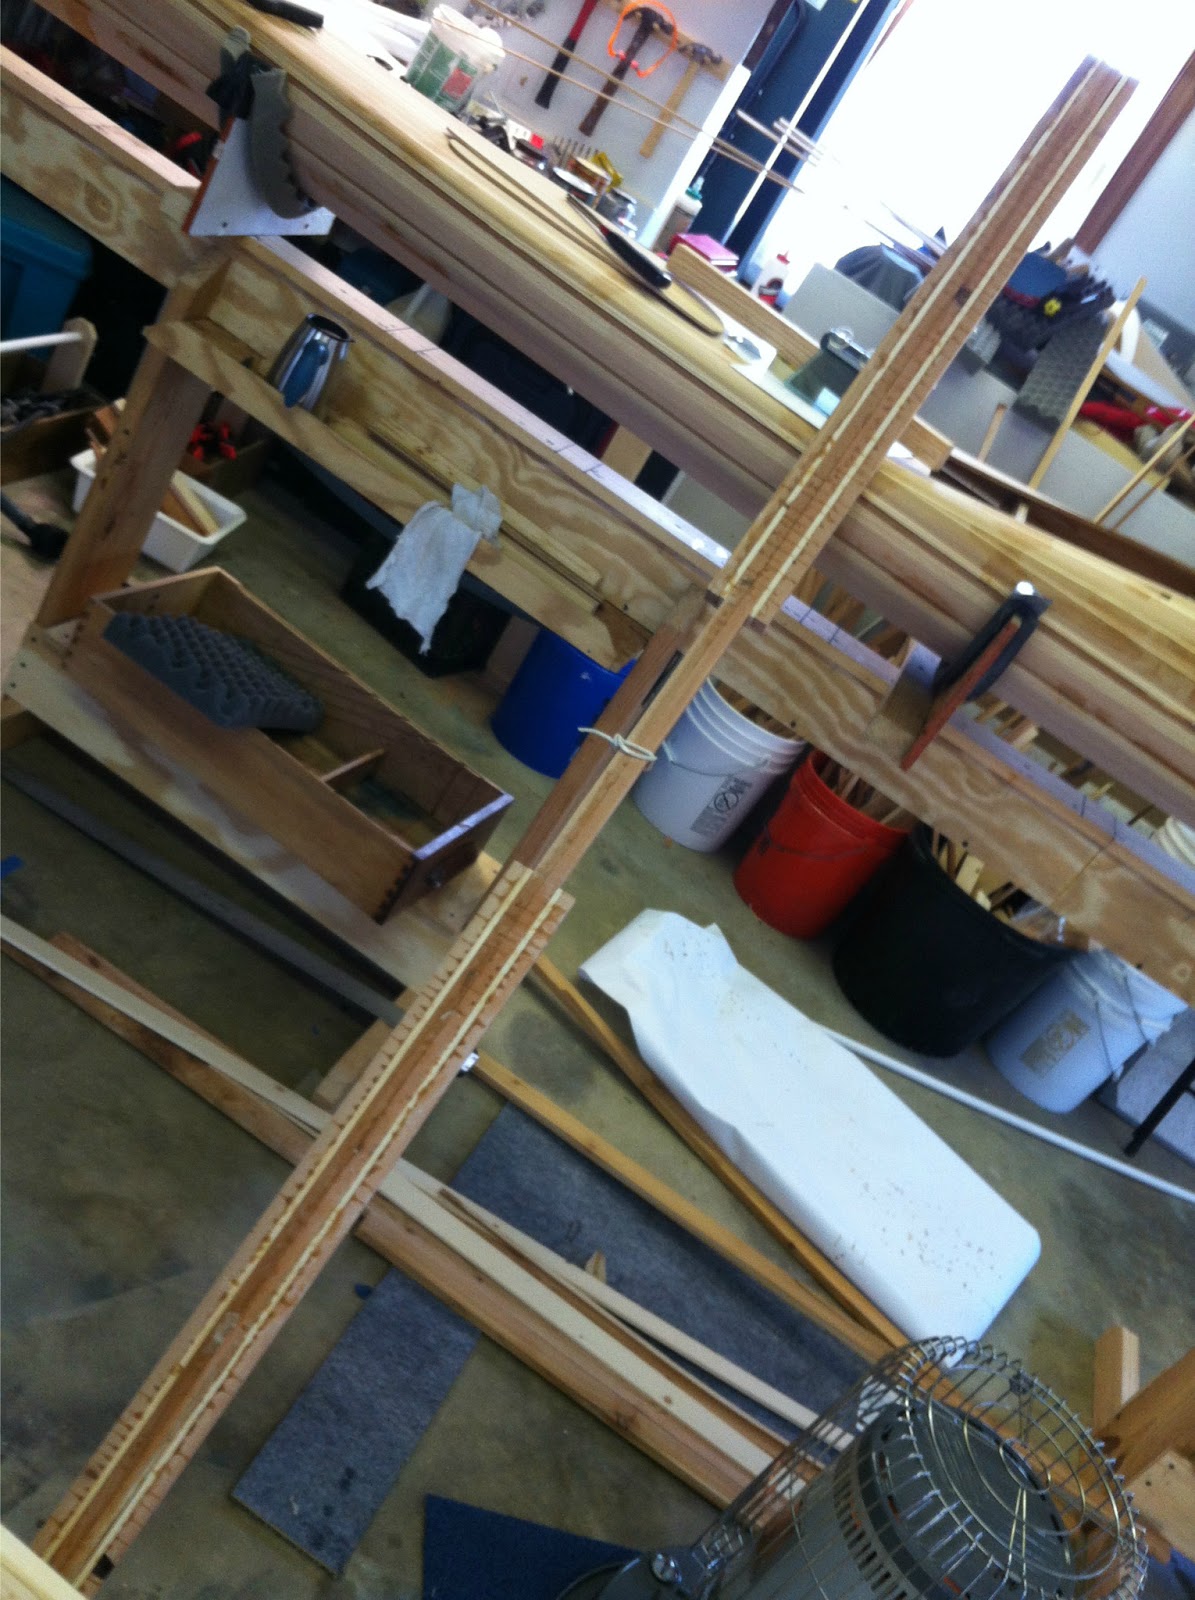
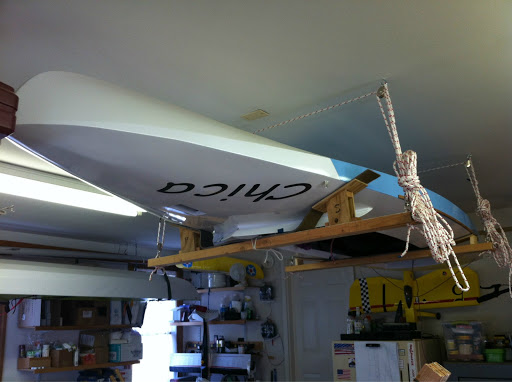
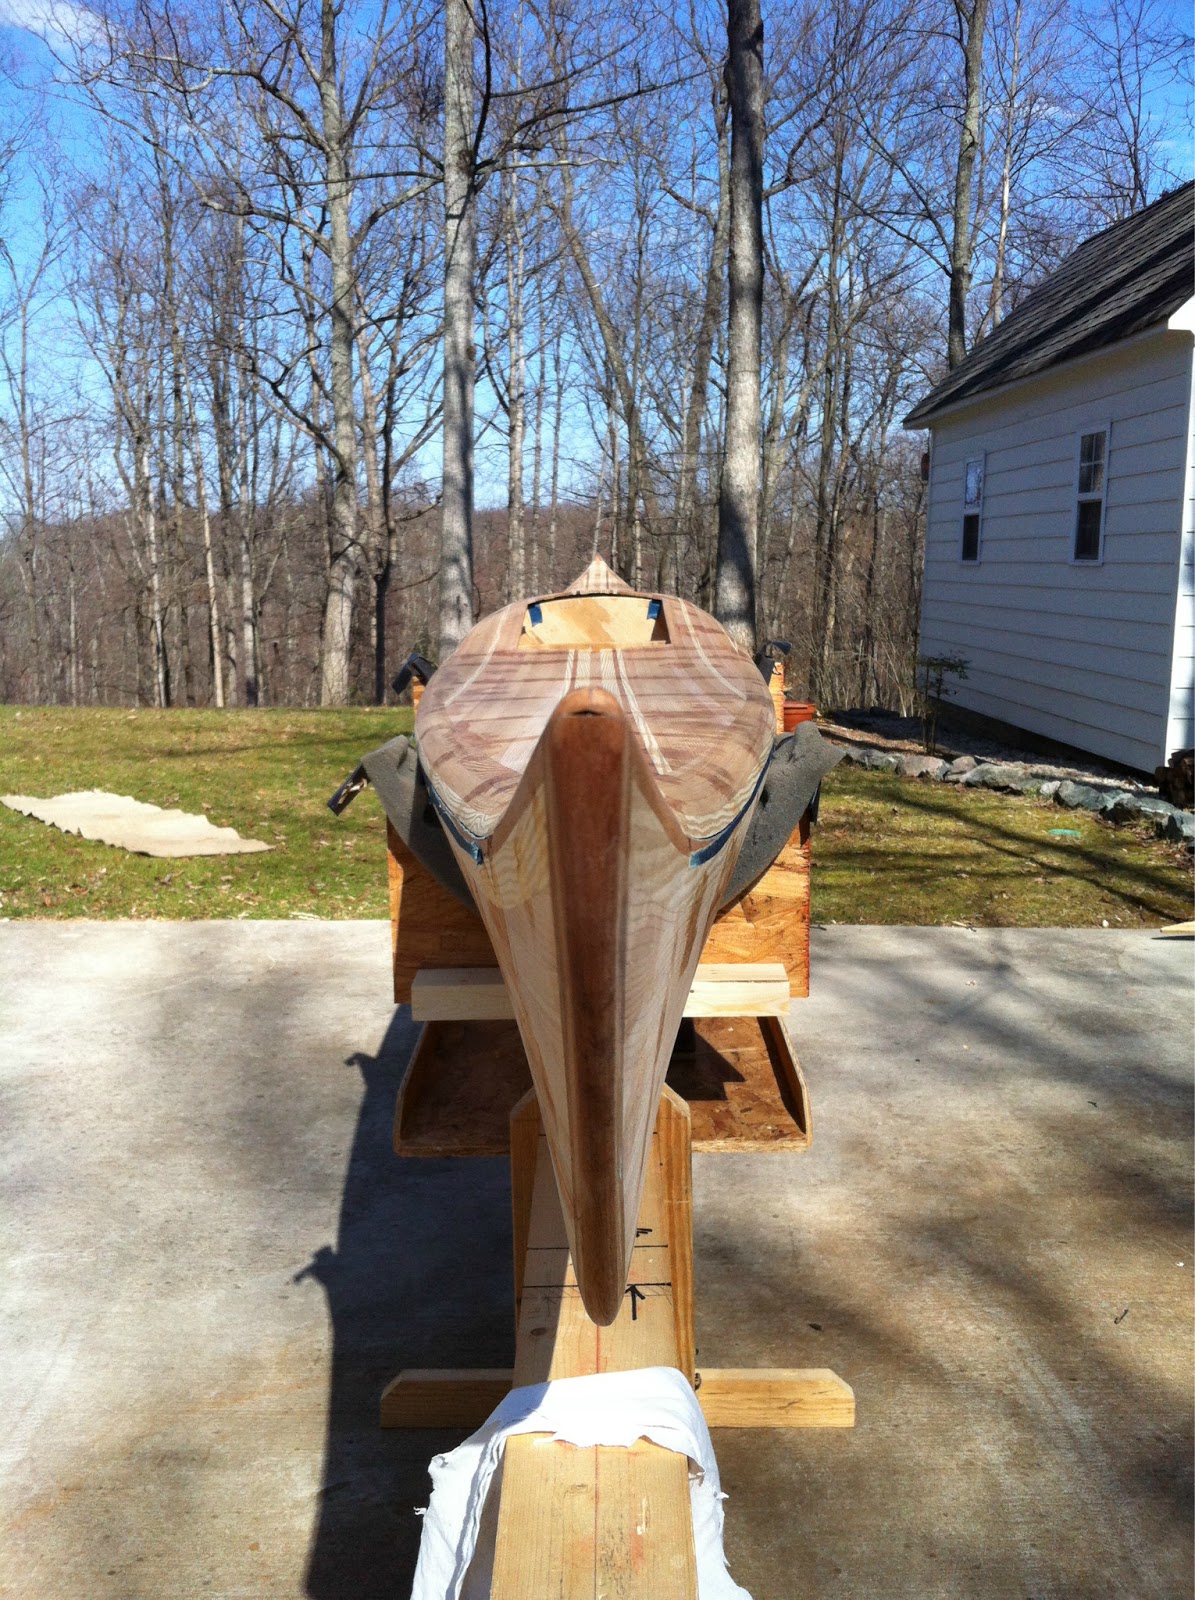
Chica was hauled to the heavens for more ground.

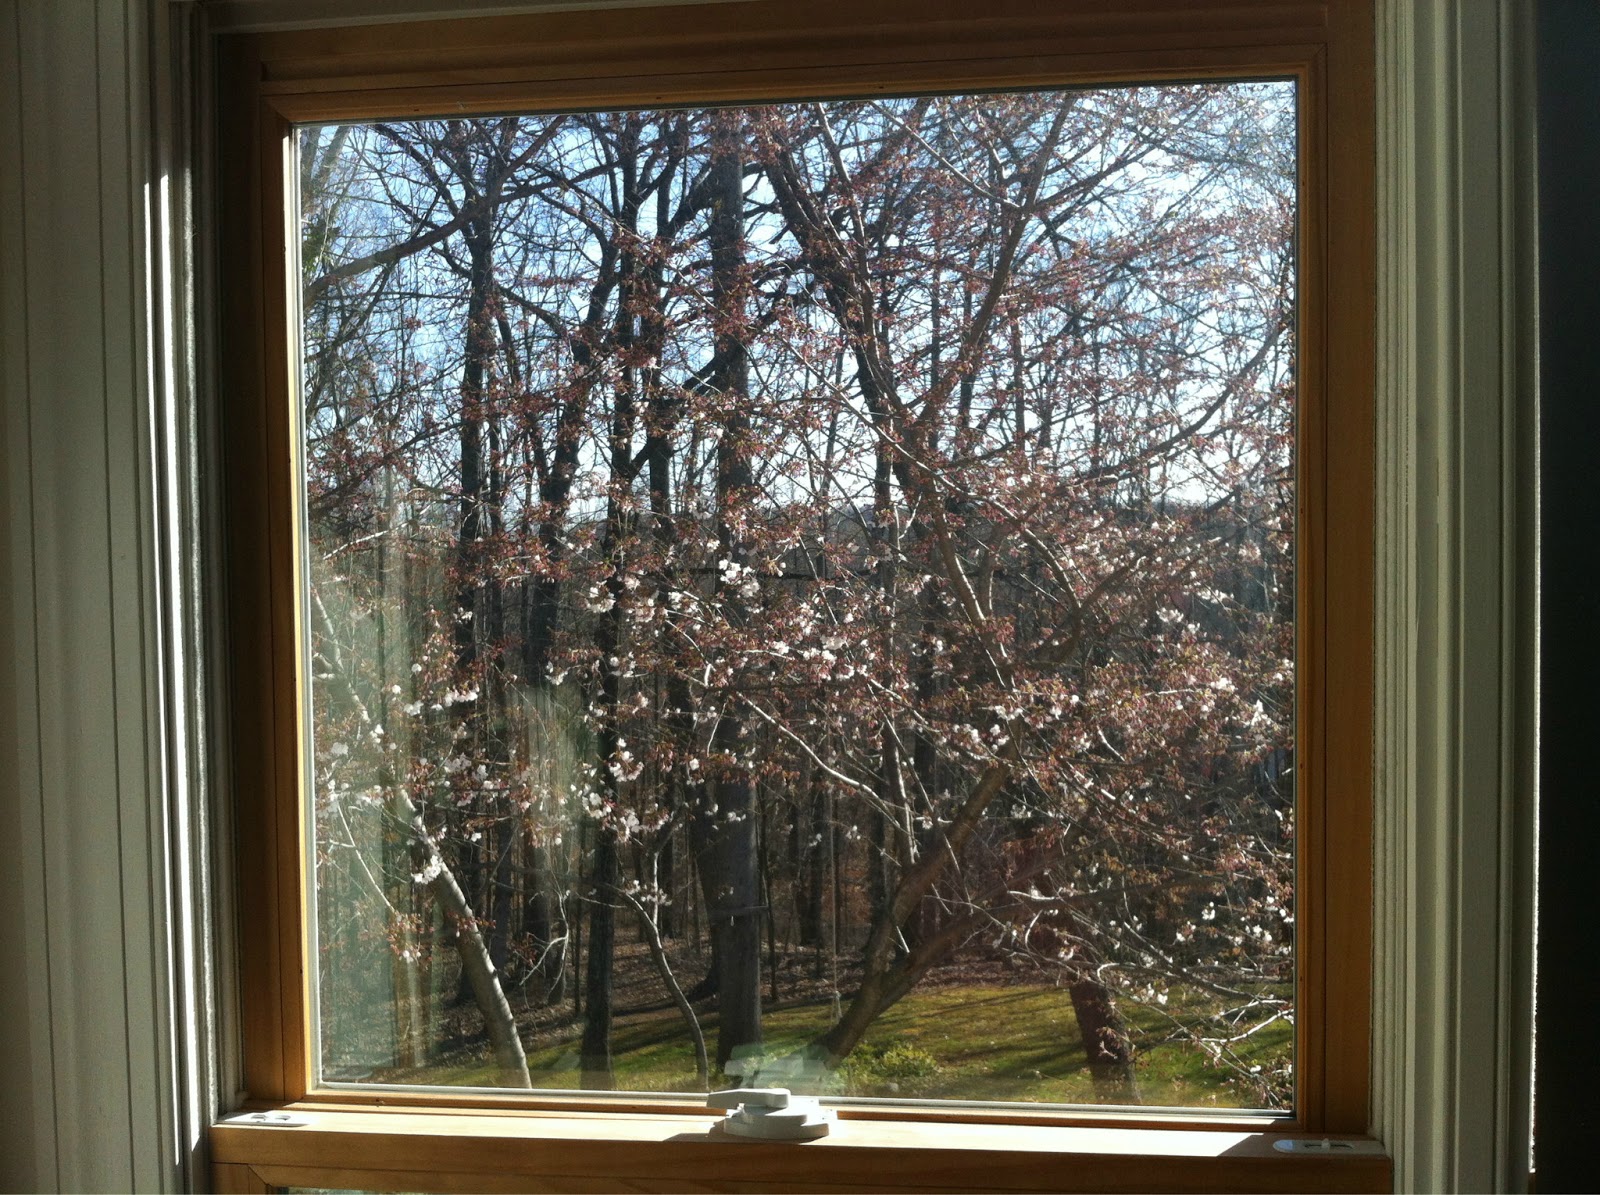
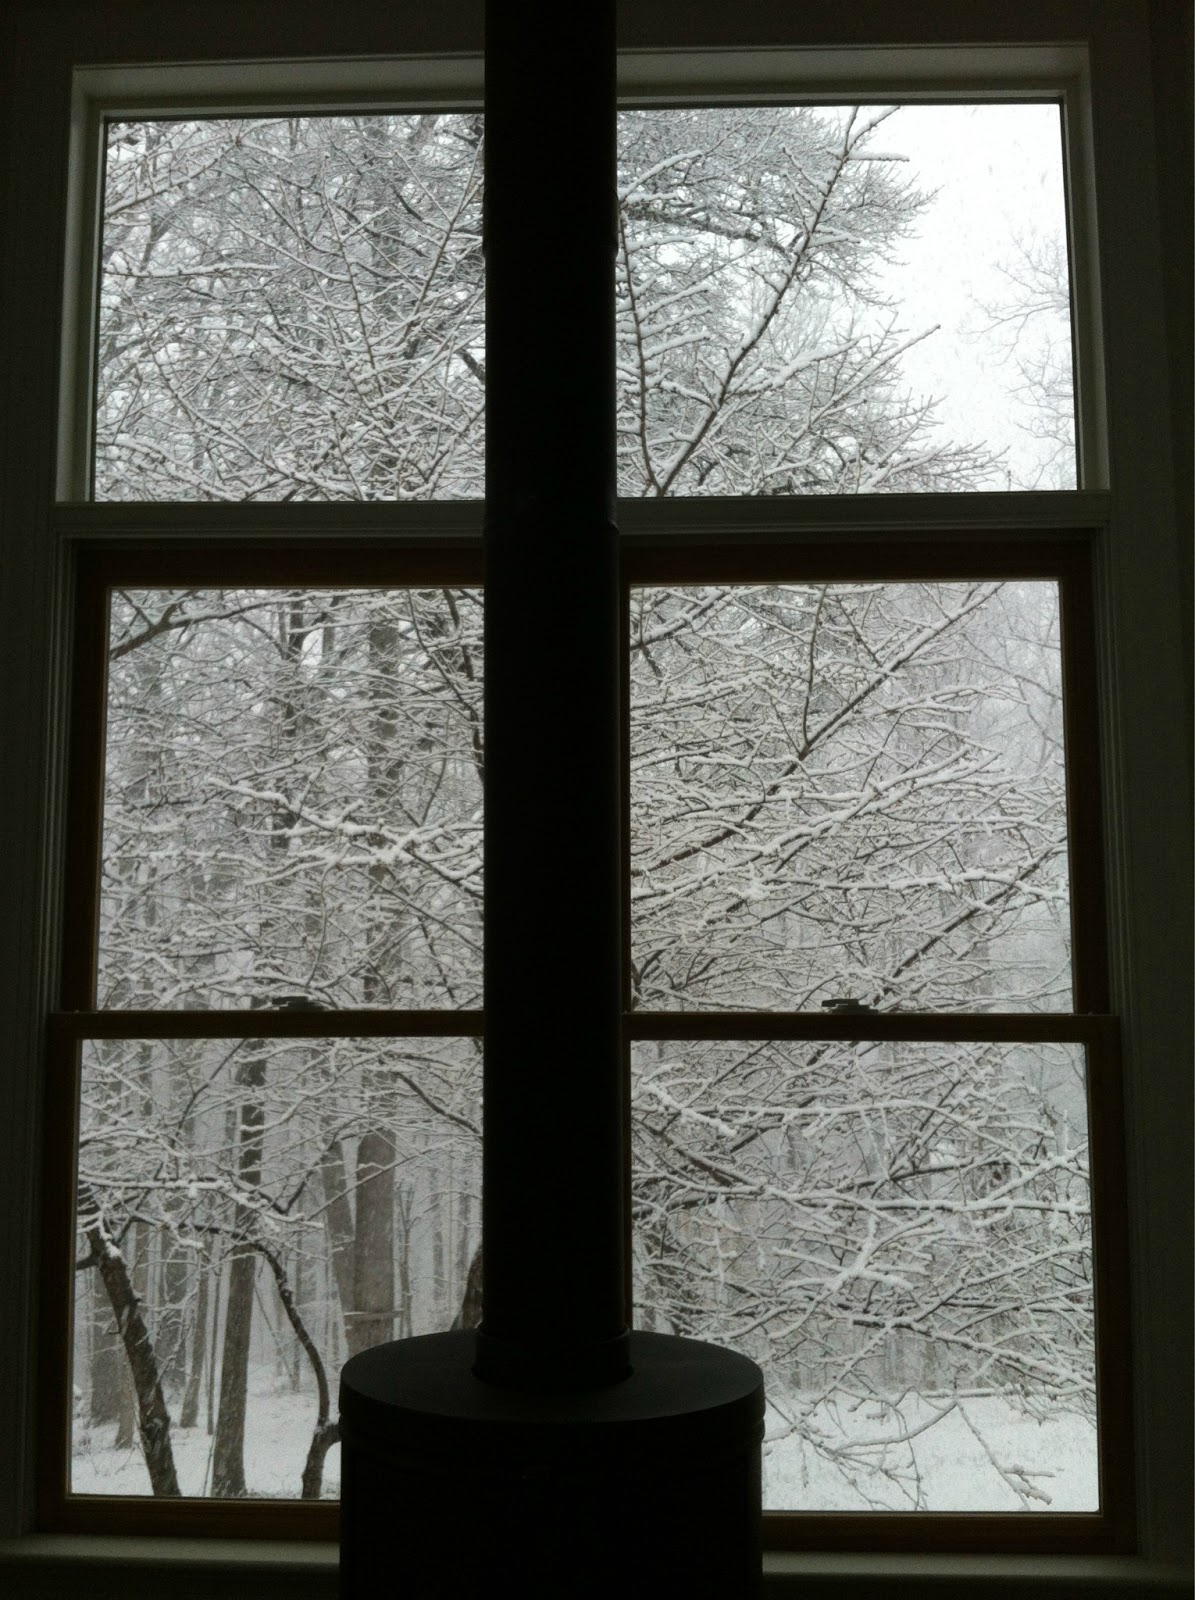
A warmer day, but not warm enough.

12k btu kerosene heater pushes some heat.

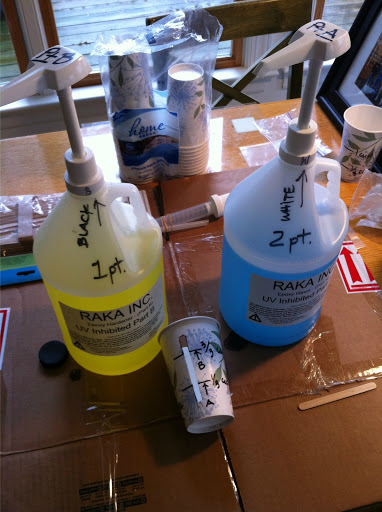
Raka’s UV epoxy here. I wanted to make darn sure the pumps stayed with their proper bottles. Also shown is the 12 oz. paper measuring cup for metering the juice. Not my idea, but I don’t recall who to give credit. I worked with 1 cup mixes. Perfect really. After marking 1/3 cup intervals on one cup, it was placed inside another with a window and marks were transferred. Though pumps seemed accurate, this prevents you from forgetting the count.

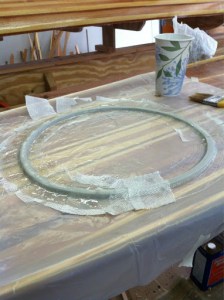
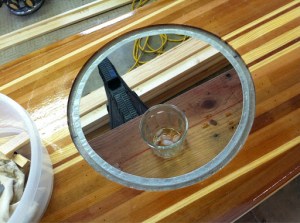
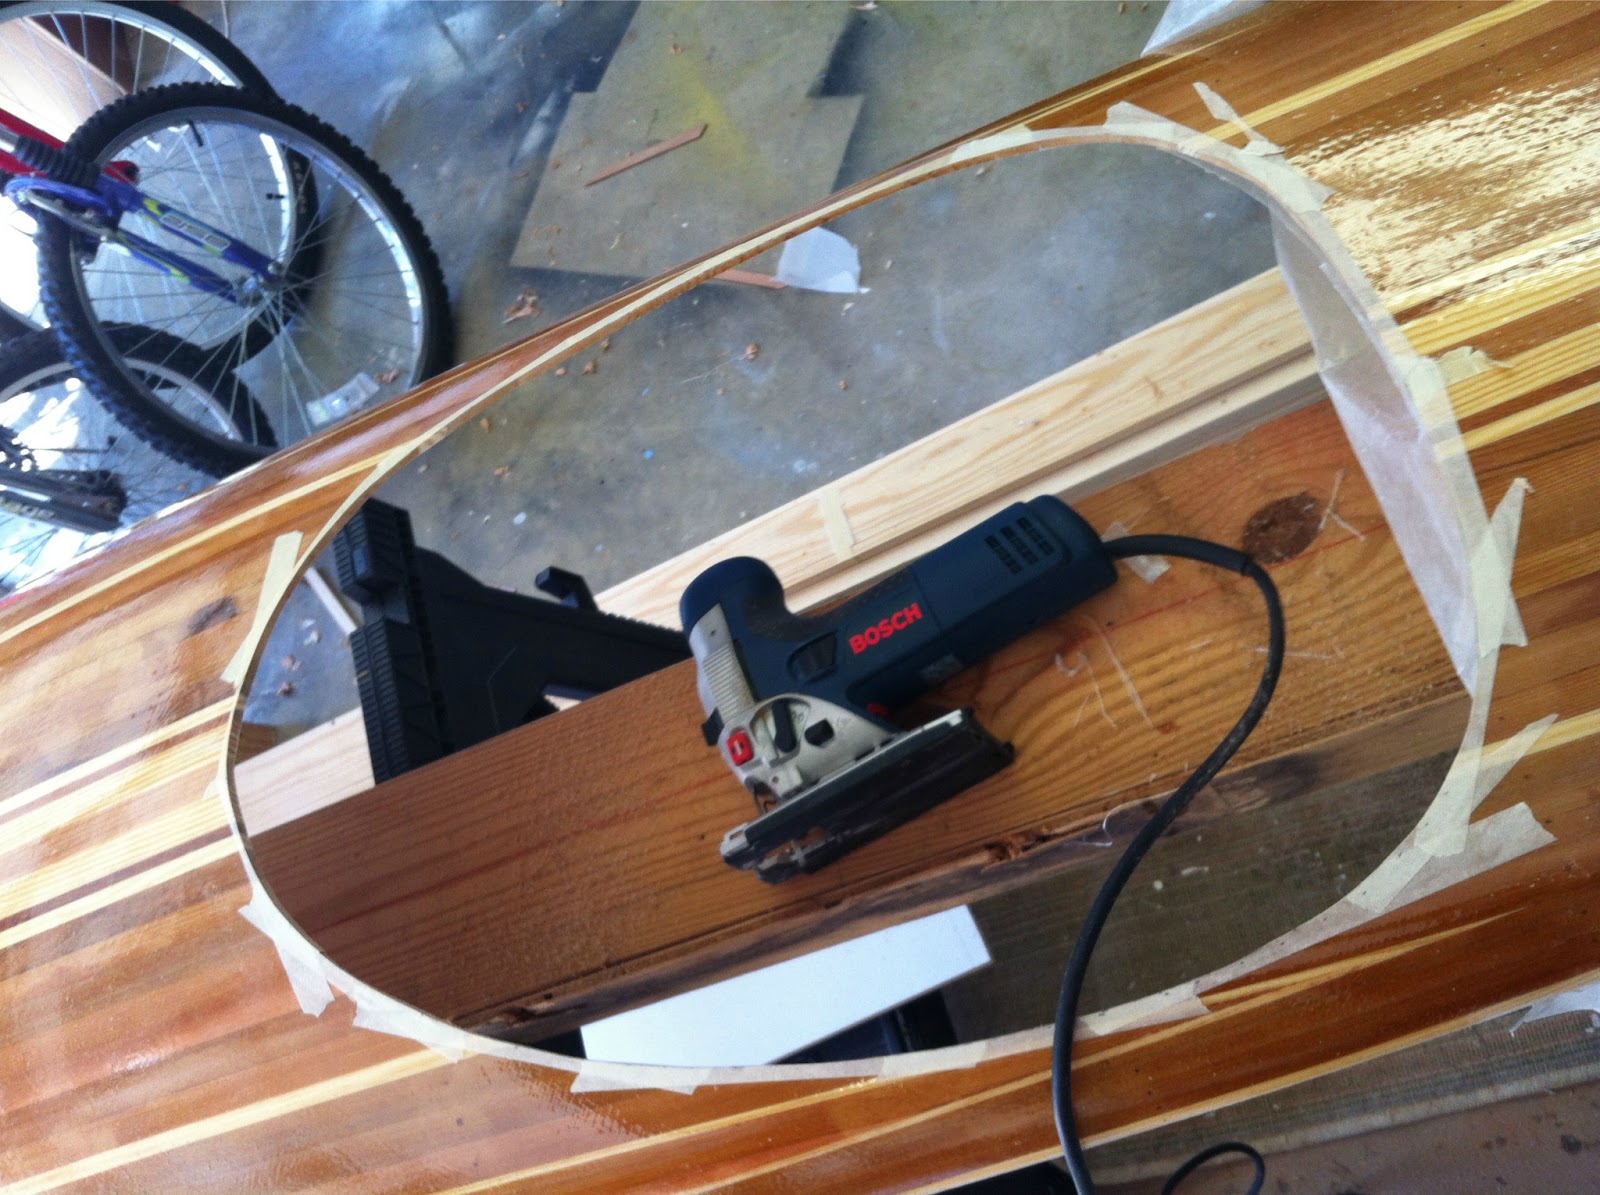
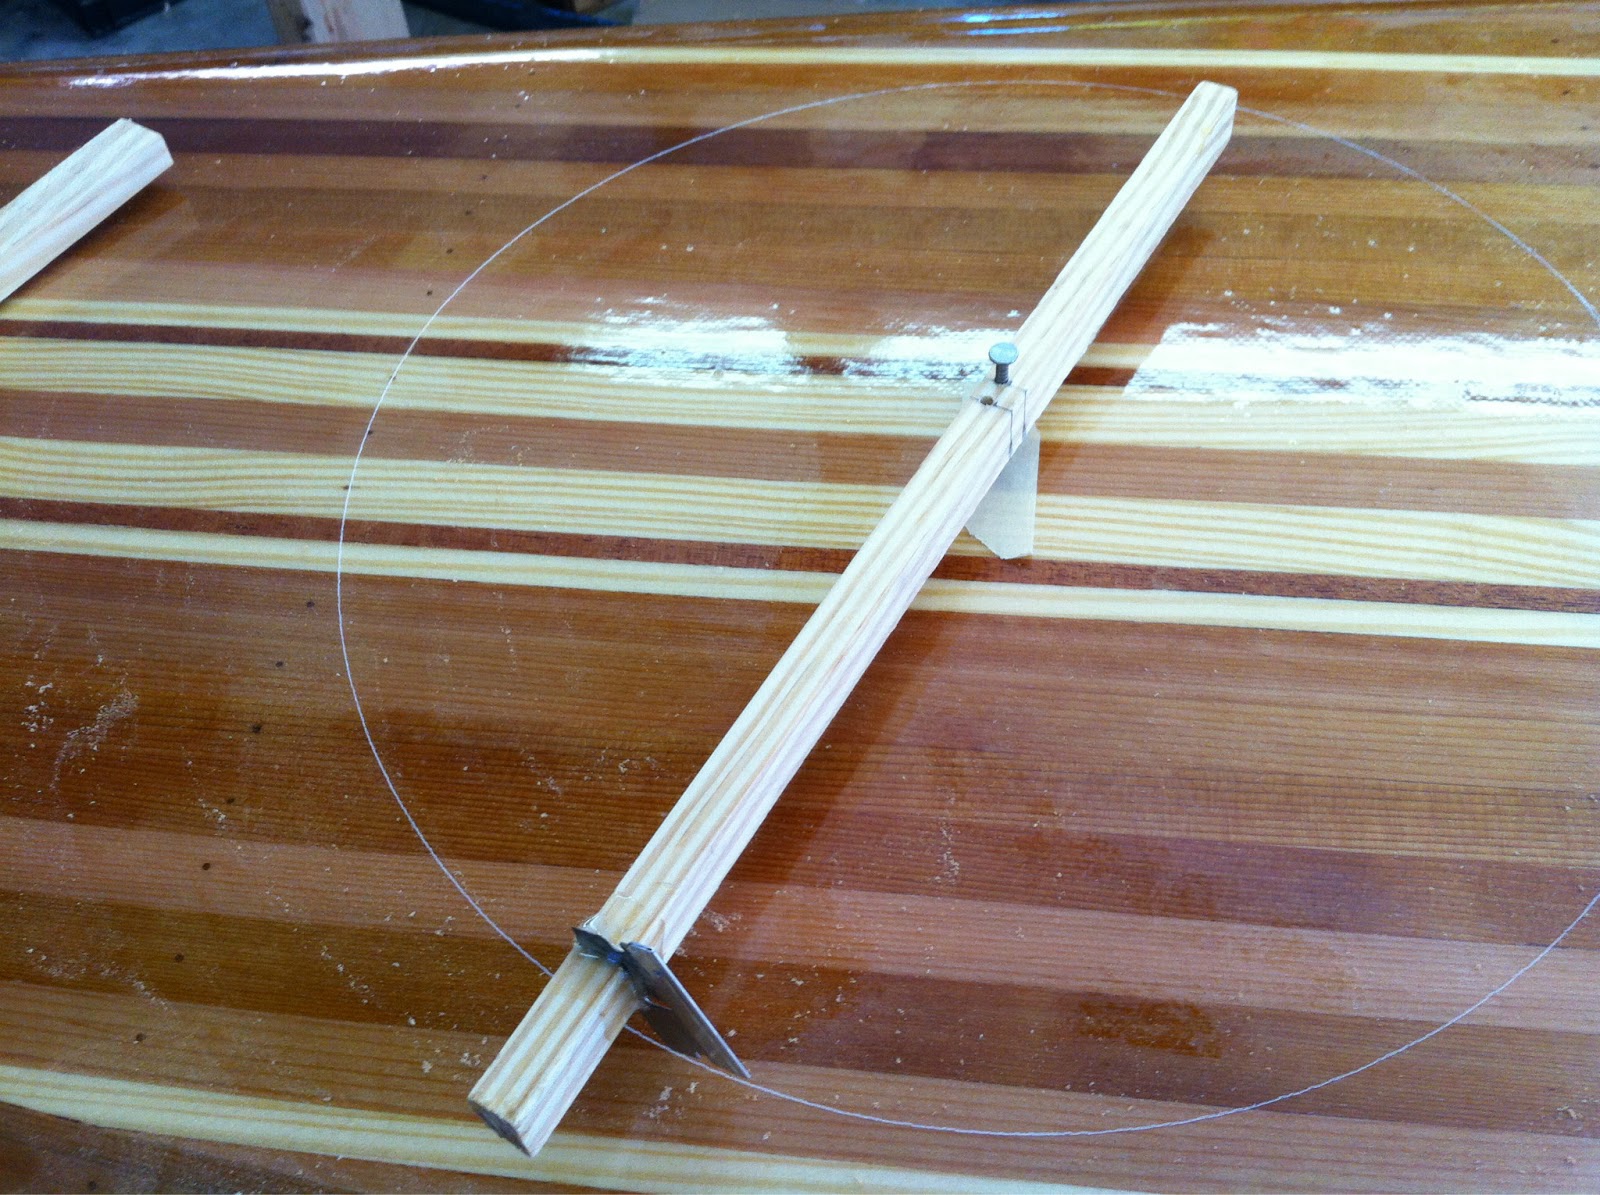
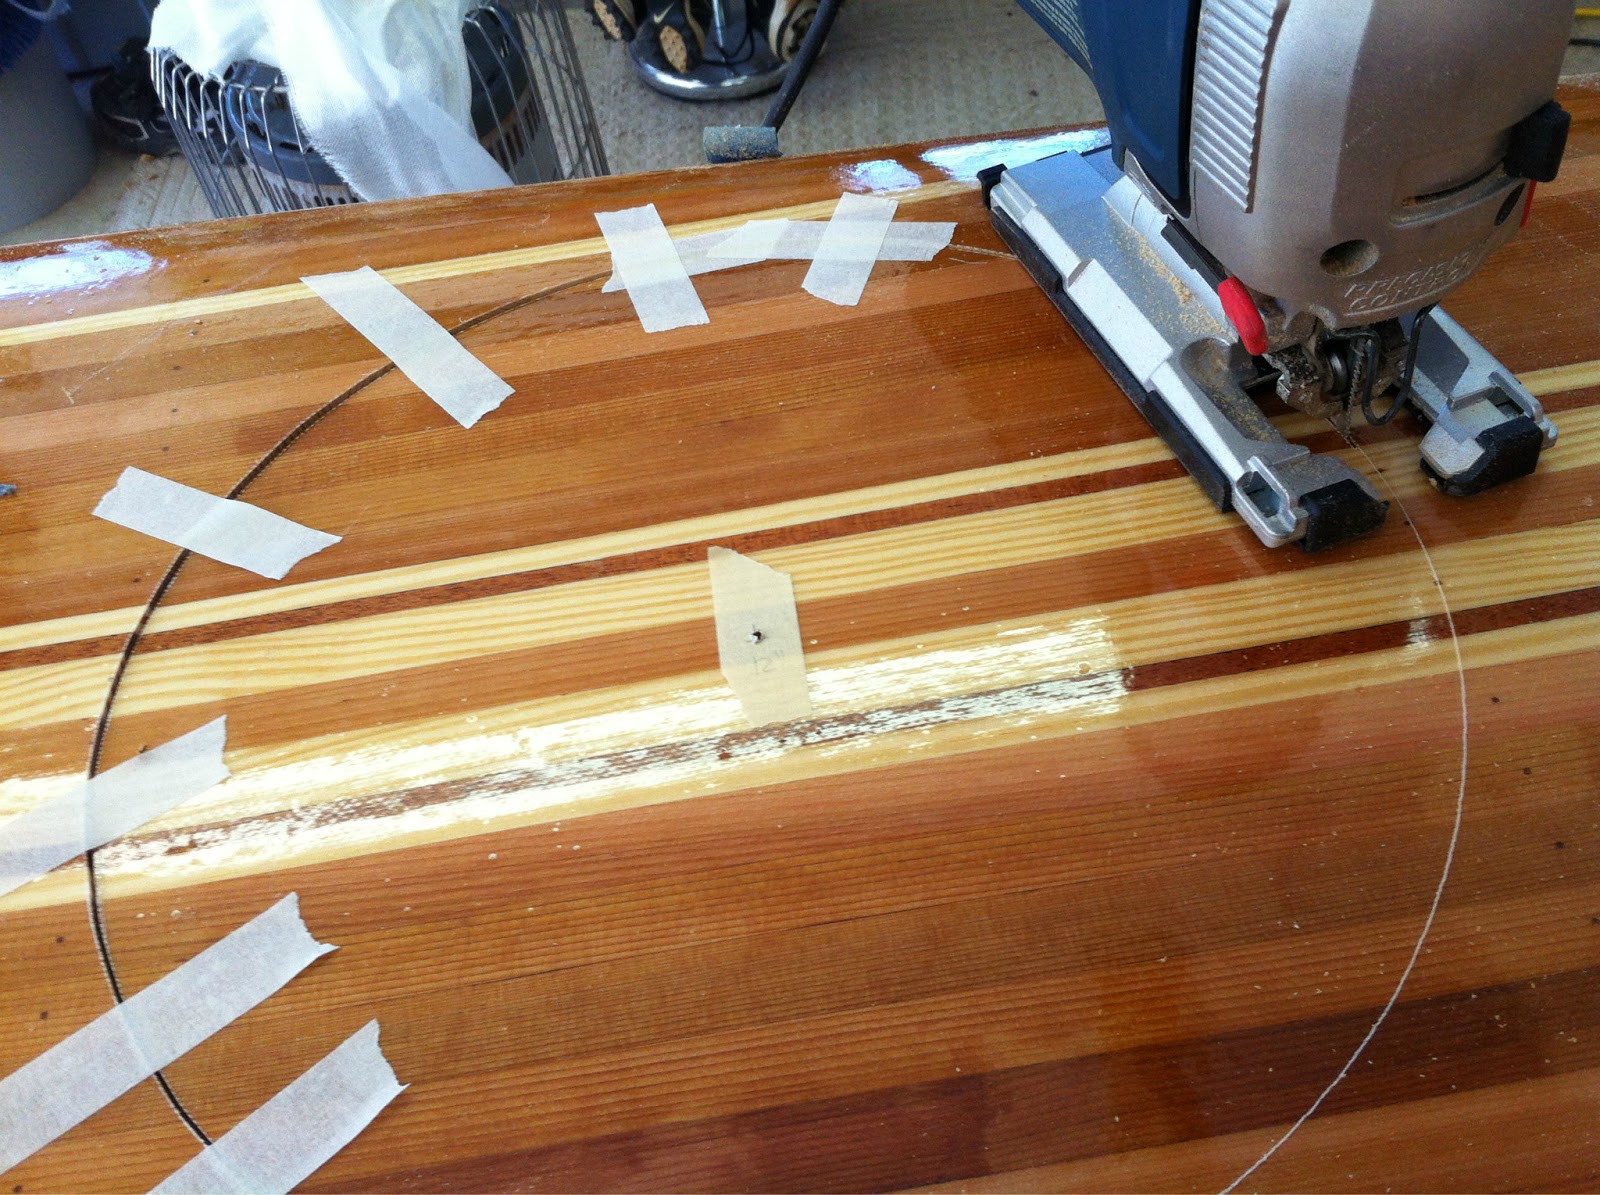
A template of the cockpit’s inside curve marked the limits of glassing required.

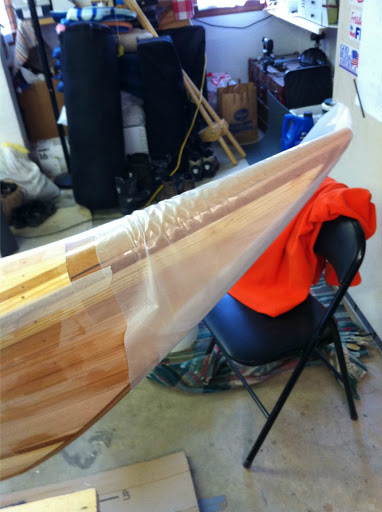
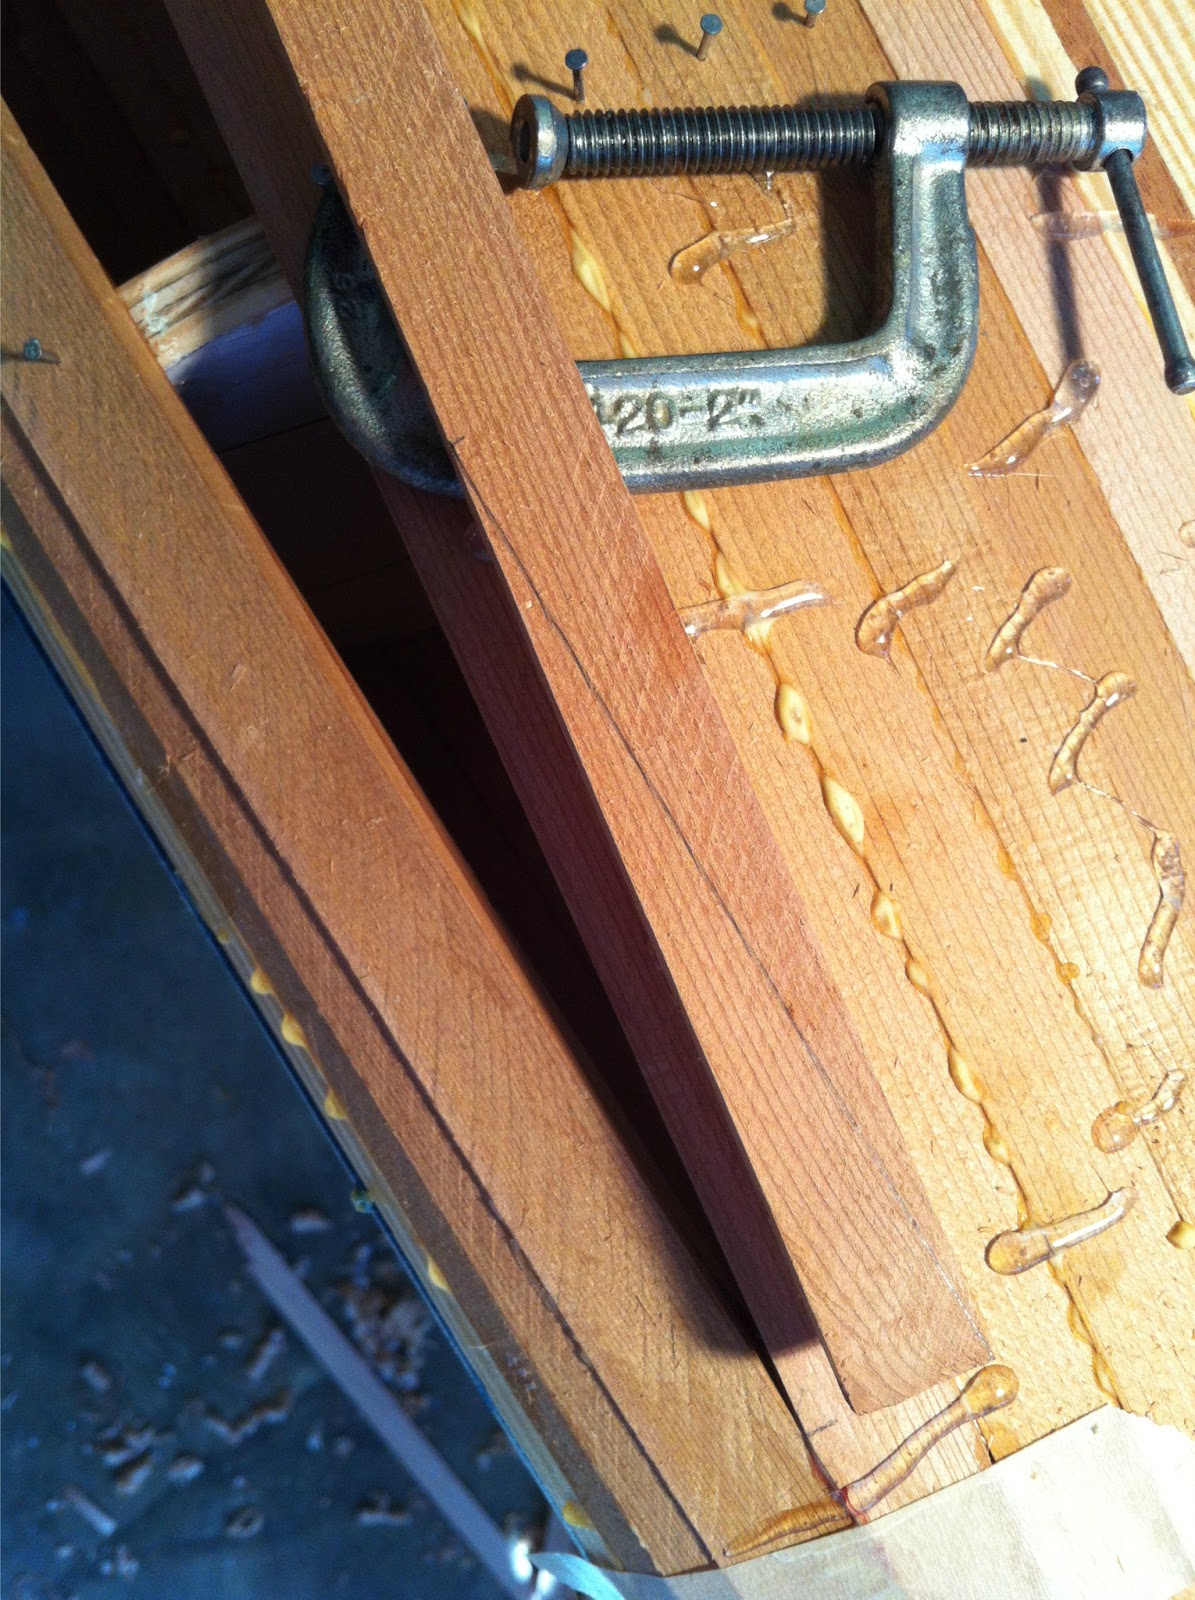
I covered the stem ends from epoxy. These are already glued to the hull.

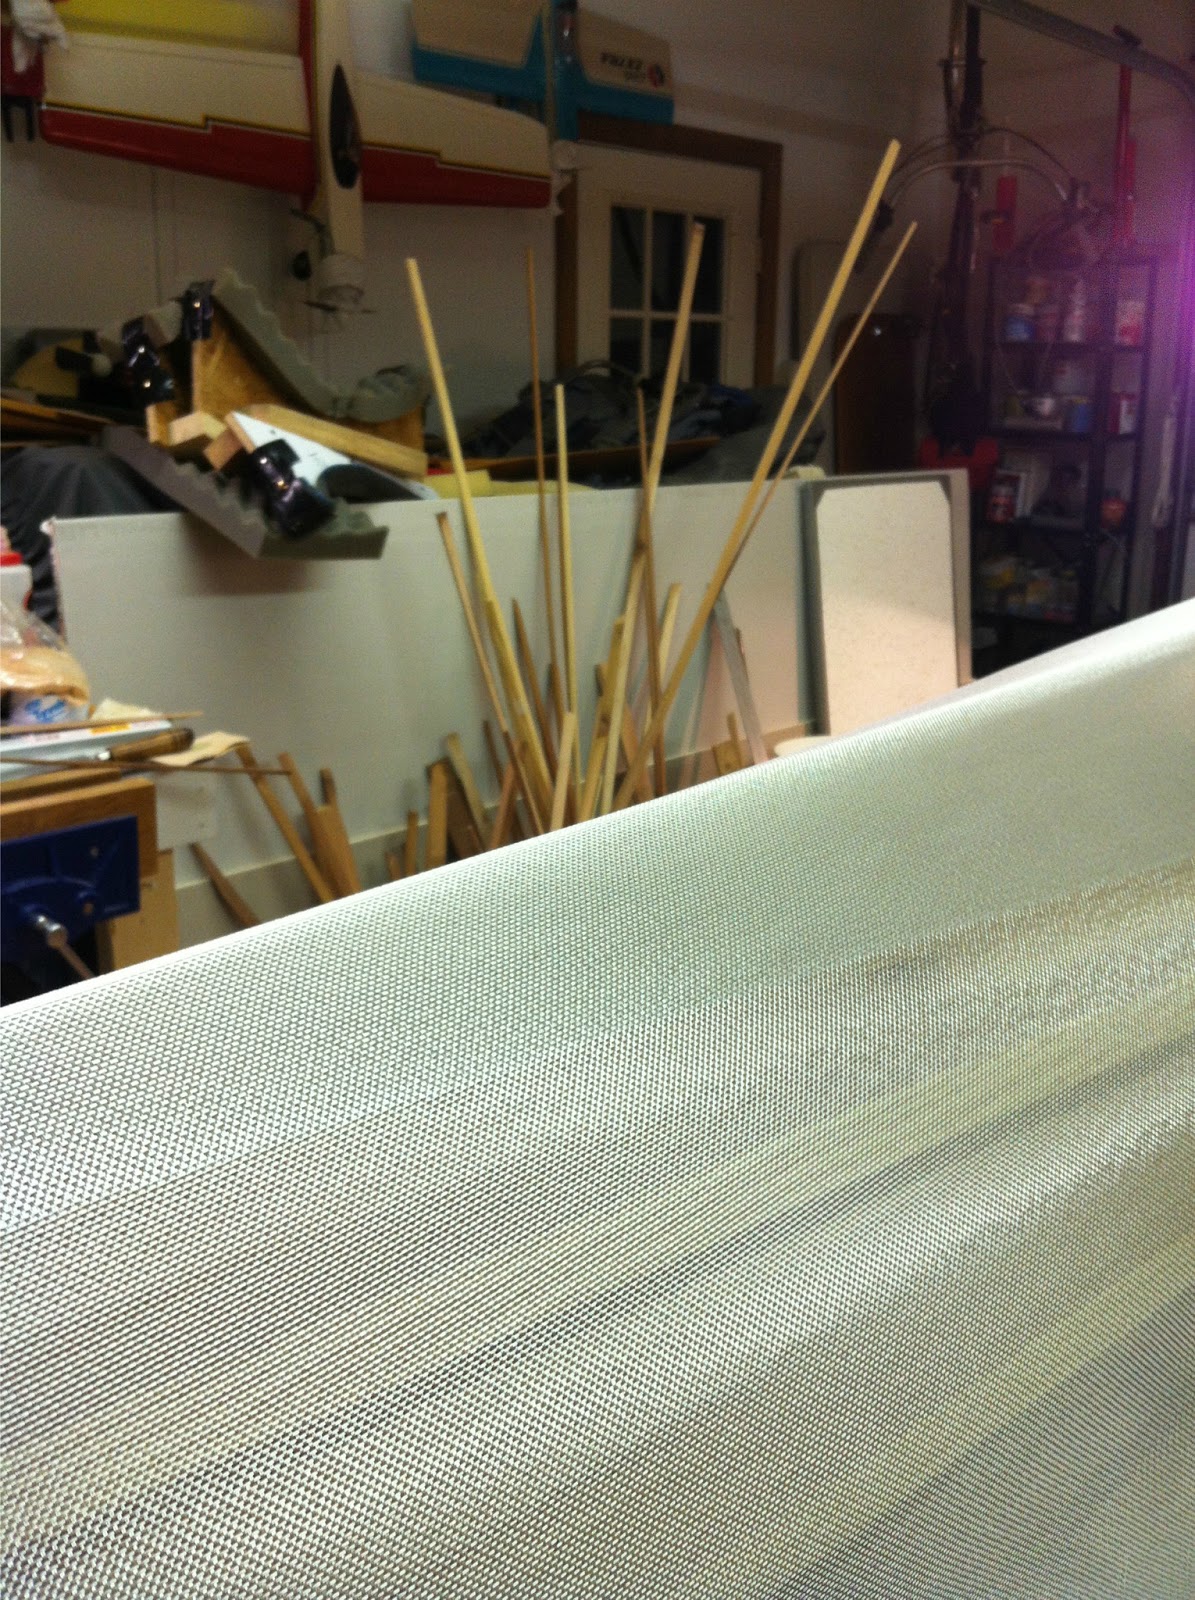
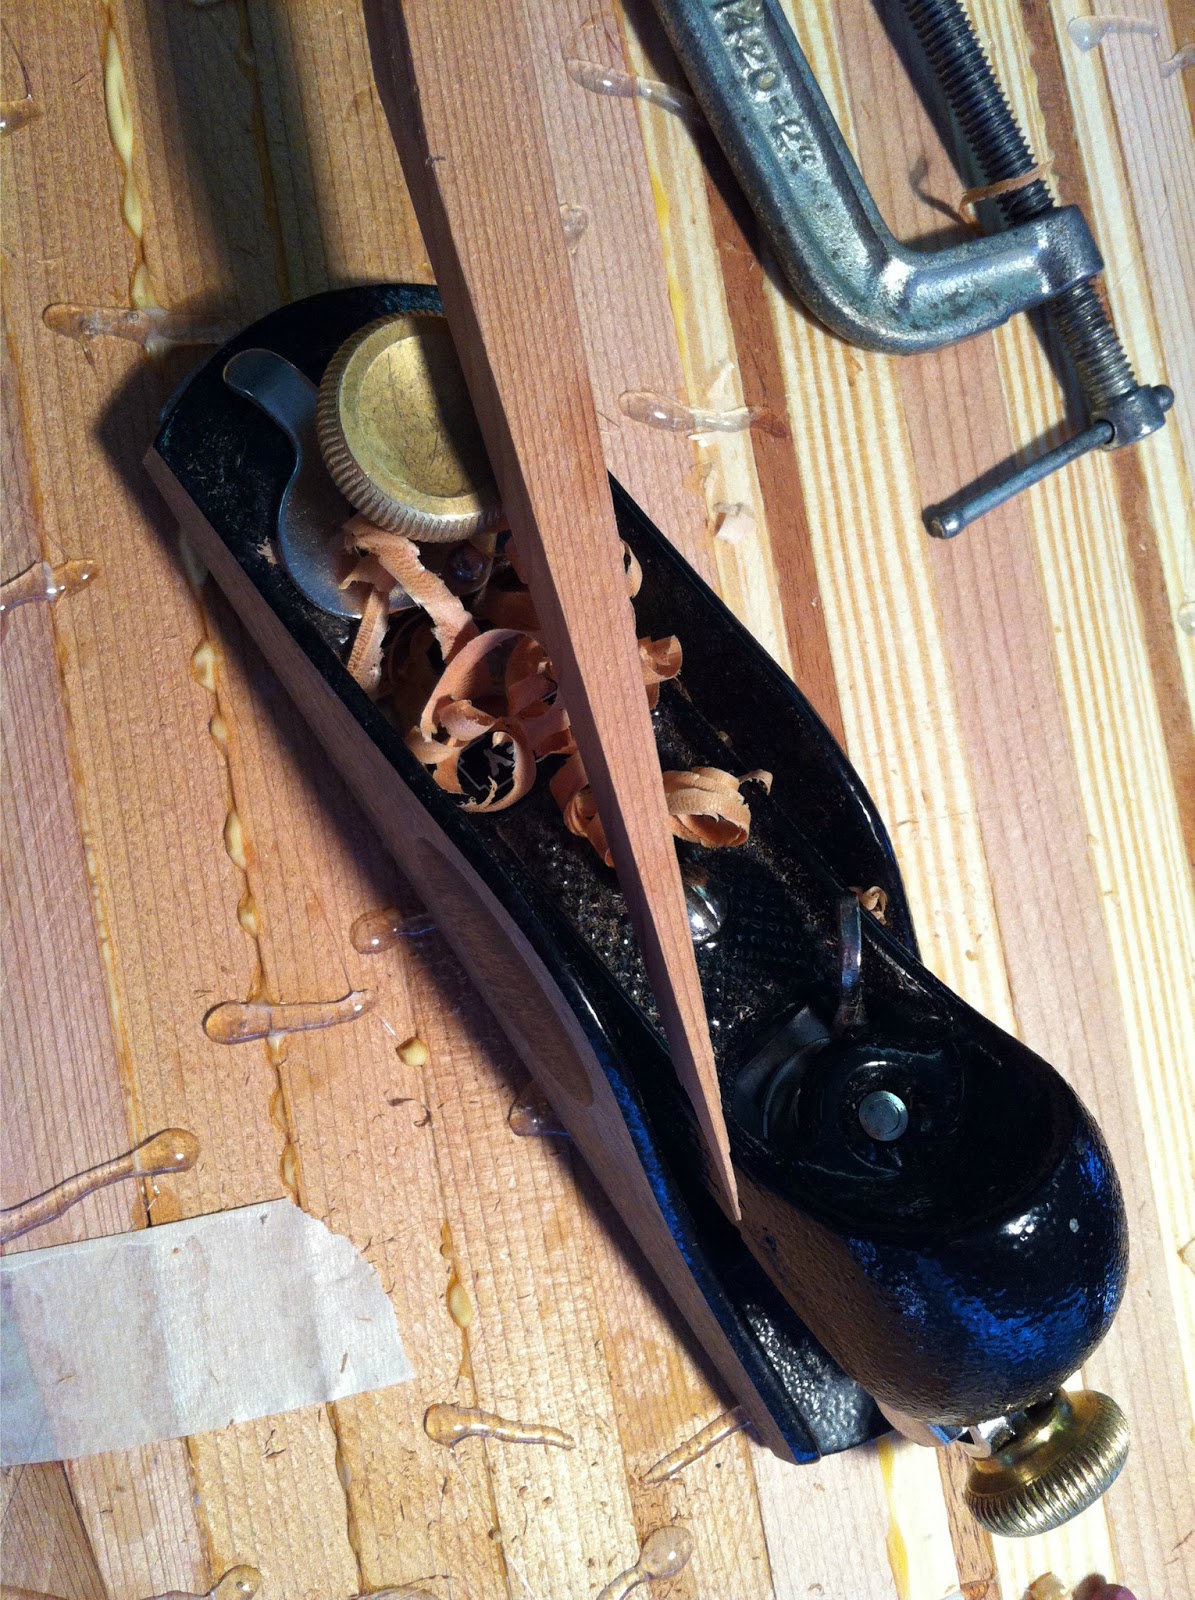
A chip brush smooths the cloth without snags and avoids oil from handling.

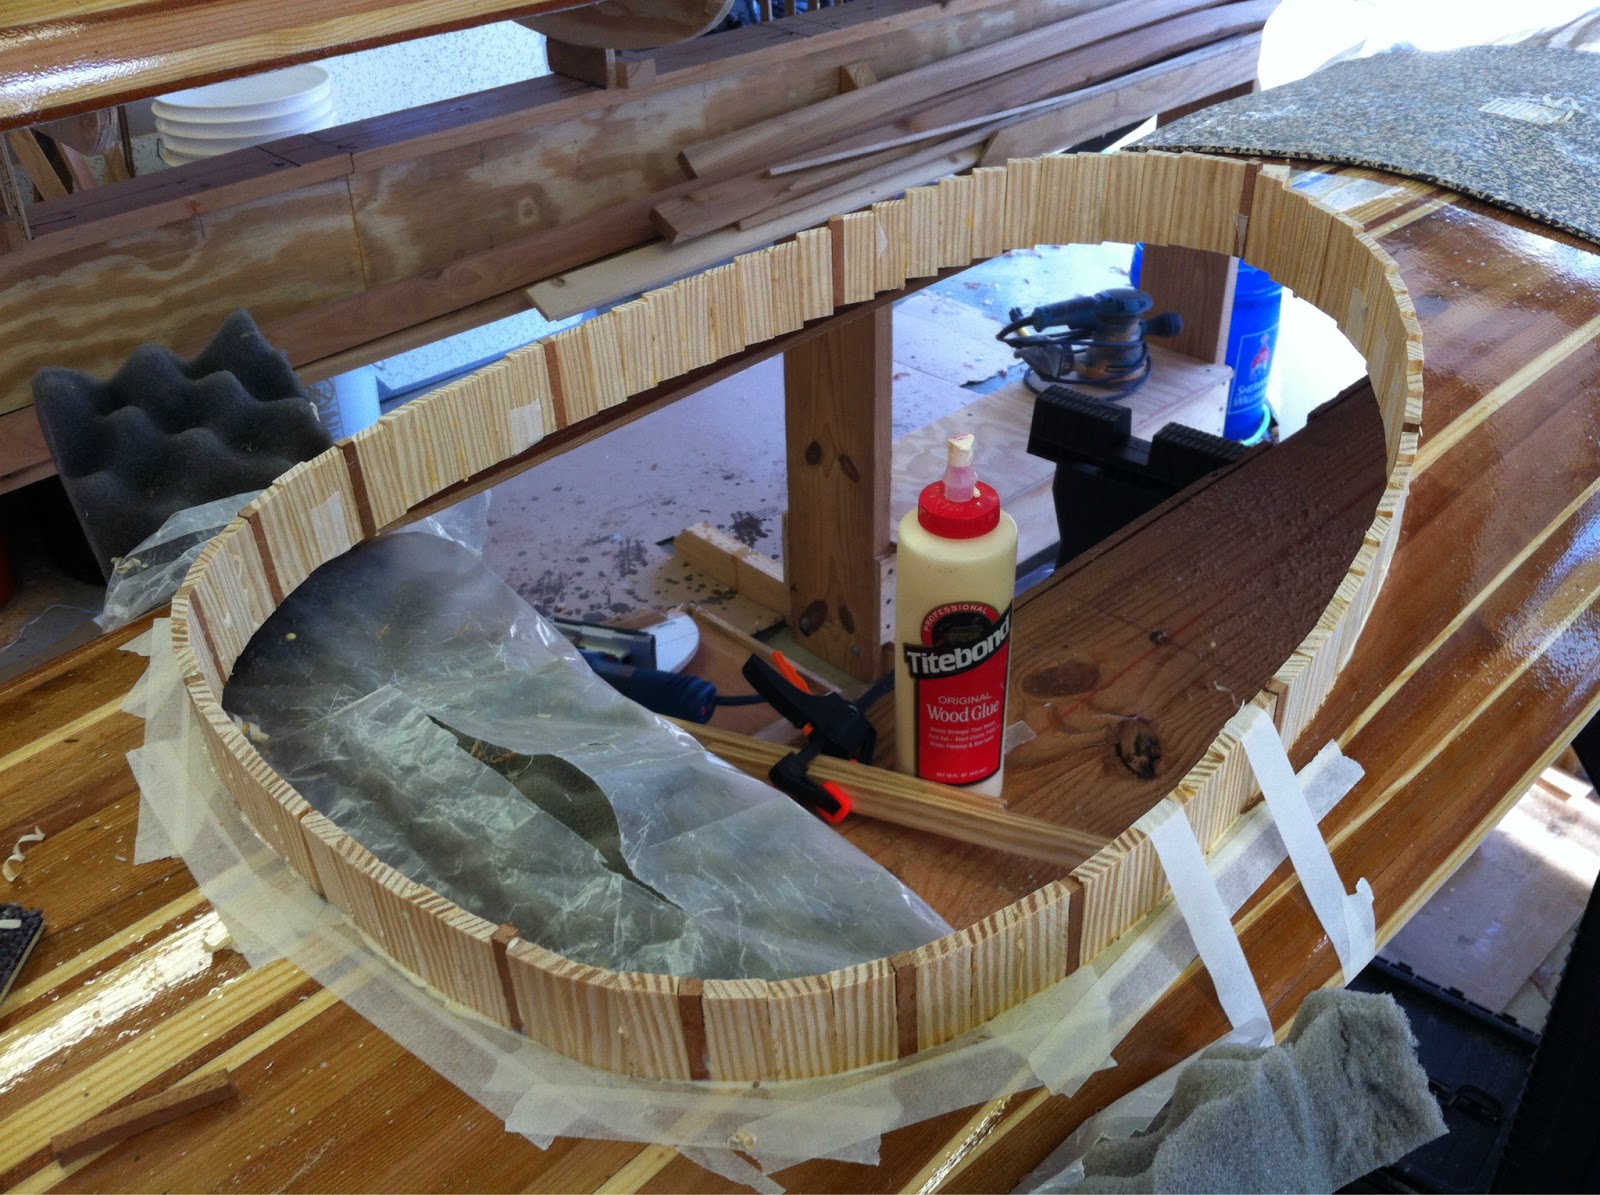
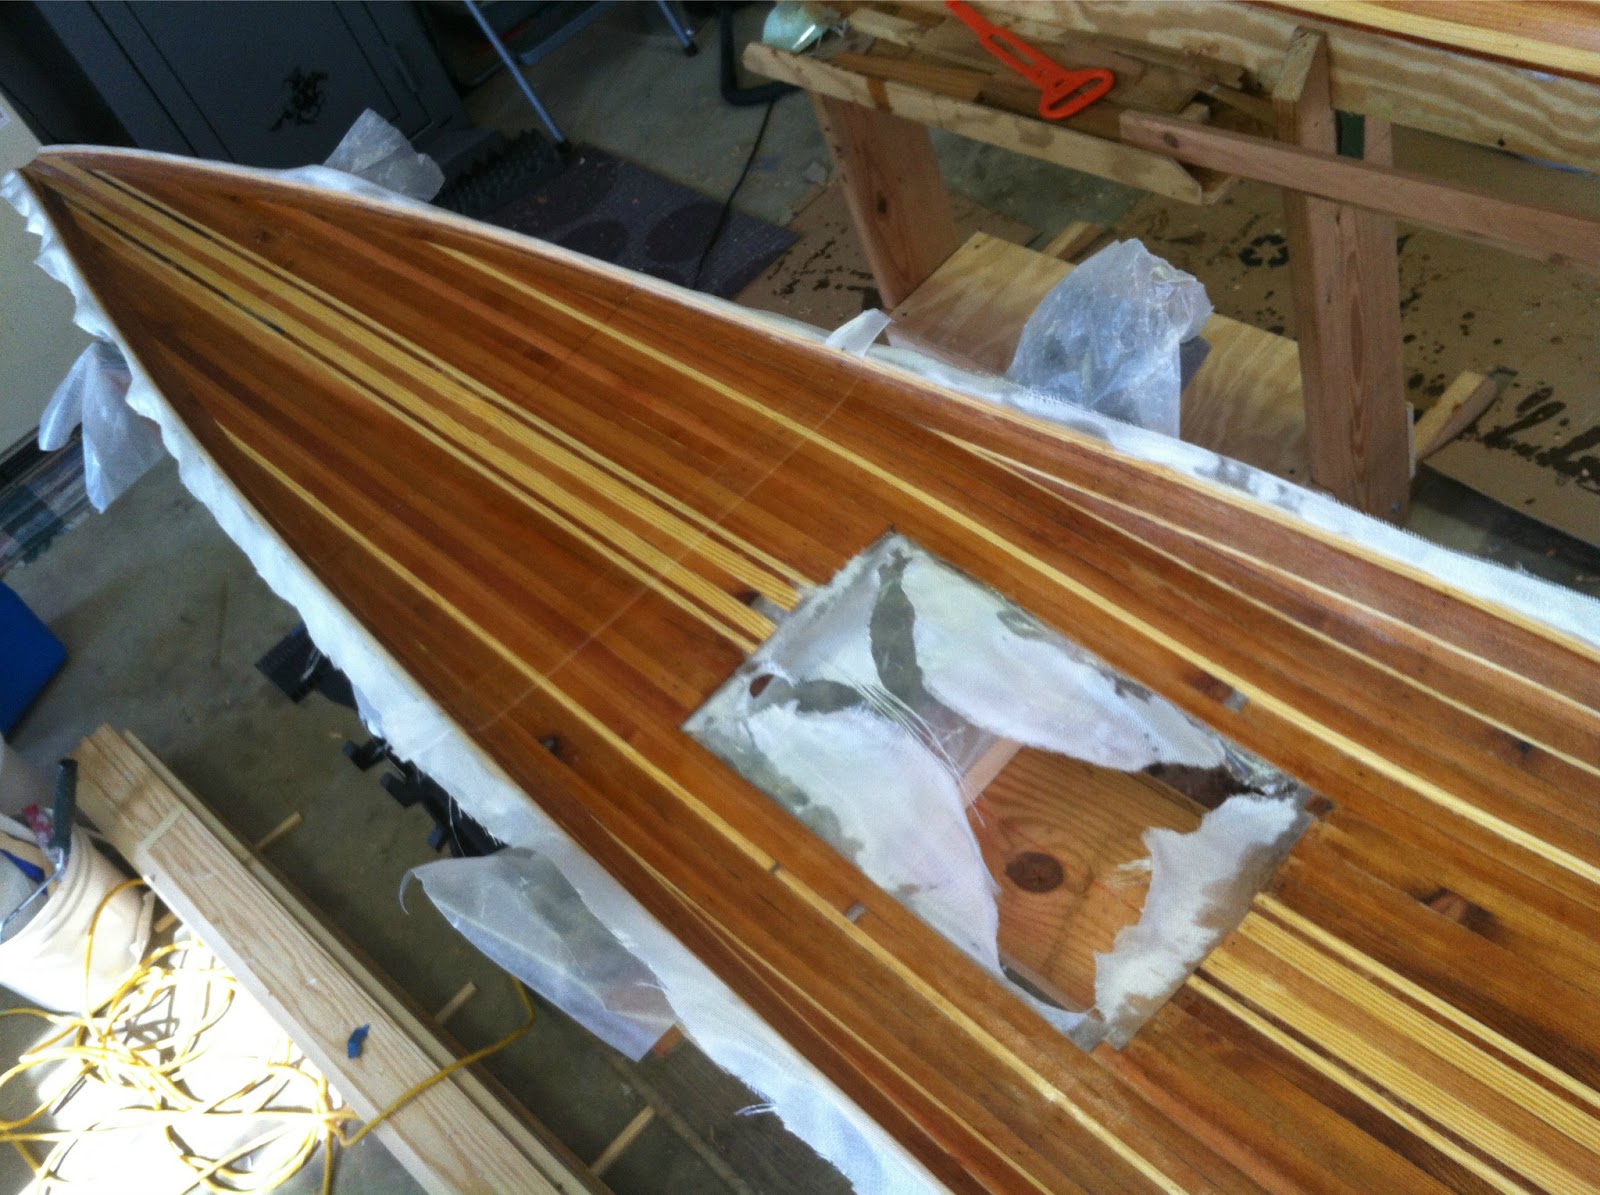
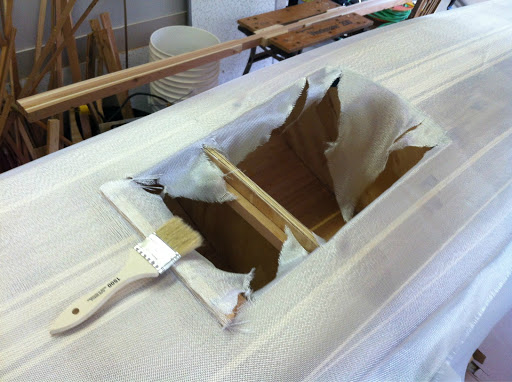
Cockpit opening is cut for better lying of the glass. I did have to cleat the aft of the opening as it had released from the mould there.


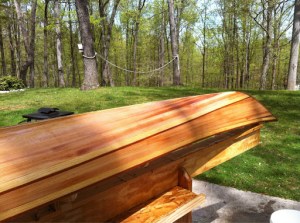
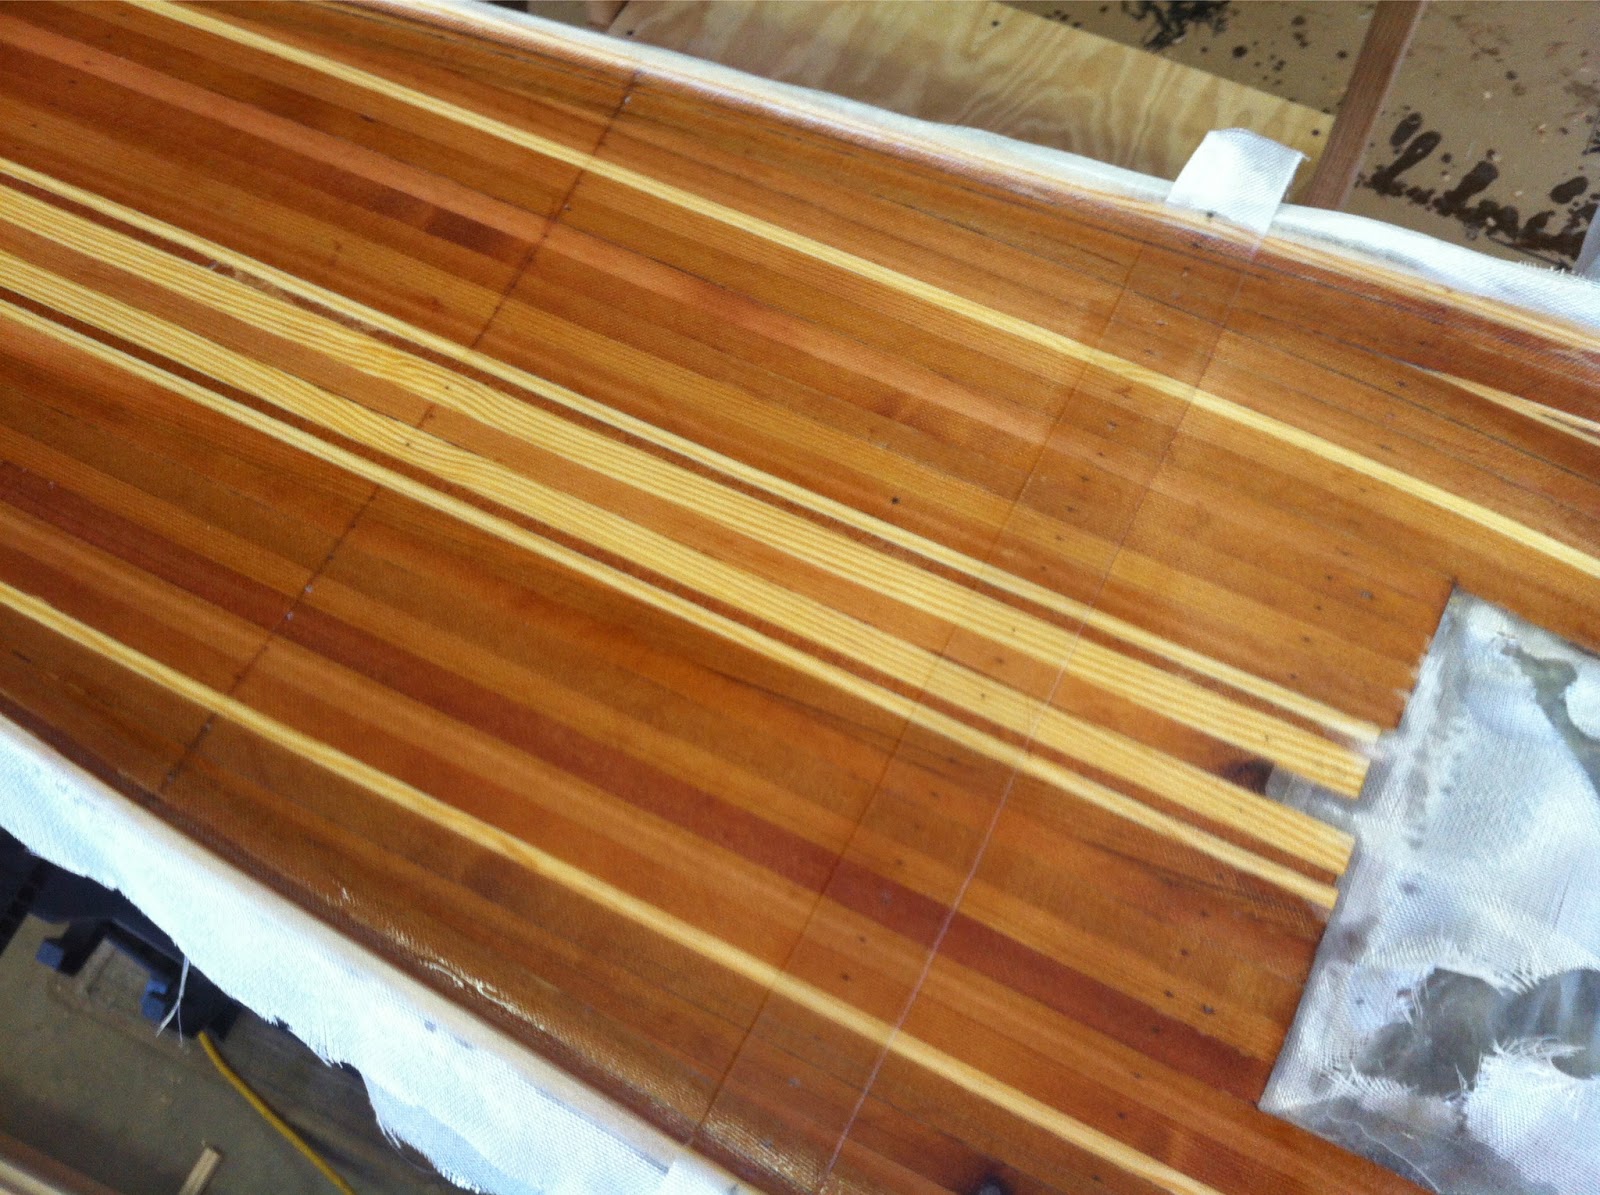
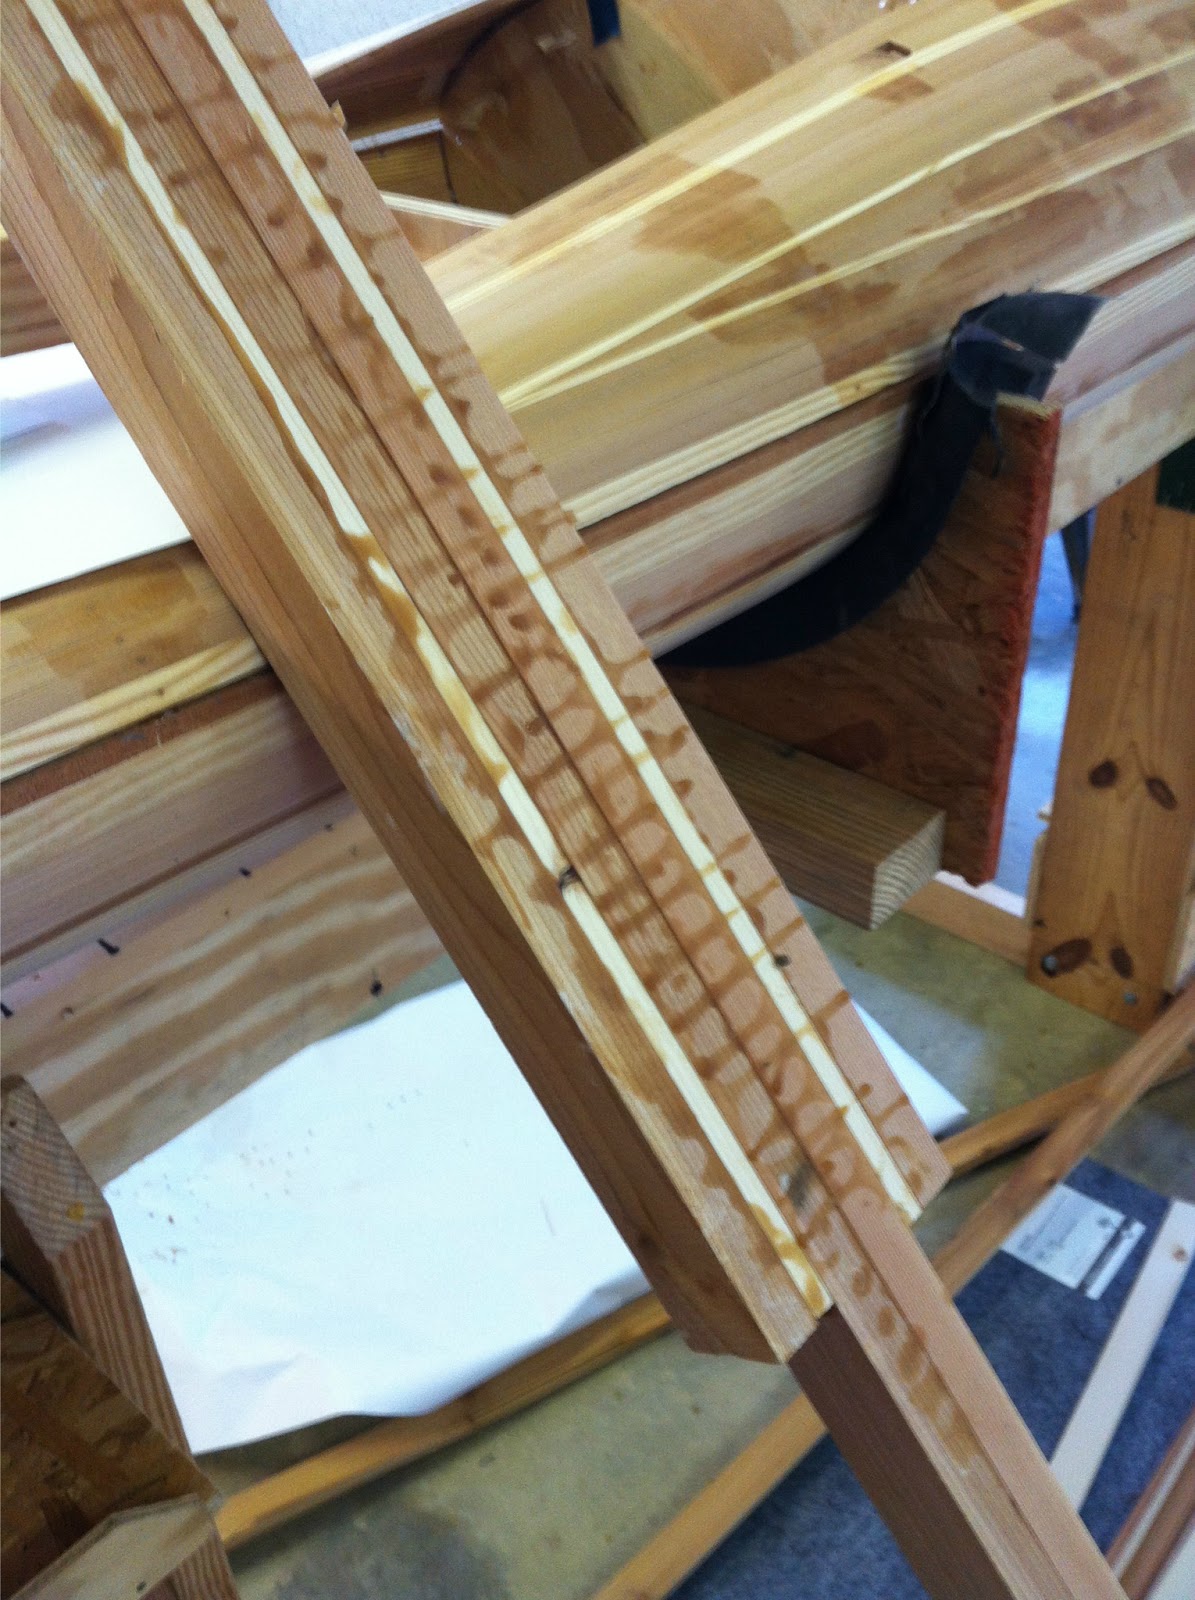
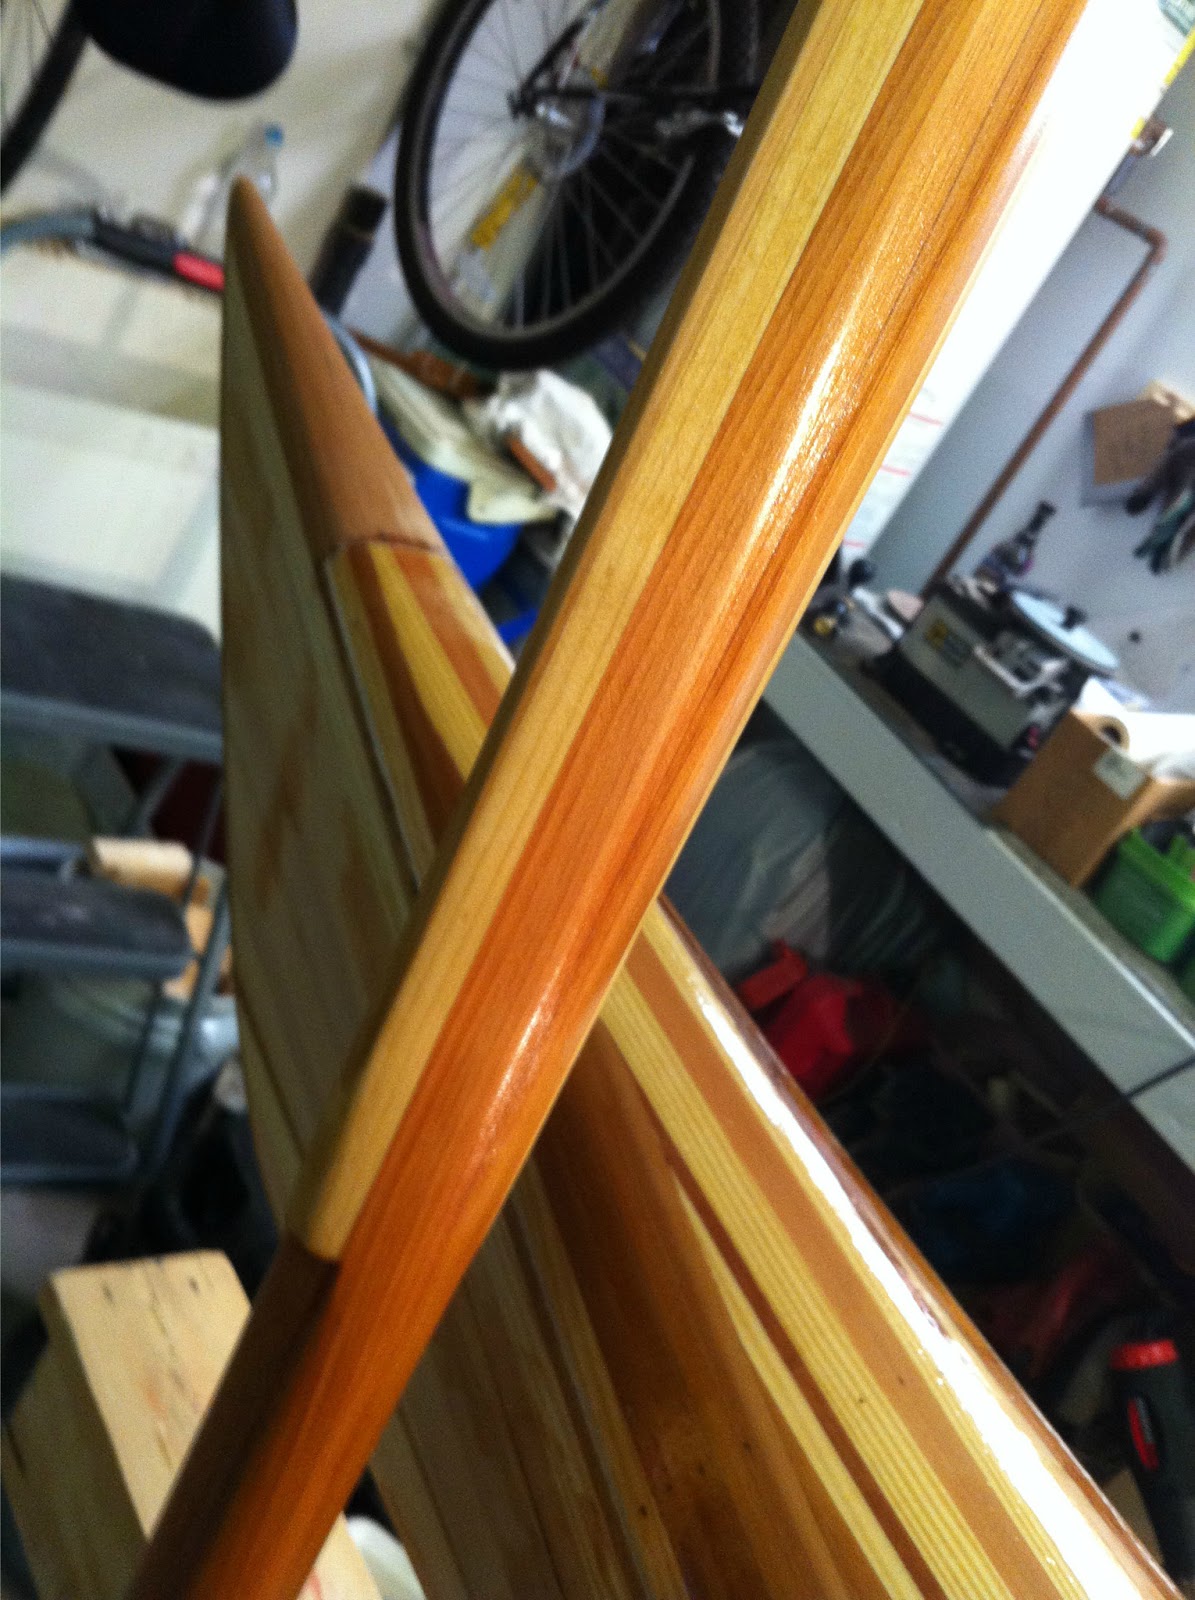
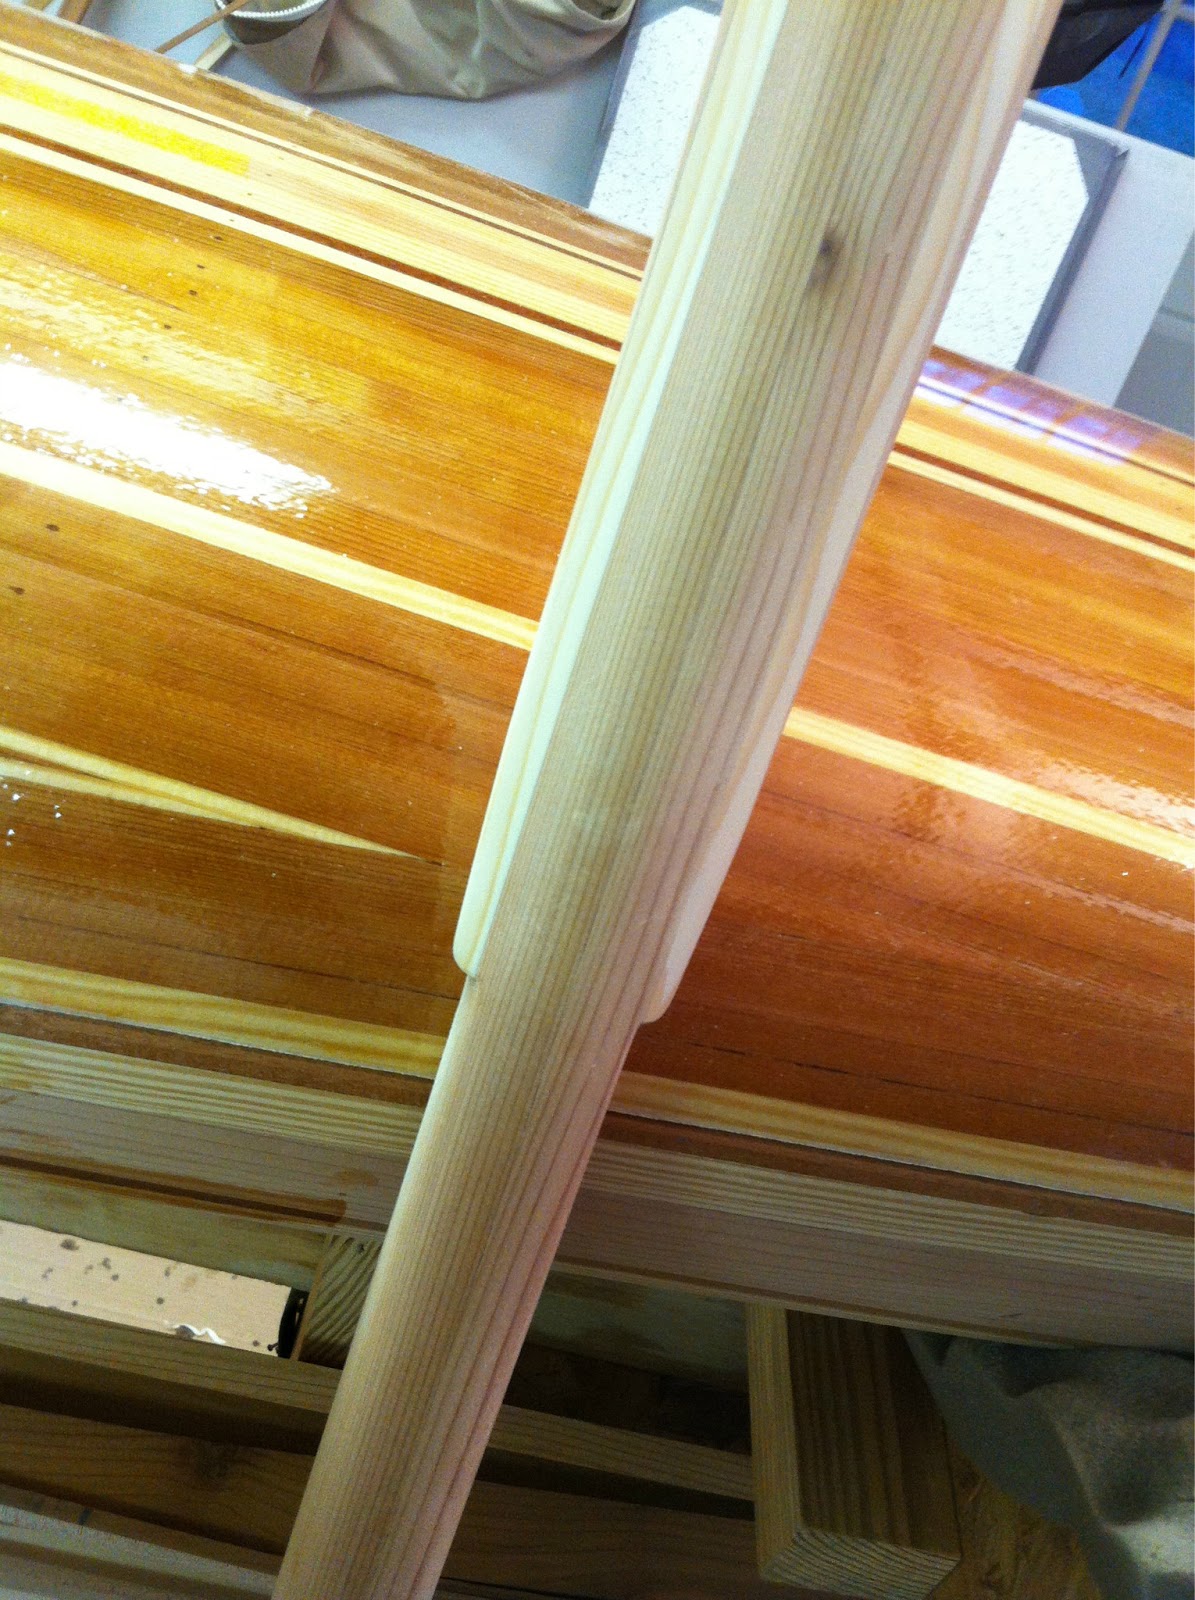
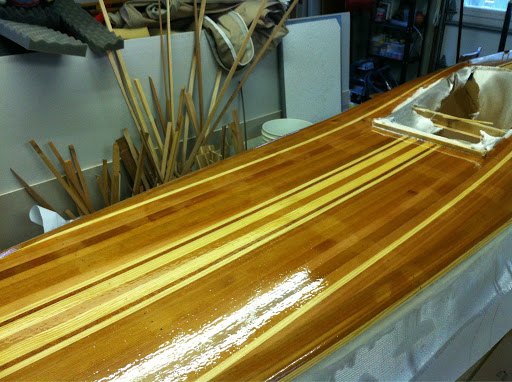
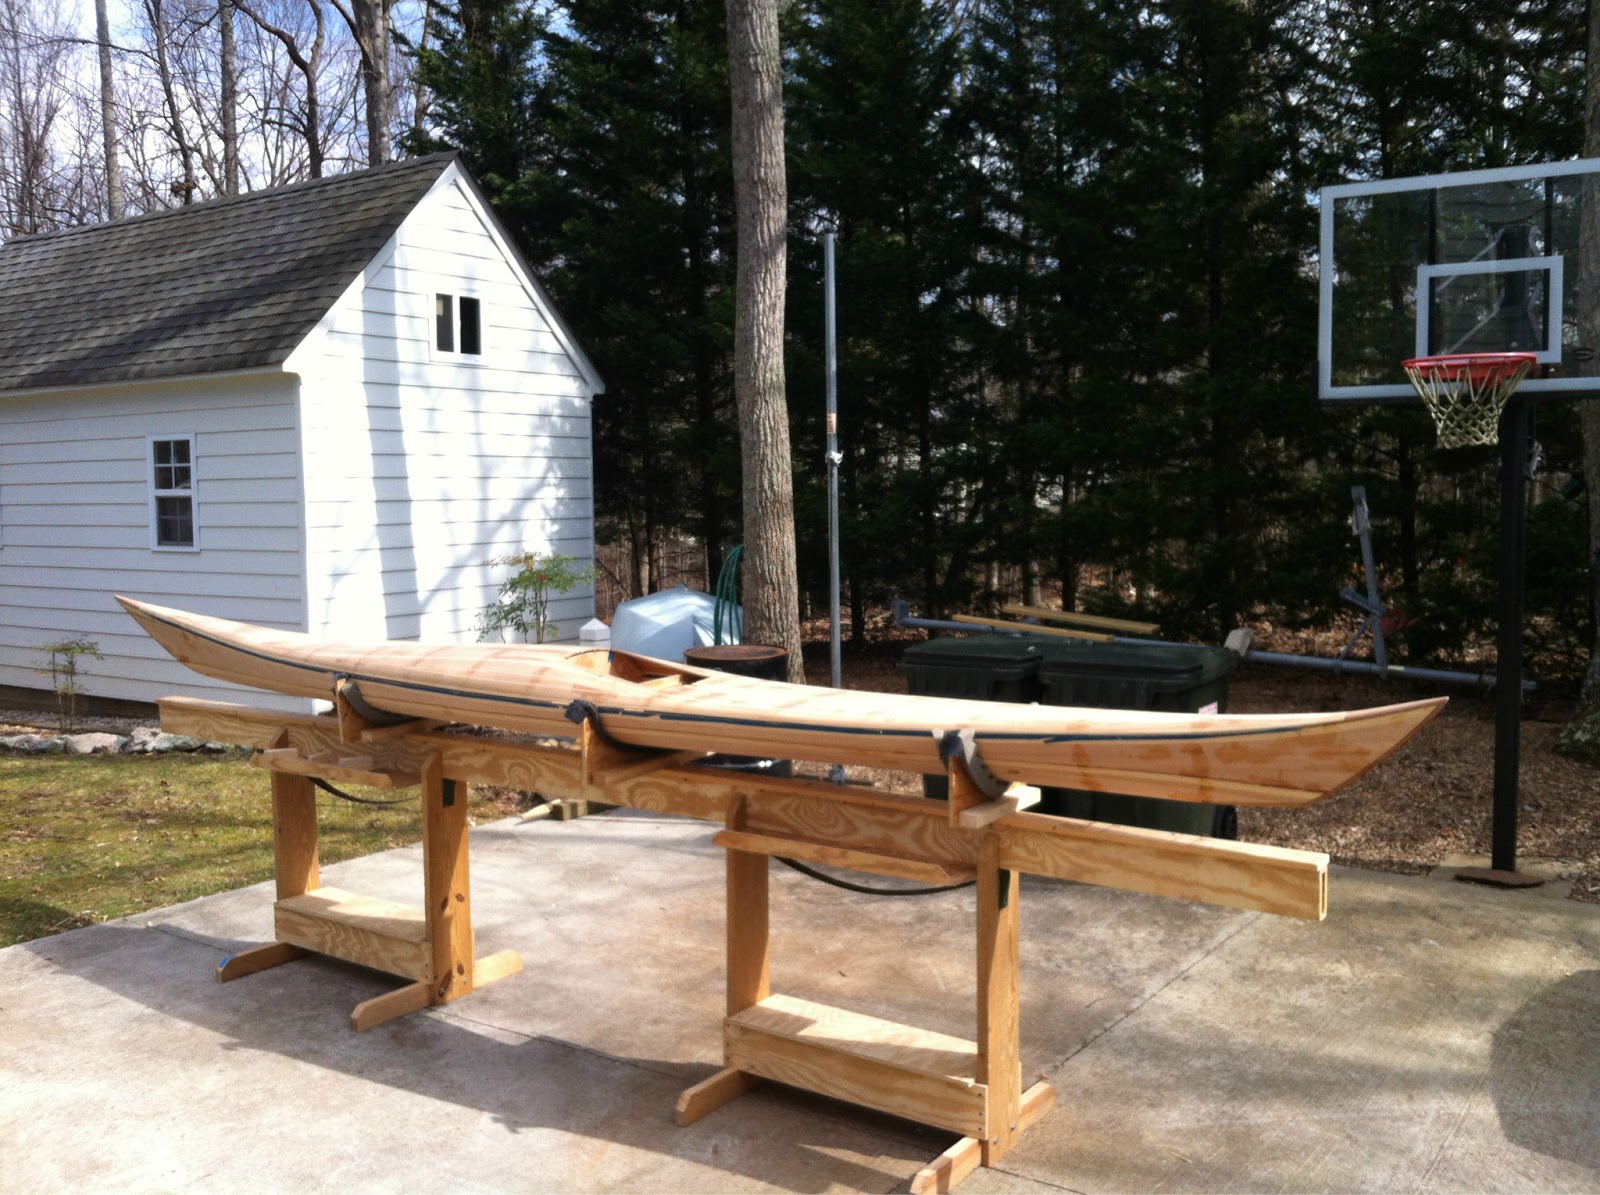
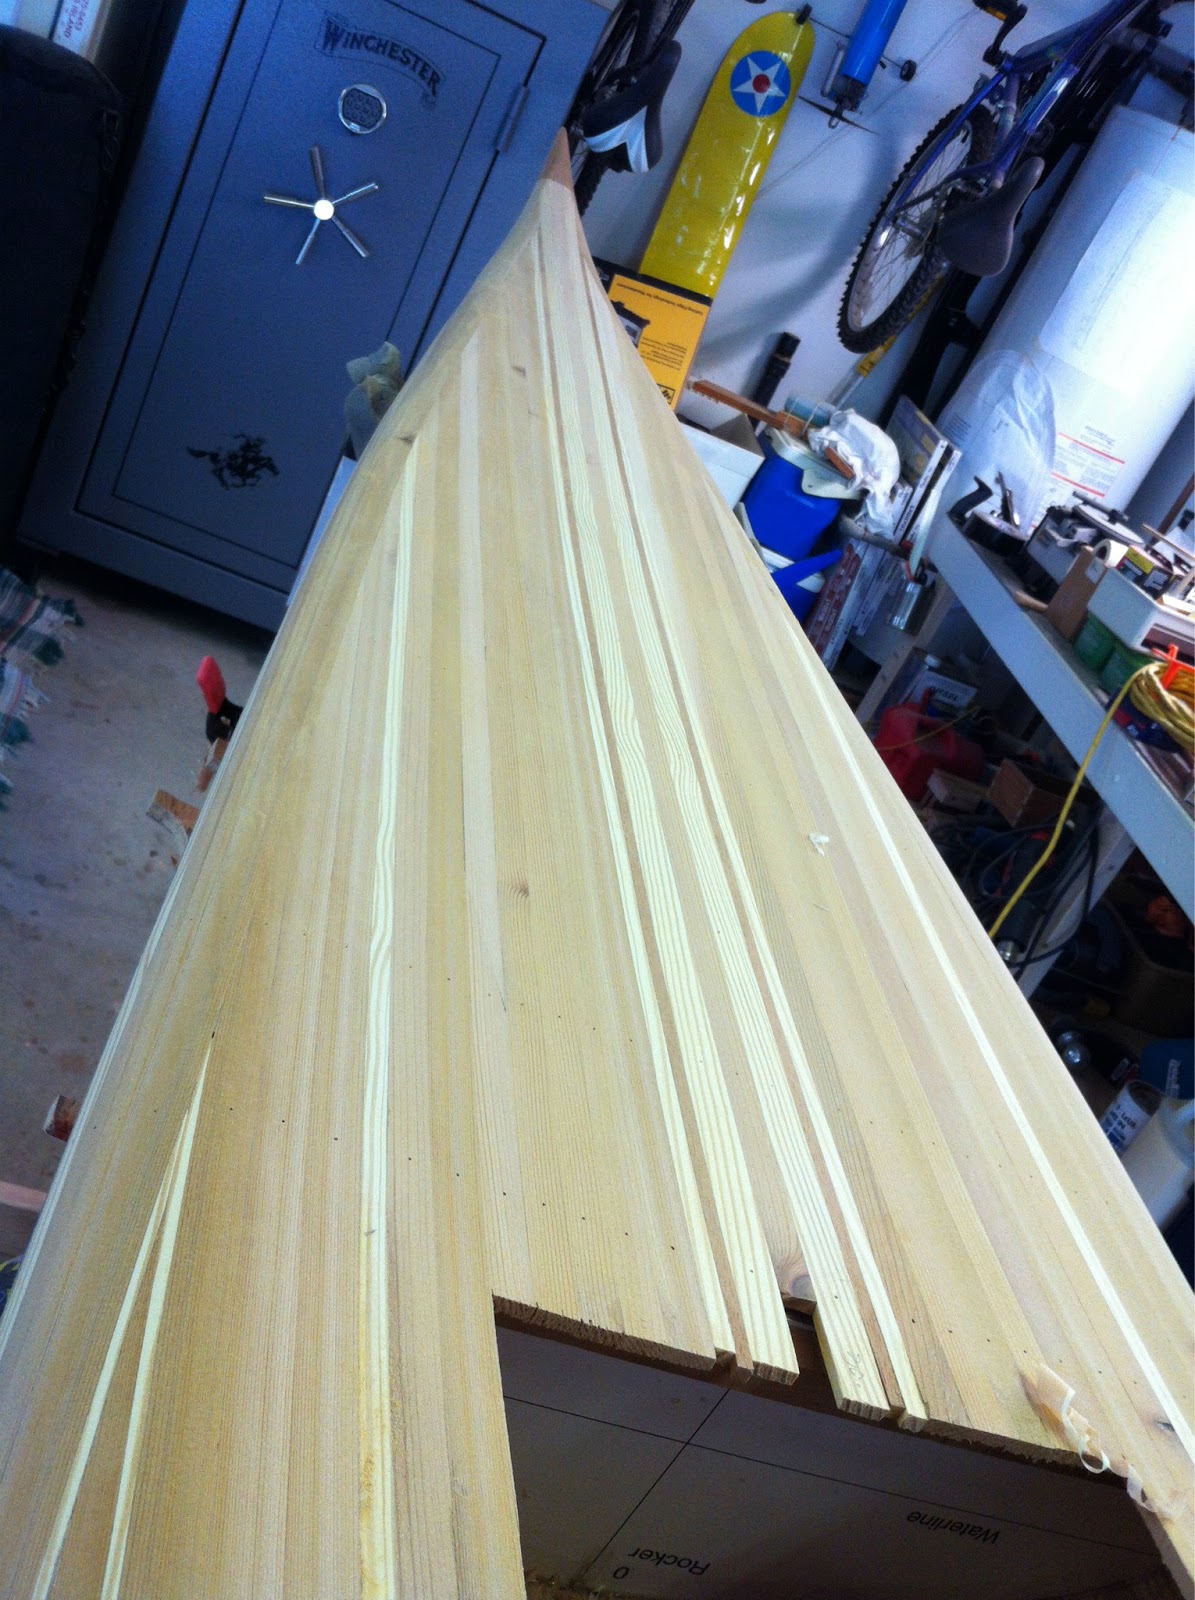
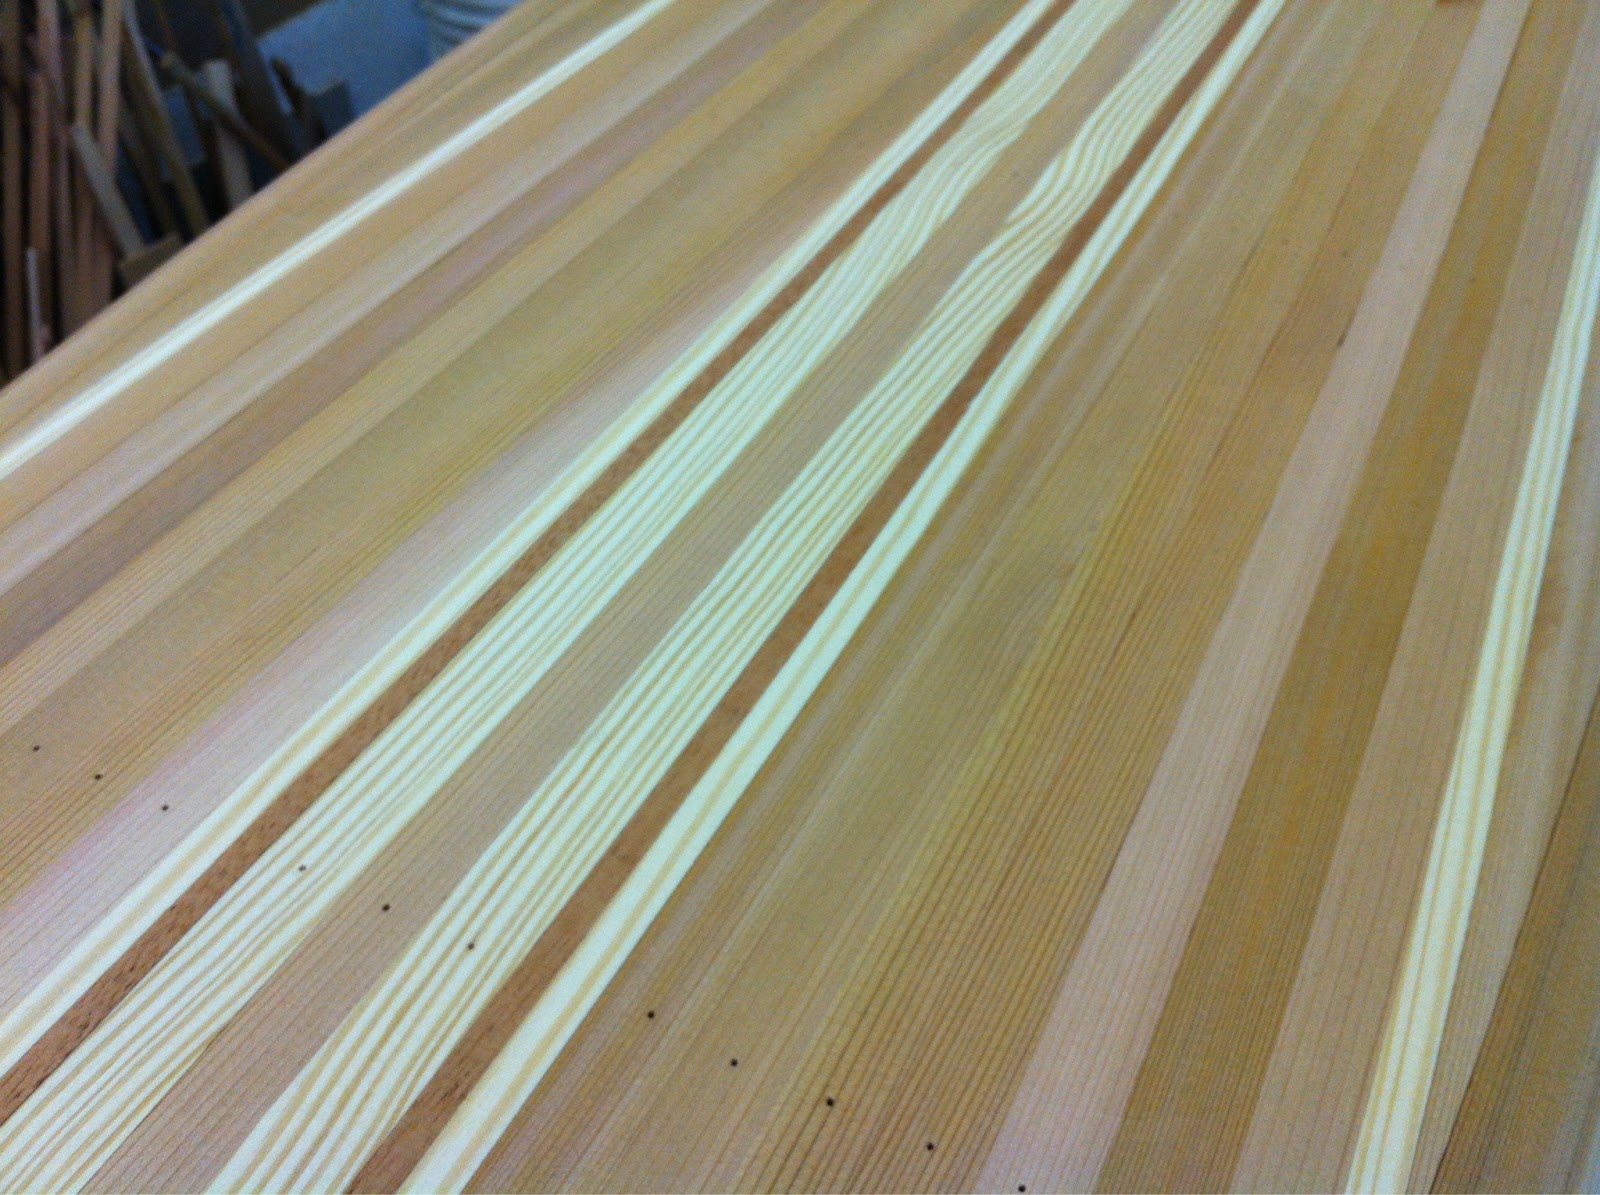
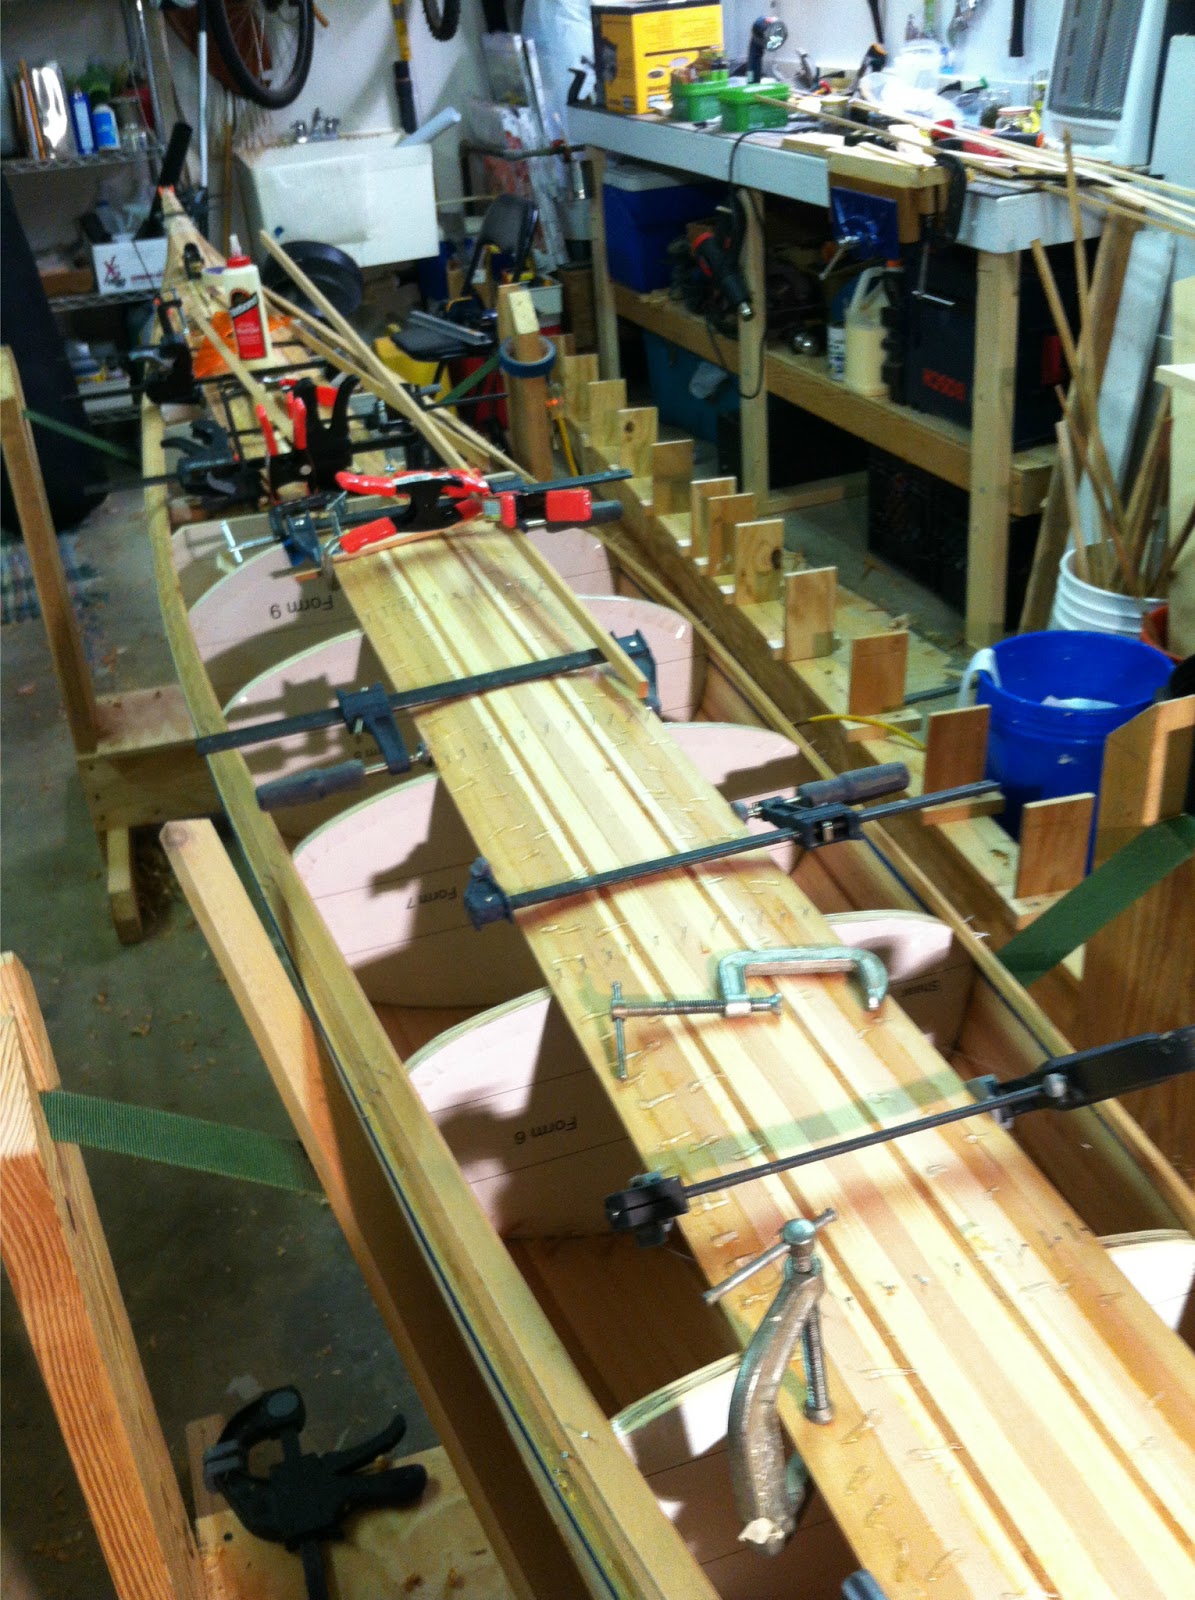
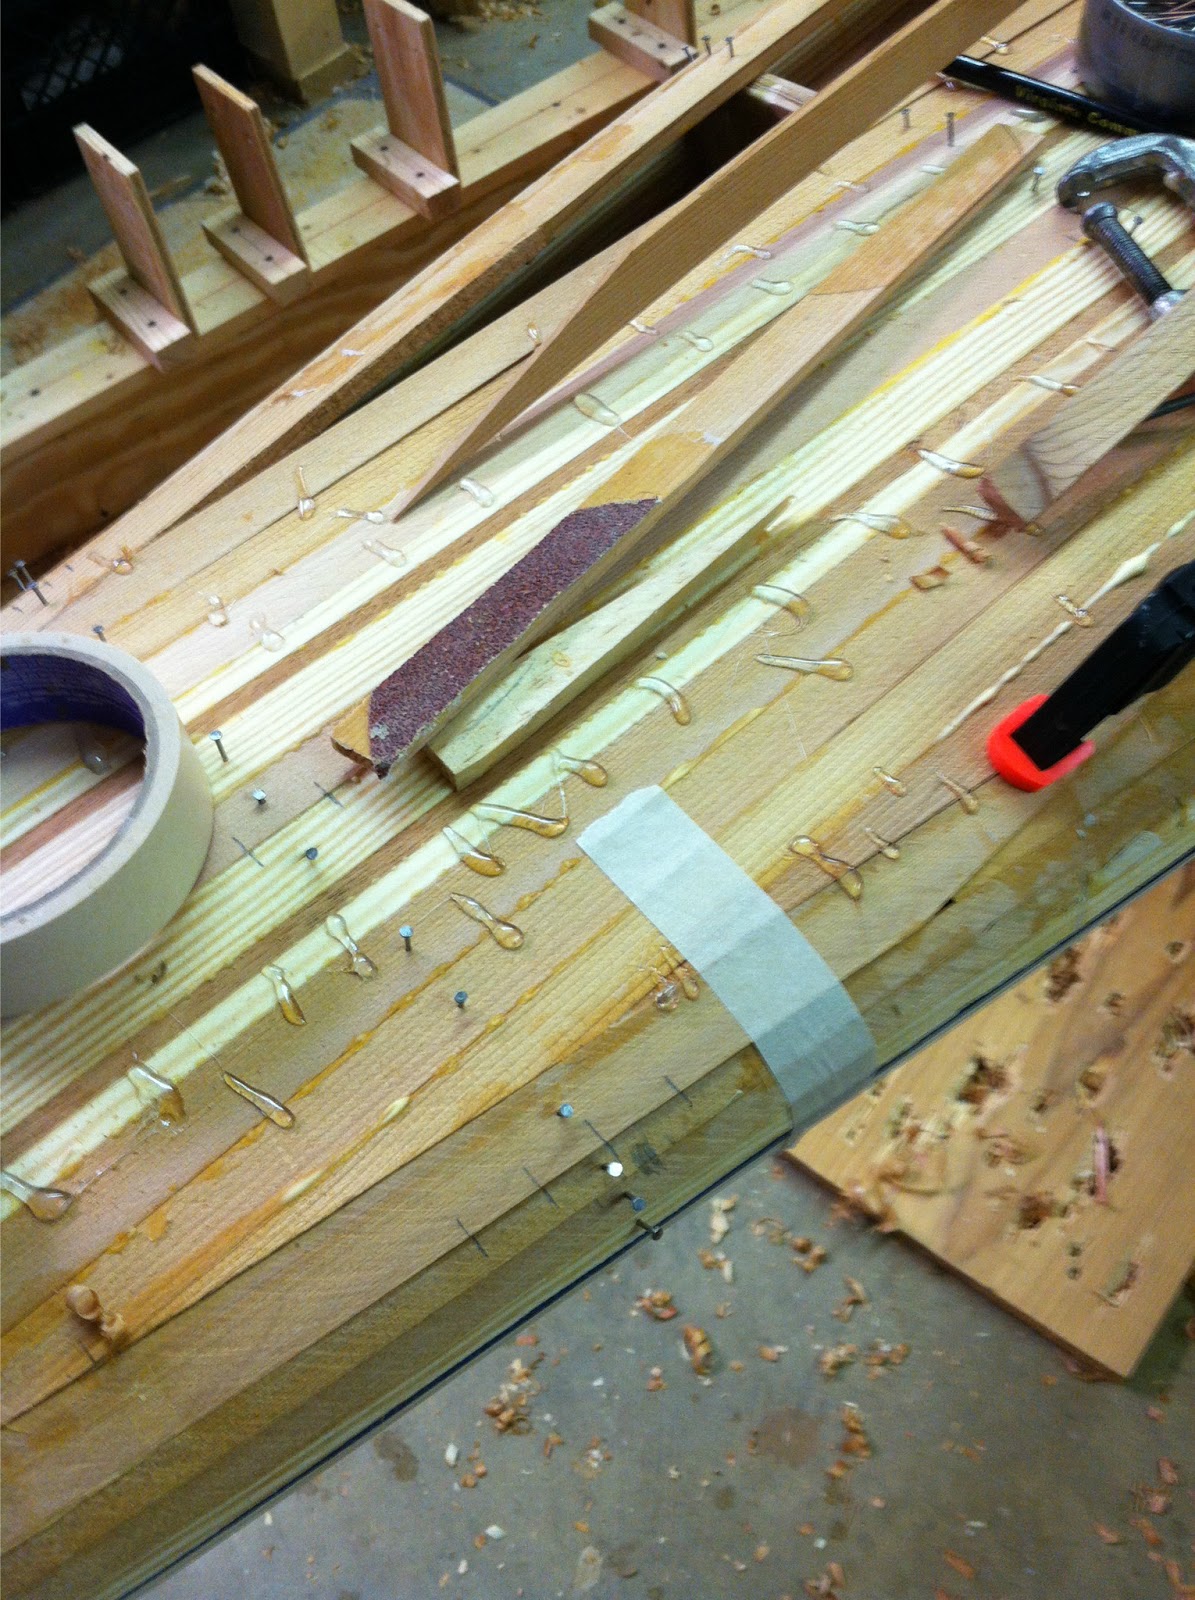
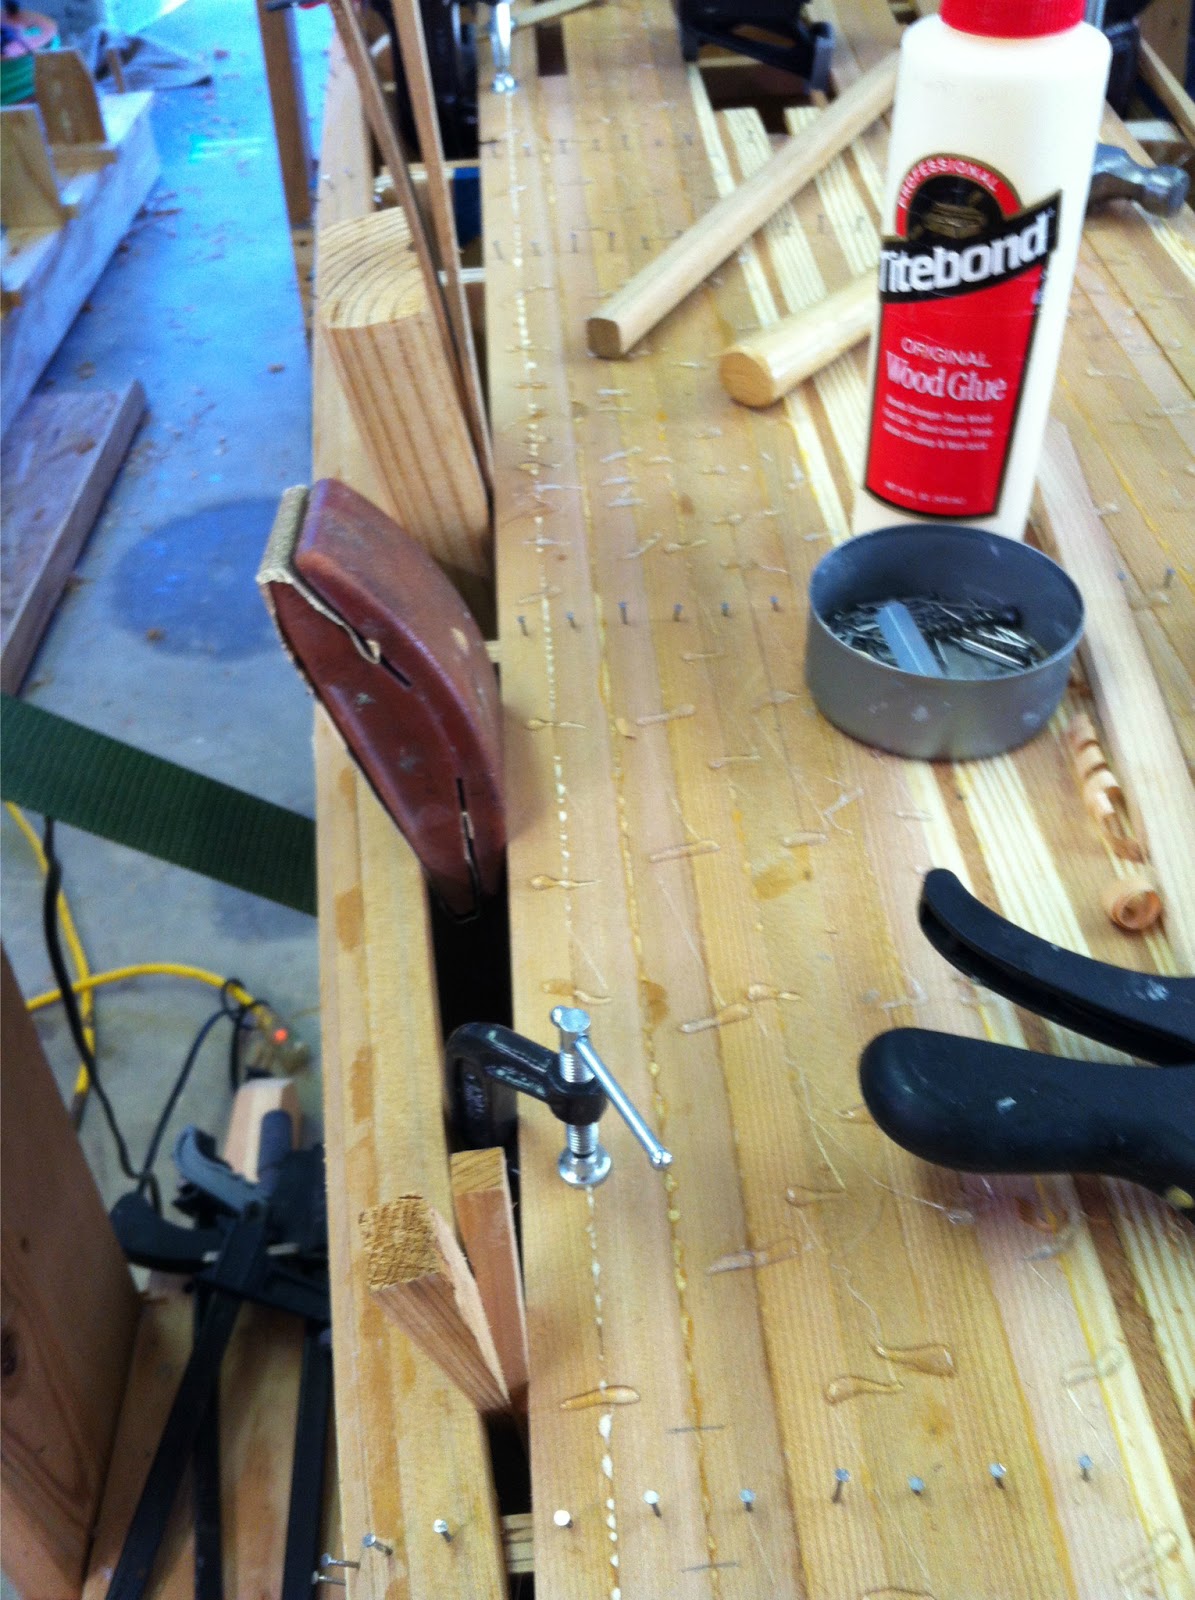
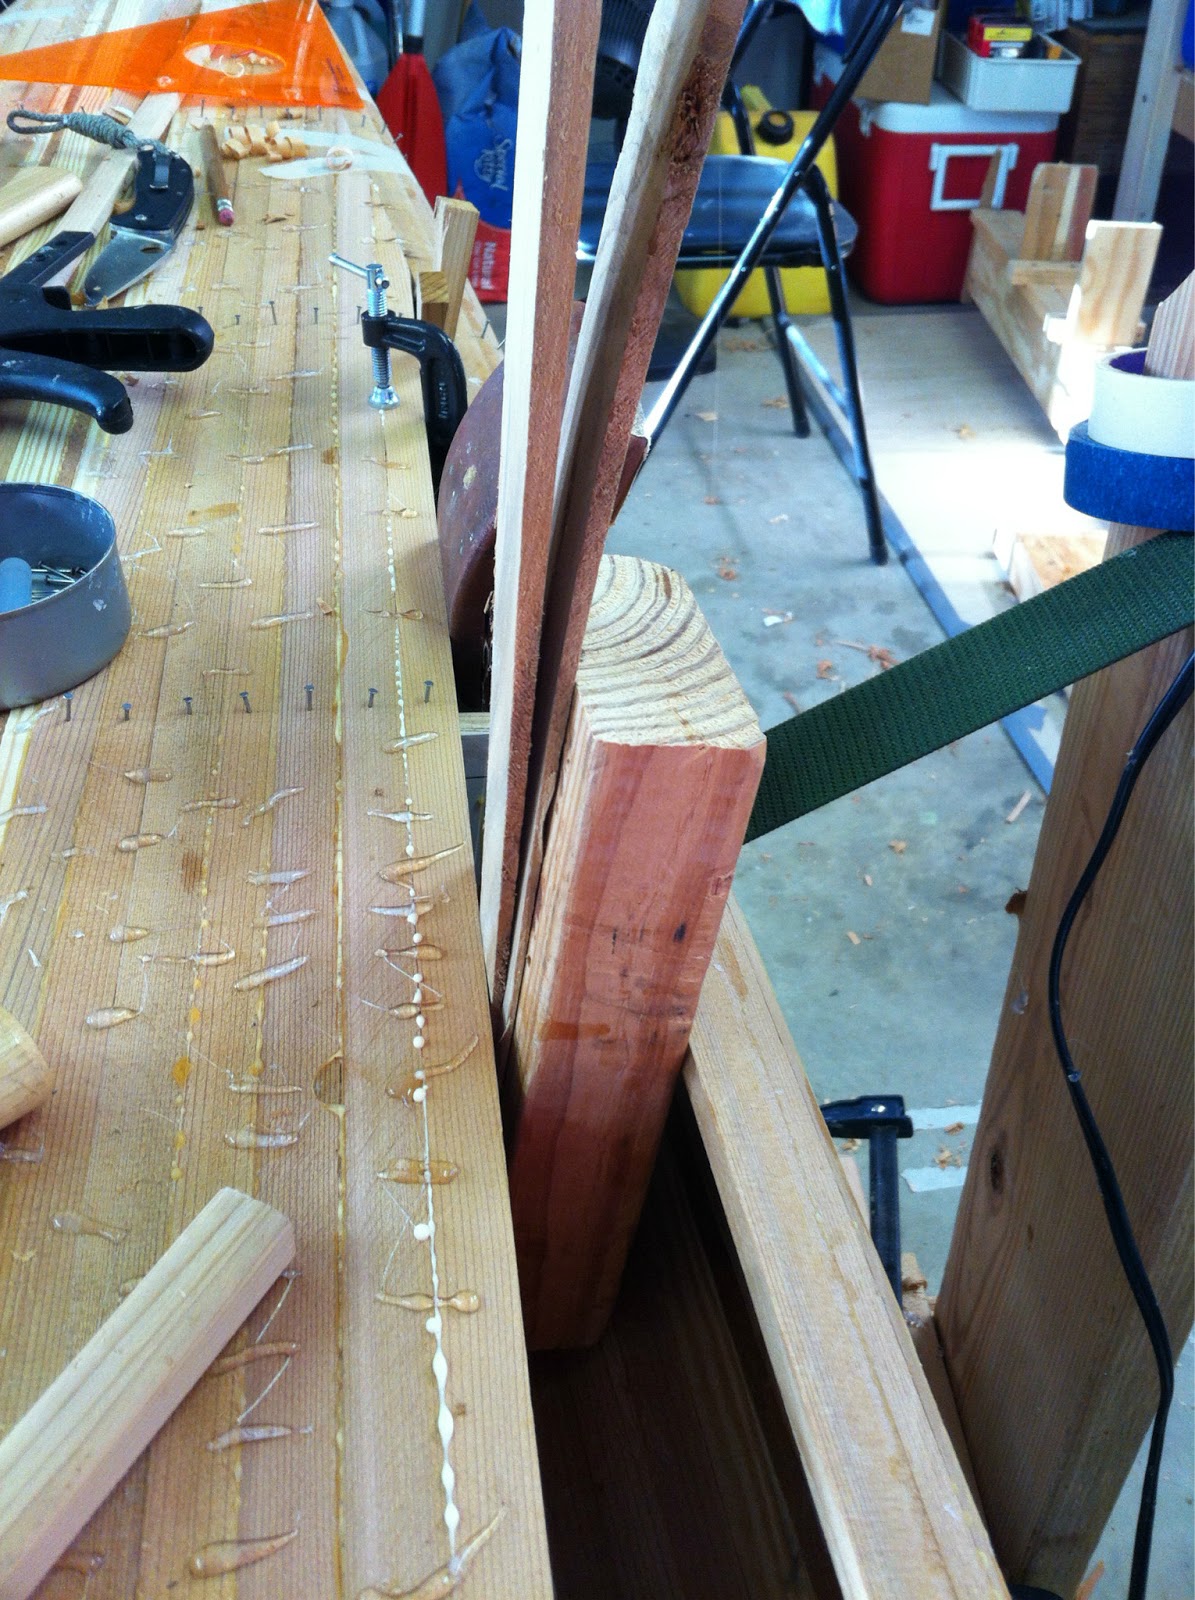
Forget the blemishes. Look at the super tight joints!

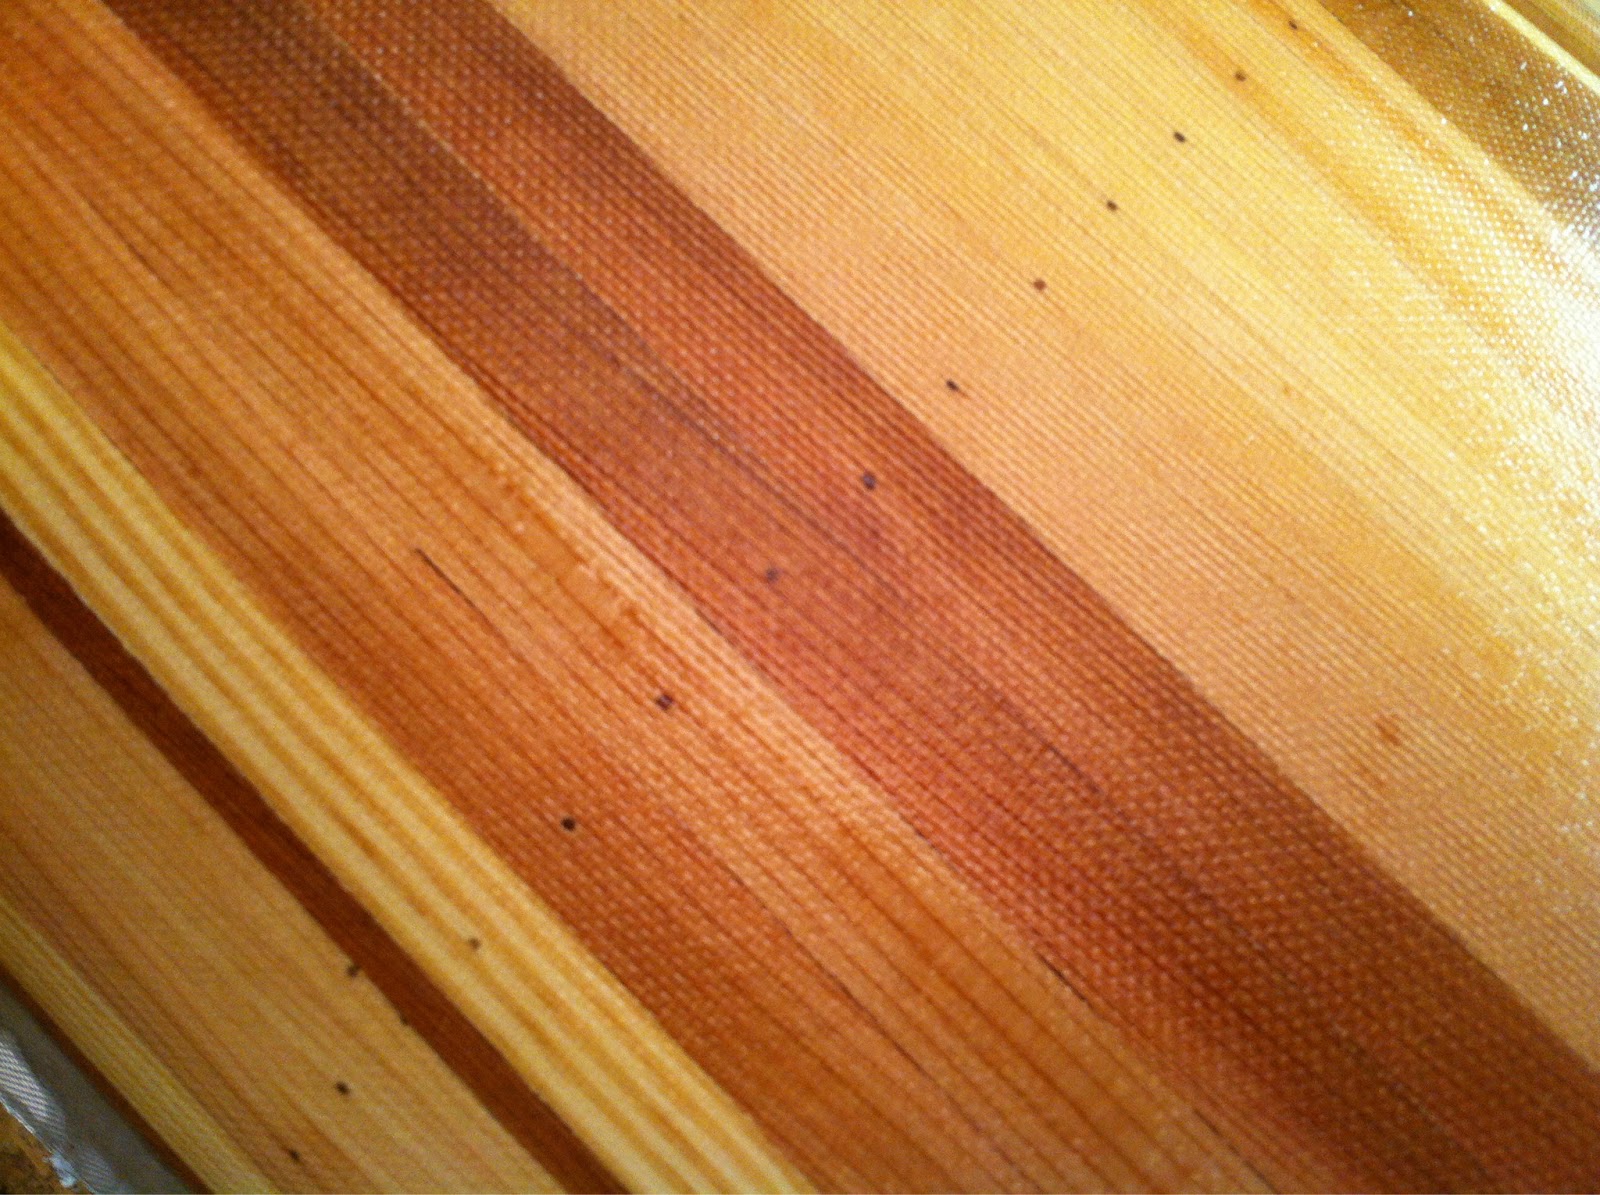
The horror. residual epoxy telegraphing through. So be it. After 1st coat. The rest was flawless too.

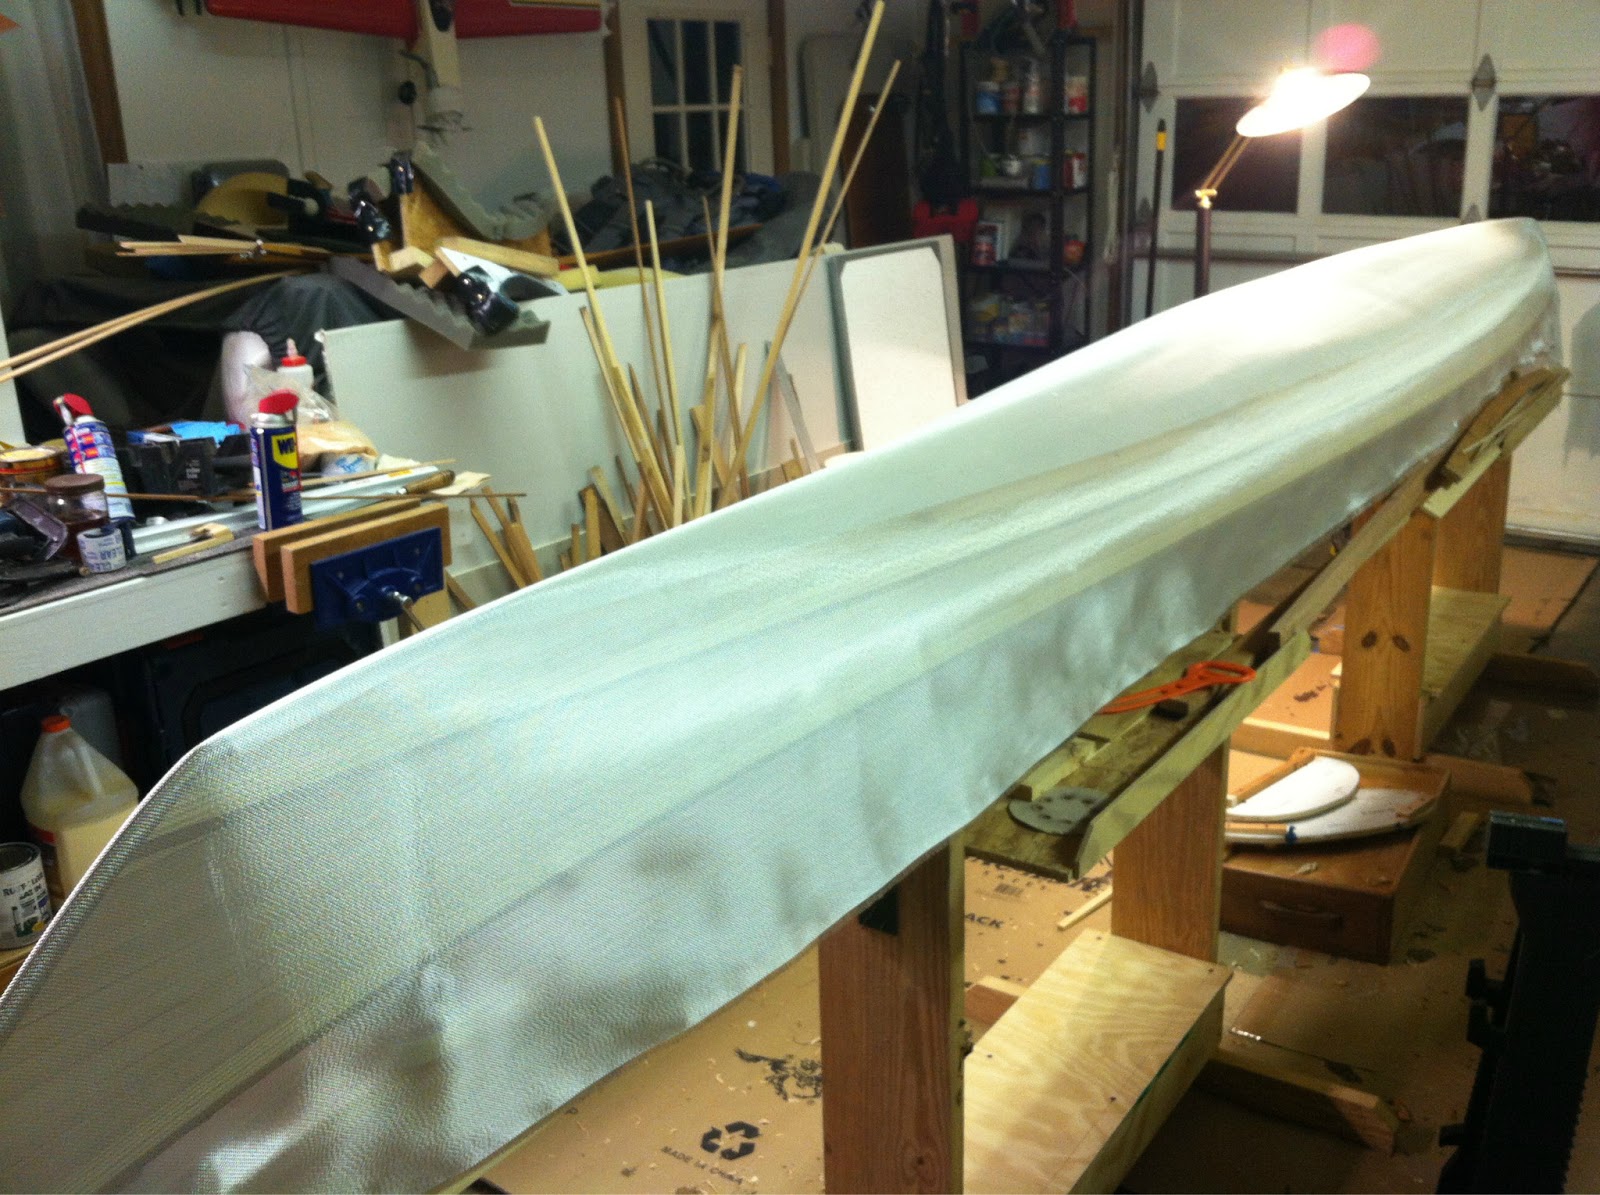
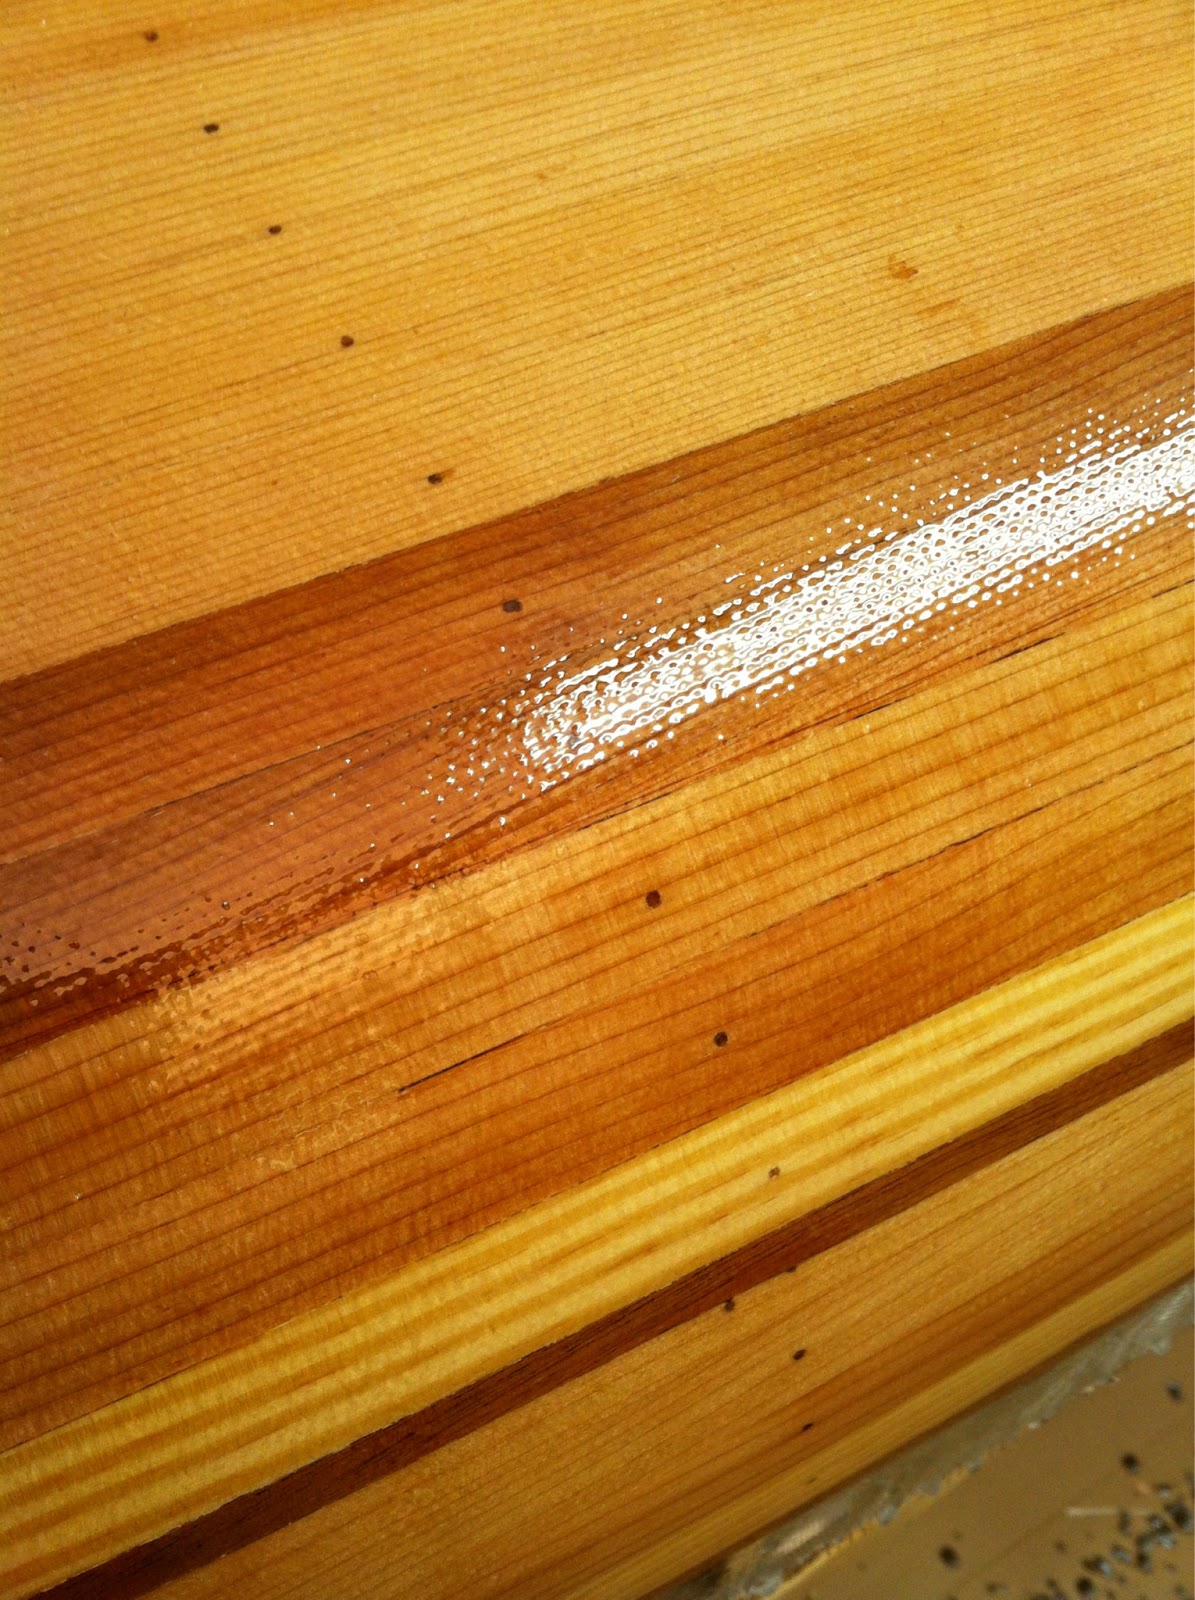
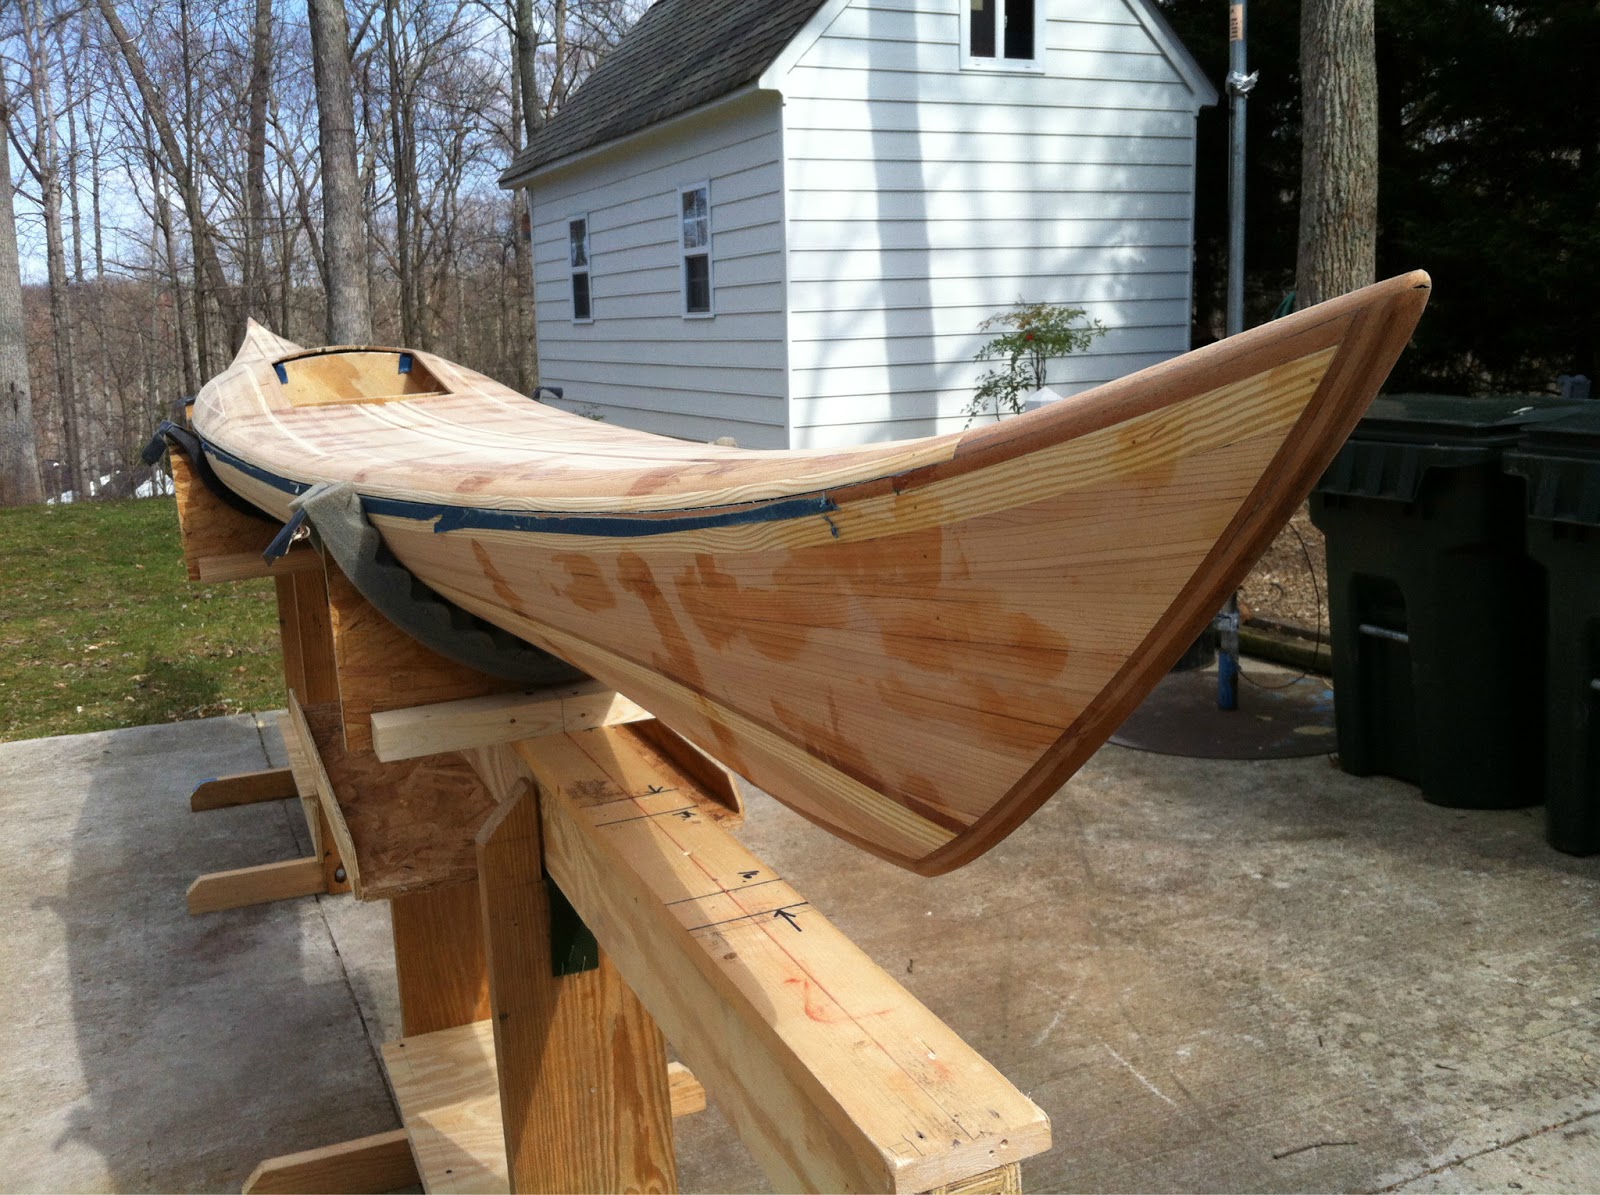
 Final fill coat displayed here. Cardboard prevents drips on floor.


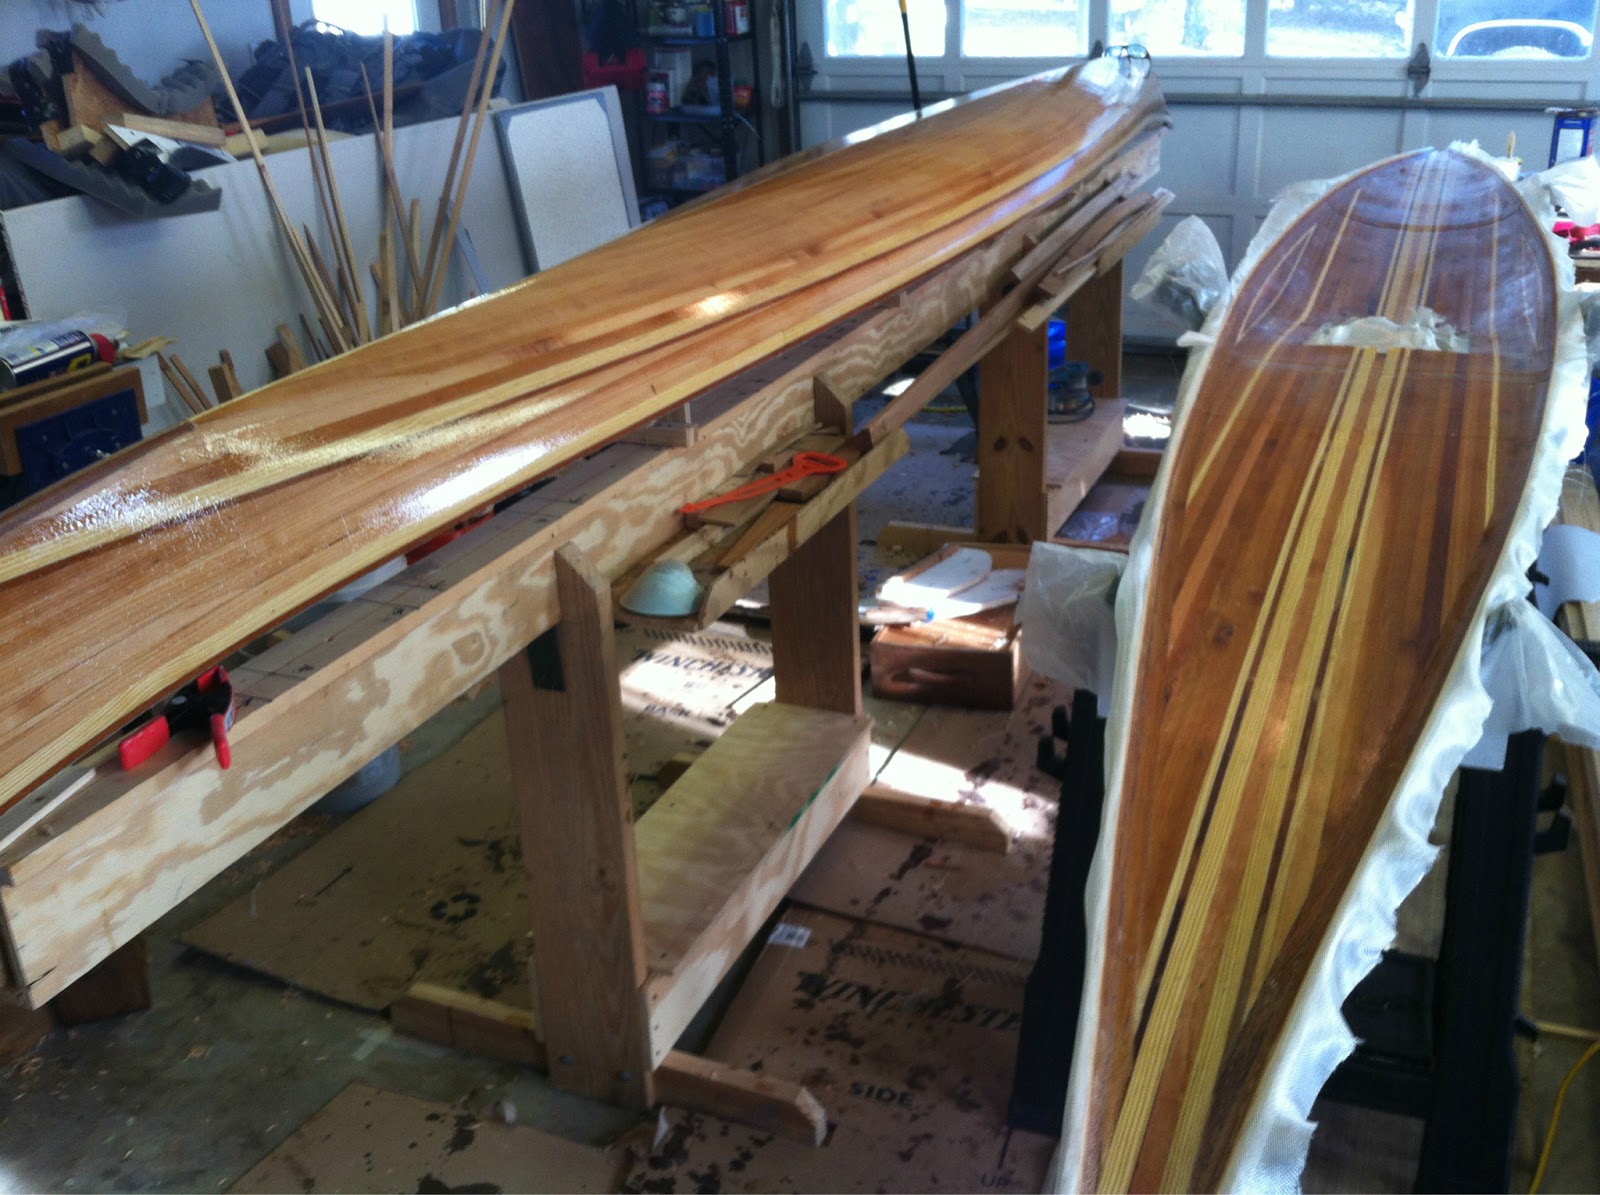
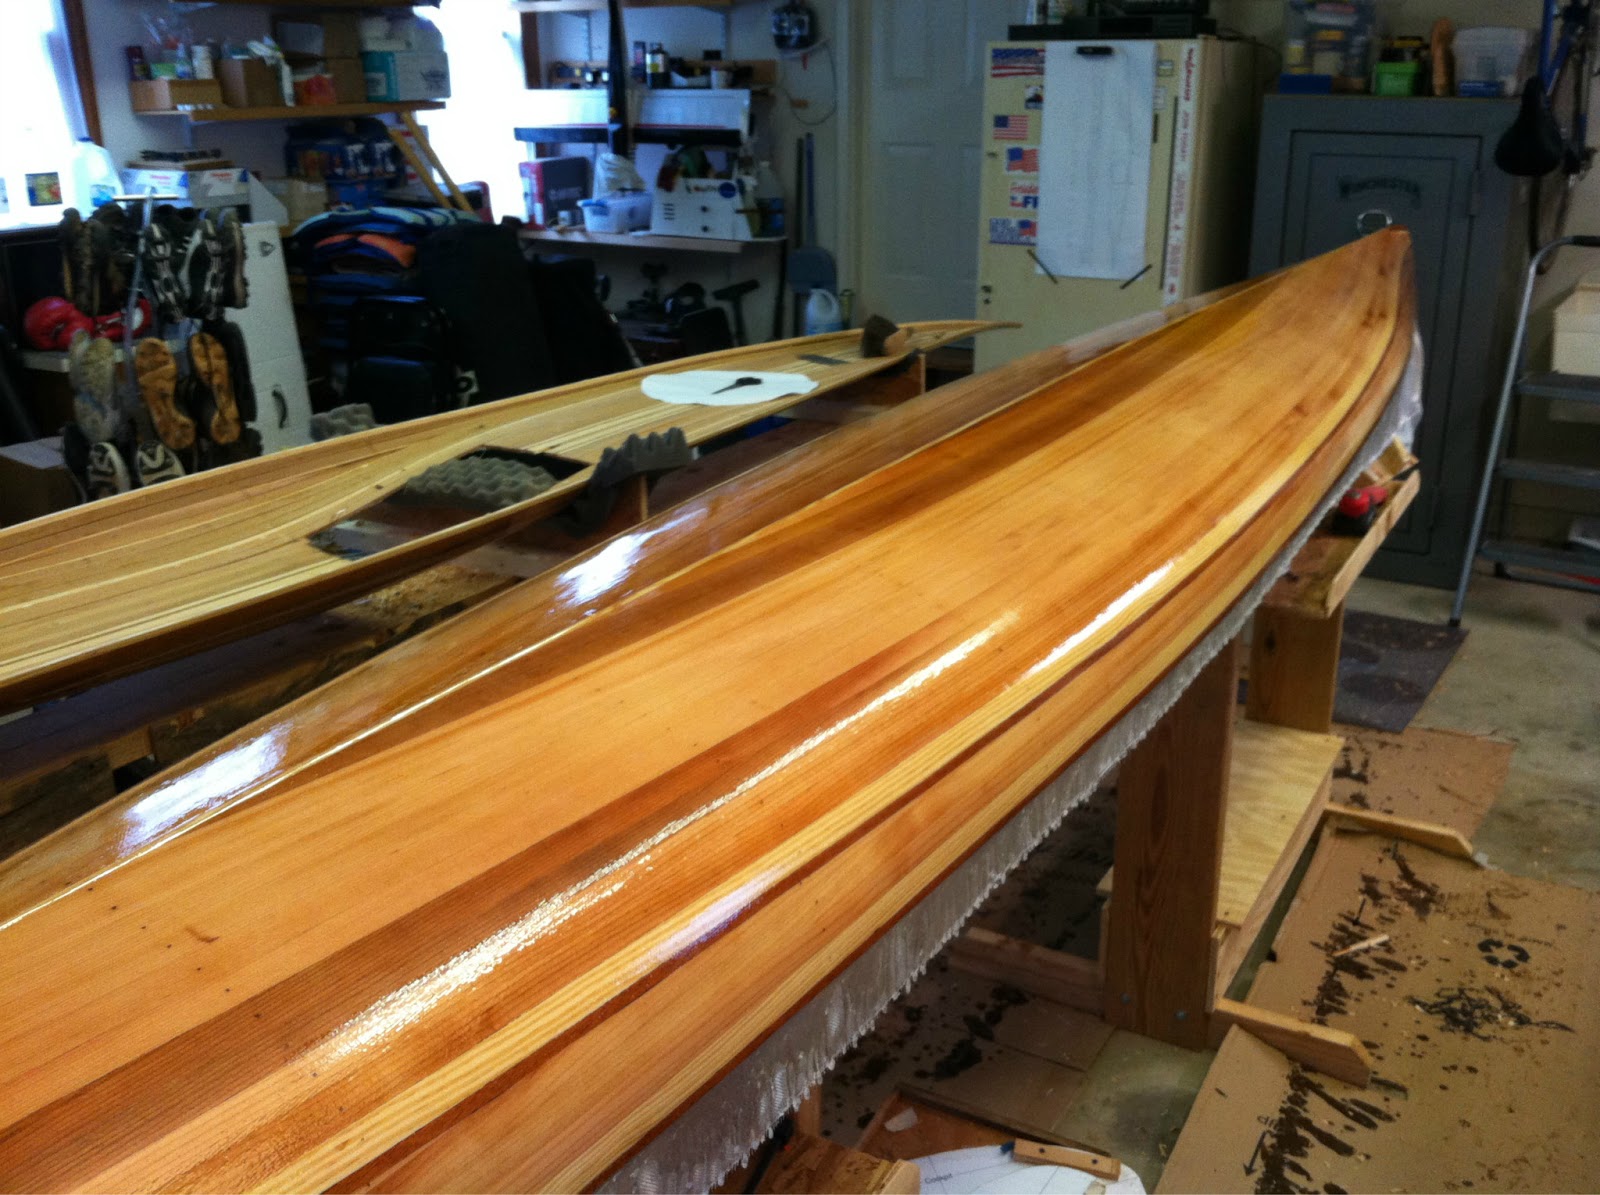
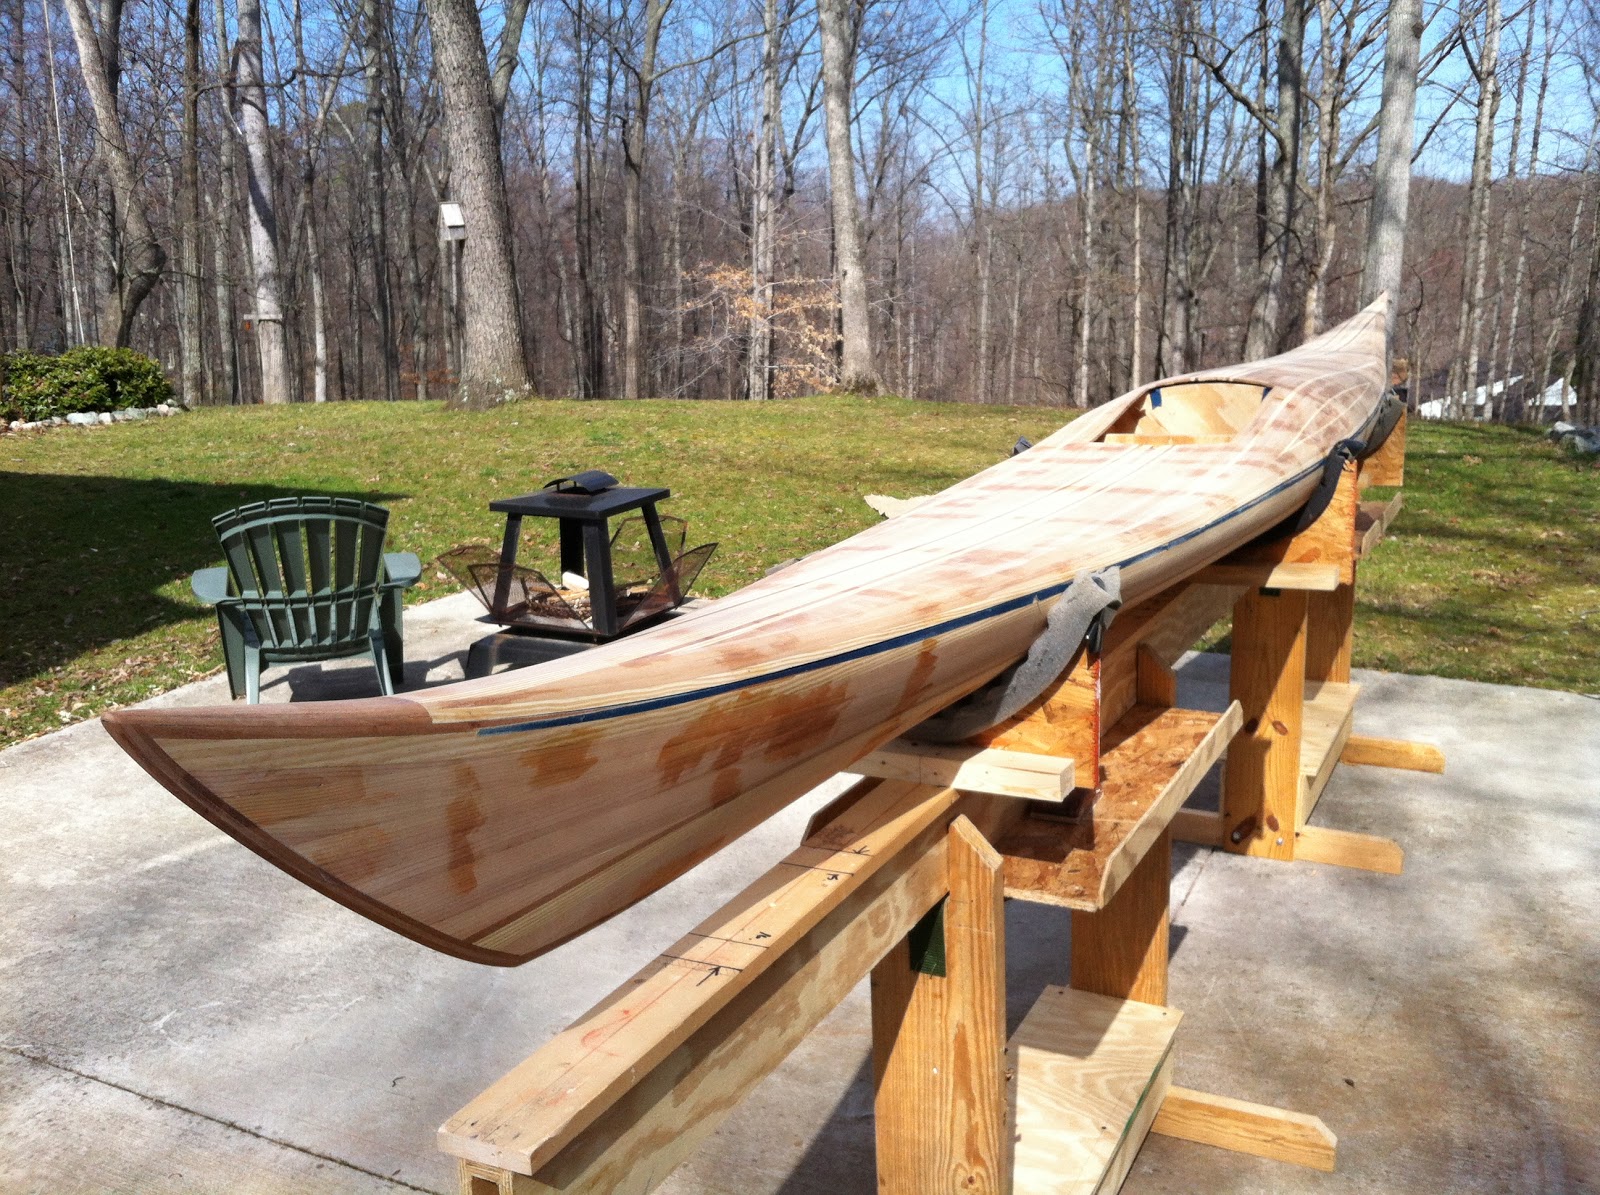
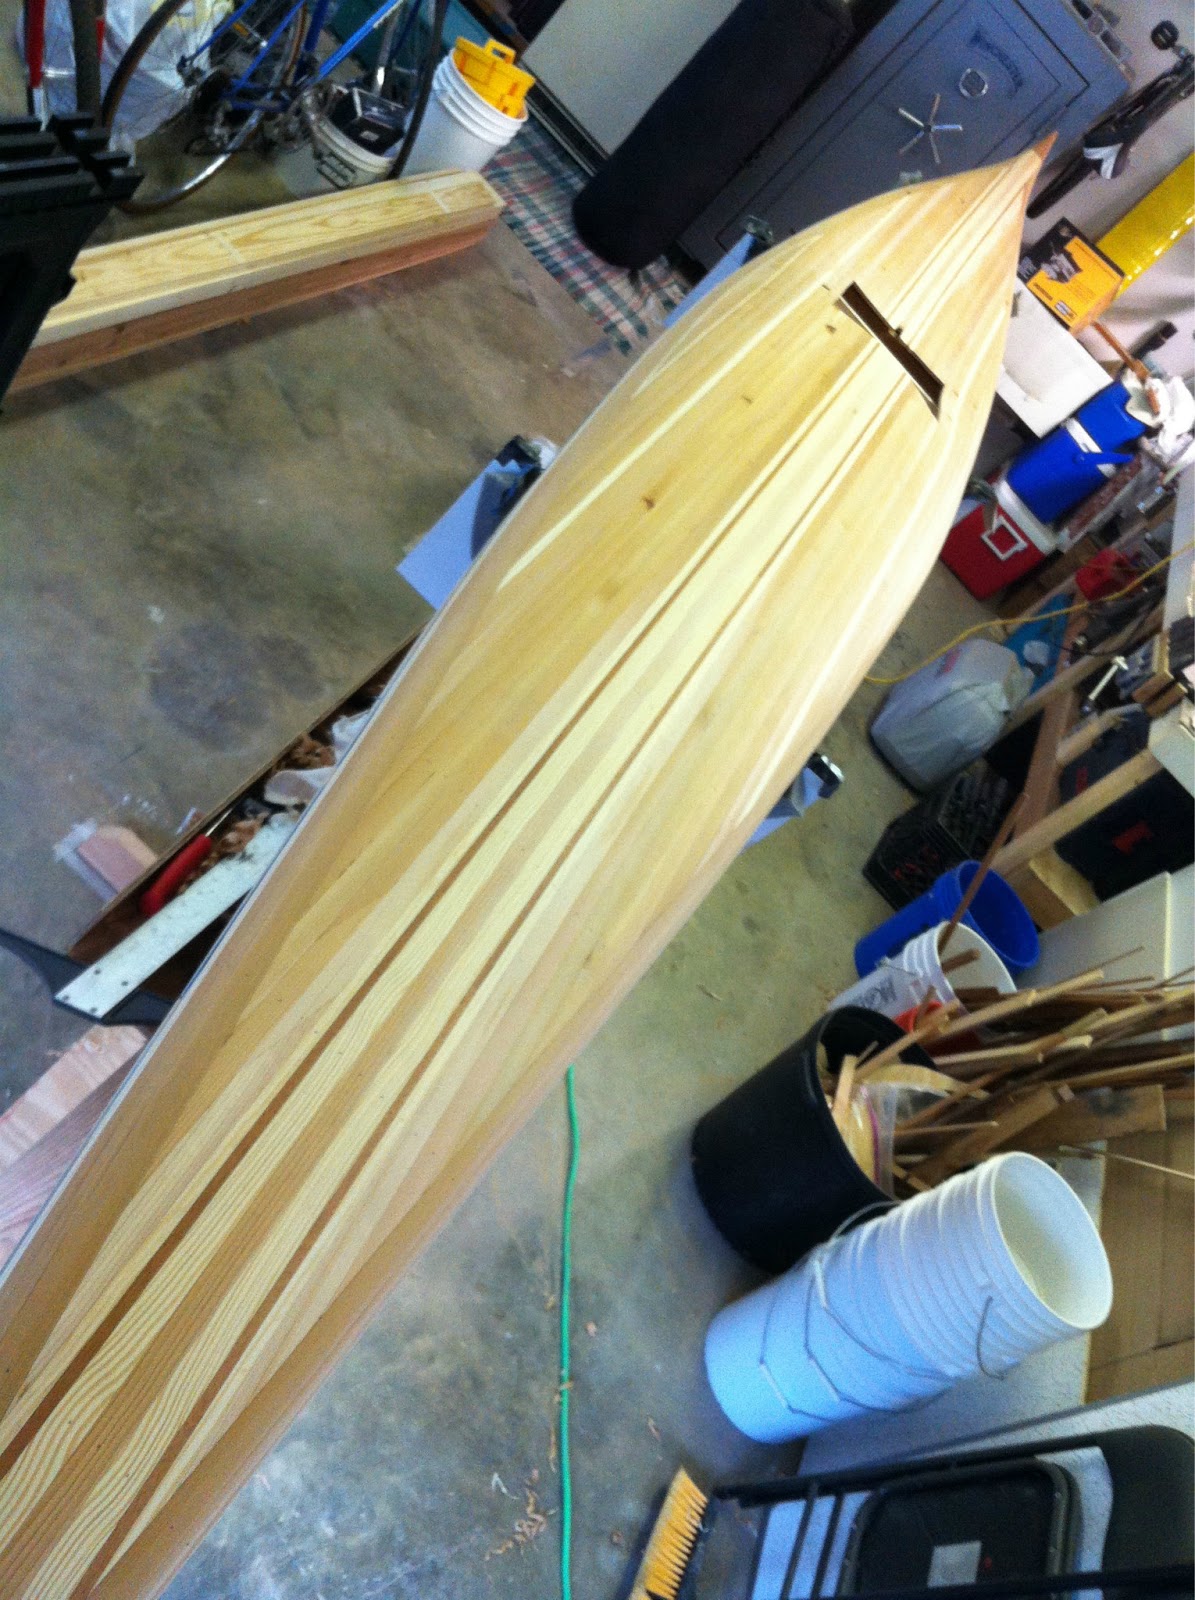
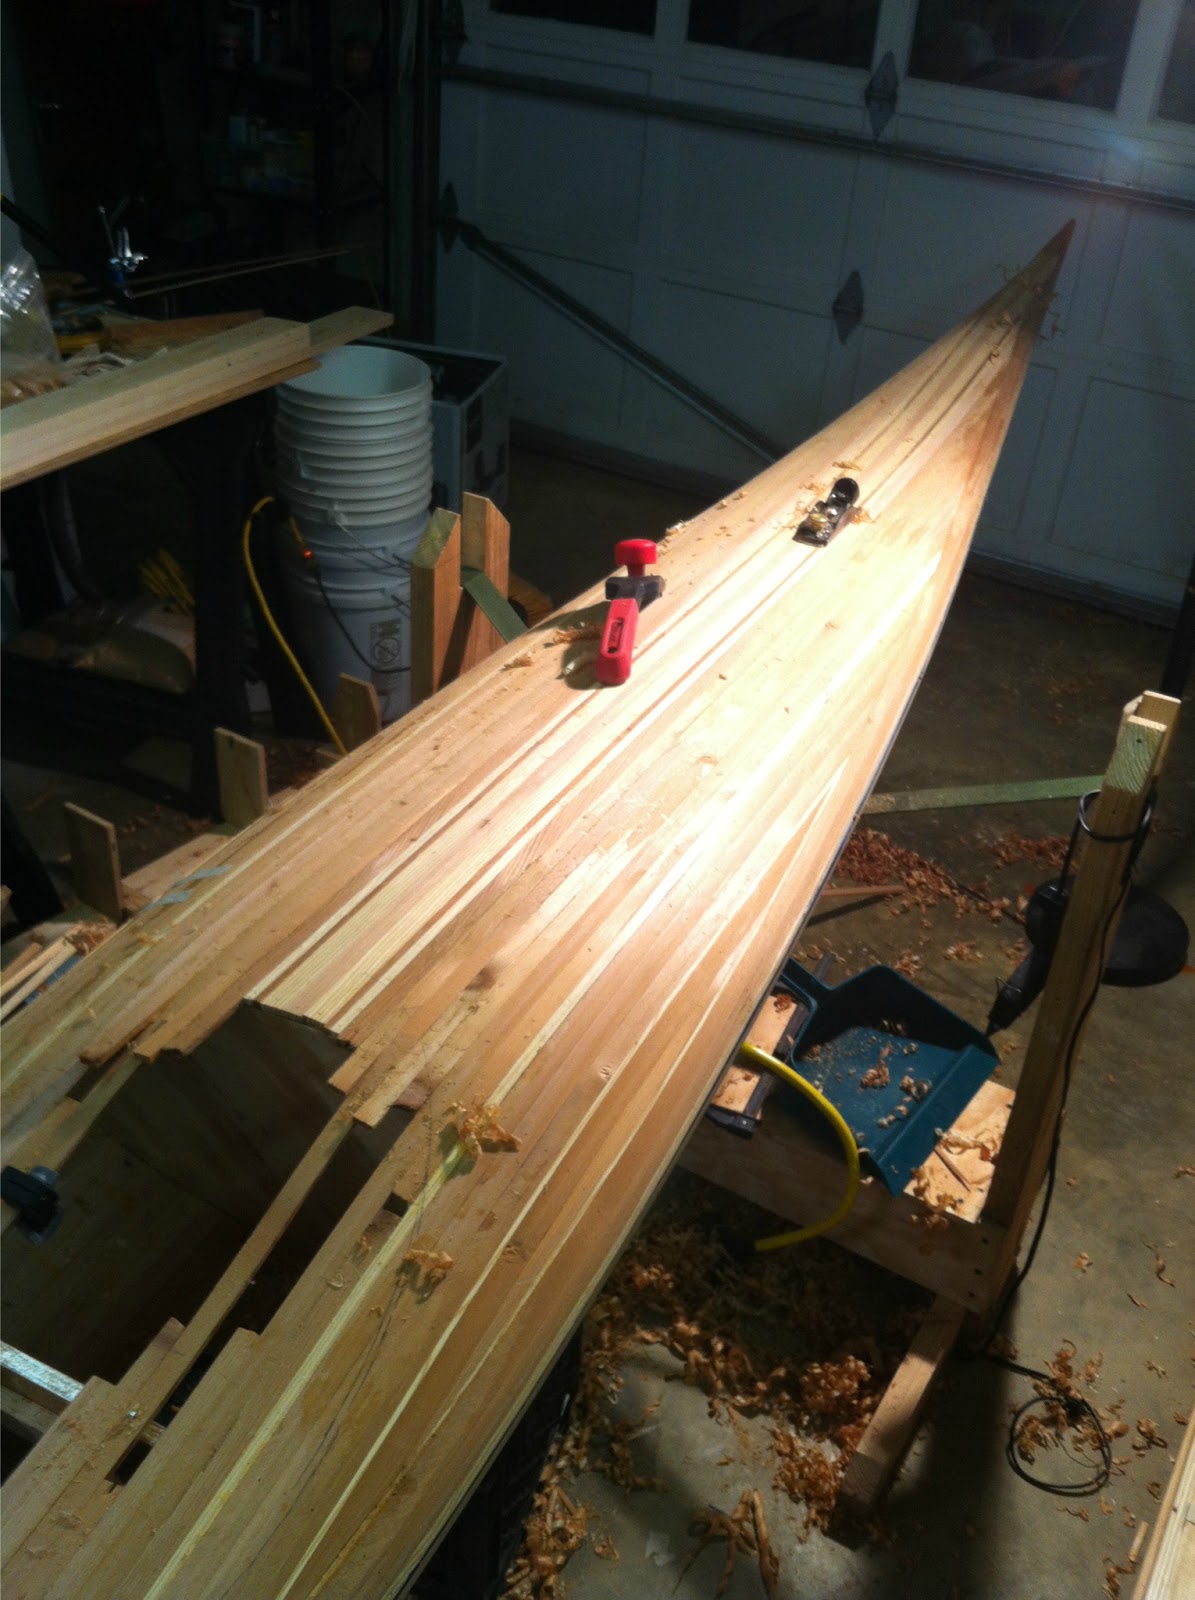
 She’s still pretty even with the pimples. Guess I’ll ever get over it? Geeze (or some expletive)!


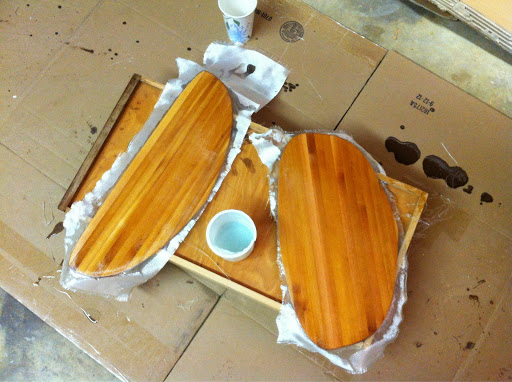
Bulkheads got one coat of epoxy & glass for both sides. Ciao!

Snow No Go

I’m now itching to glass this boat (no puns re: scratching). Mother nature however has not warmed up to the idea. Though the thought of moving into the dining room is tempting, it is not an option, but give me credit for the thought. Actually, flashbacks of someone screaming after I painted a road bike in a kitchen years and years ago still put on the brakes. Who says there isn’t something to learn in every situation?. All I can say is, cover up all you want, but that mist can travel! I’ll leave that to the reader’s imagination. No pictures were taken then so, maybe it is plausible to deny. This can be considered a work of fiction.

I do have a few photos here from moving the boat out for the final deck sanding prior to glass on Saturday. Otherwise, I used a good part of the day to make some boxes to store my multiplying clamp collection. They are modified drawers from the old bath vanity. Also, I added more pulleys to the lifting supports raising the Moth off the garage floor. Also cut some trees back in the yard. We’ll see if they survive, soon I hope.

I’m now seriously considering heating the garage on a 60 degree day up to delivered the needed 70 (epoxy temp). However, temps crashed again on Sunday and delivered more snow. So, I’ll leave you with a few long views of the boat. This is prior to the sanding, and epoxied nail holes are obvious. Painter’s tape has since been removed.

port side view


port aft qtr


stbd aft qtr


Cradle to Shavings

Yesterday, I cut cradles for the deck and hull. Working at chest height makes a huge difference.

I’m now sitting by the wood stove after a productive afternoon. Planed, sanded with 60 then 120 grit, and filled the nail holes with sawdust and epoxy in the deck. While the temps have not been agreeable for glassing yet, they are fine for this exercise. I had hoped to do all this outside, but rain prevented. Using a fan on the deck pointing out the garage may have helped, but there is a fine dust all over the garage (more work, clean up, later).

I had thought I was more careful aligning the strips on the deck, but apparently not. There was much more planing required. Chalk it up to learning. Results still look great. Pics below-

Next up will be glassing of bulkheads as prelude to the deck.

A small portion of shavings.


tresses


port side
aft deck


long shot


nice close up

Cannonball Folly

Started an initial planing of the deck last night and began shaping the mahogany on the prow at the deck. Here are a few pics that are likely to irritate the fastidious. Please reserve judgement for final results. As a general note, the deck looks good.Planing doesn’t open joints to expose more glue. There is an odd almost indented place to either side of the cockpit at 4 and 8 o’clock. I don’t believe it was intended, but I got symmetrical results. Doesn’t look bad. It is what it is.

The most egregious clamping of all!

Sometimes you just keep adding junk until the task is done. Some sort of strap would have been better, but this worked. No need for a patent here though.

“cannonball hole”.

When I mentioned that I had put the last strip on the boat, my youngest boy (9yrs) piped up and asked, “What about the cannonball hole?” Well put. You can see a light pencil line of the final hole for the cockpit. I didn’t want to fair any more area than needed. Some of this I’ll cut back before glassing as projecting sticks will mess up the laying of the fabric I think.

Deck fairing begins.

Half Way Home

Once the deck is stripped out, I’m told you’re at the halfway point in the build. It has gone quicker than expected and has been a joy really. Yet, at some point this past week I became much more absorbed with turning another page on this kayak. Taking pics became a distraction, but I did continually stepped back to admire the lines.With the hull ready for glassing, the deck seemed an easier undertaking. In reality it is perhaps more difficult, yet my new found skills have allowed me to motor on through completing the strips. I’ve become proficient at measuring, whittling, planing, and then sometimes giving a slight sanding to the tapered ends of strips for a tight fit.

Thursday night, with the help of the “crew” that showed for dinner, we put the table saw back in the shed. It deserves better care than it has had over the past 2 months. I also thought any more cutting would be of shorter boards. As luck would have it, I ran short on strips and have been scarfing pieces together, but generally that went well.

The weekend allowed for much progress. Was expecting to complete the stripping, but we are still seven strips shy of a “full deck”. Ran out of time … and to some extent, energy. Slept well last night in spite of the time change. Having the extra daylight hour as the days get longer is going to improve productivity. Working in the evening with more daylight will definitely give a psychological boost. Sunday was by far the nicest day of the year thus far. the warmer weather has me eager for the 1st splash.

I had thought the deck would be easier than the hull. There is physically less of it. Yet, the strips are really tortured left and right of the cockpit. A tremendous amount of twist here requires using the heat gun to relax the ligaments in the wood. Additionally, there is a rolling bevel that must be shaved here to assure a nice joint. I think I’ve got it, but only later planing and sanding will tell. I’m certain the underside will show some misses. Thankfully that will be hidden.

Here are shots of the steps to fit a strip:

mark the cut

Step 1: lay the new strip in the opening and draw a scribe line from the start of the hole to where the strip exits the lower edge of the hole. If done carefully, you are 95% fitted.

Step 2: whittle close (1/16″ removed) to the line.
A sharp stout knife works best for getting there quick.

whittle to line

Step 3: hand plane to line.
Depending on the strip, a bevel may be needed.
Occasionally a slight sanding may be needed for the final touches.
Test fit several times to confirm a tight fit.

I’ll cast in the remaining pics for proof of work. Not much to add. I was getting short on full strips and scarfed several together. The ragged opening in the center will be the cockpit cut out so craftsmanship here went out the window. None required, unless you think the attitude reflects on the rest. So be it.

Those slant eyed holes became increasingly difficult to fir strips. Aside from the twist at the cockpit, the tapered ends grow longer. Again, sanding will tell.


Eventually my bar clamps didn’t reach and masking tape wasn’t adequate. Thus, various and sundry “wedges” were employed.


Blogger is really protesting today. Photo organization and captioning isn’t working. I’ll have to try again later.